Congratulations on your purchase of an OpenCart template! This documentation consists of several parts and describes the installation, configuration and setting up an OpenCart website process.
We did our best to make this manual information to be presented in a simple way. As an effective reference, the documentation below will provides all information you need, it has been restructured in different chapters, you can see in the left-side menu. You are able to navigate to any part of the documentation using the active content headers' links.
We recommend that you should start reading the documentation at the first section.
OpenCart — is an Open Source e-commerce application. OpenCart provides easy customization of your online store.
OpenCart community includes a number of users starting from the experienced web developers looking for the
user-friendly interface, ending with shopkeepers that start their online business for the first time. OpenCart
provides a great amount of features that allow you to control your store. Using OpenCart tools you can easily
uncover the store potential.
Usually there is a vast of different settings that available with a new Template, and because this is an open source software, it isn't always the same for each developer. Make sure to read through this documentation available for the Template that you are installing so that you know what features are available for you.
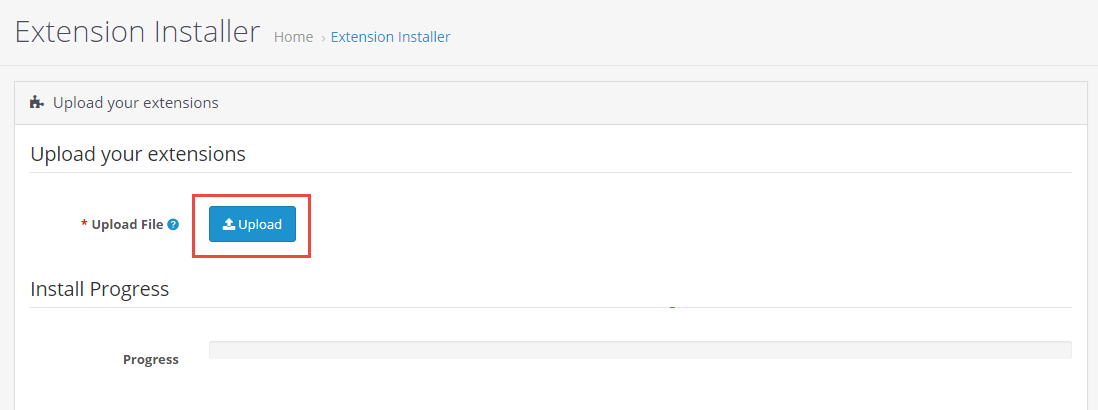
Go to Extensions › Installer › Click Upload and select the so_emarket_theme_oc3_home1_to_home20_v1.1.7.ocmod Or so_emarket_theme_oc3_home21_to_home25_v1.1.9.ocmod file to upload or install the latest version of theme. 1 - Code_so_emarket_theme_oc3_home1_to_home20_v1.1.7.ocmod for the layout 1 to 20 2 - Code_so_emarket_theme_oc3_home21_to_home25_v1.1.9.ocmod for the layout 21 to 25 So you can select the layout that you want to use for your site. Then install the package contain that layout. With other themes you can install the latest version of that theme.Then you will see the message Success: You have installed your extension!
Note:
If you get this error: file could not be uploaded, you can do these steps
2.How to manage content, products and categories translations
Note
When you install multi language the default language is arabic, it is not an error. Please You enter your content
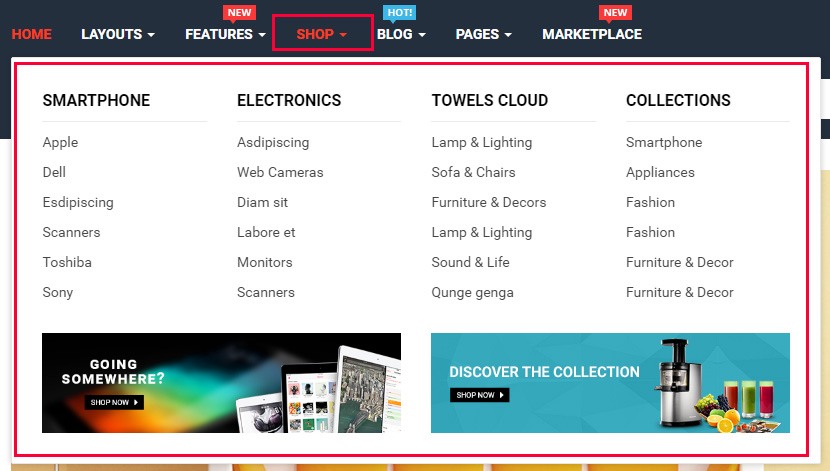
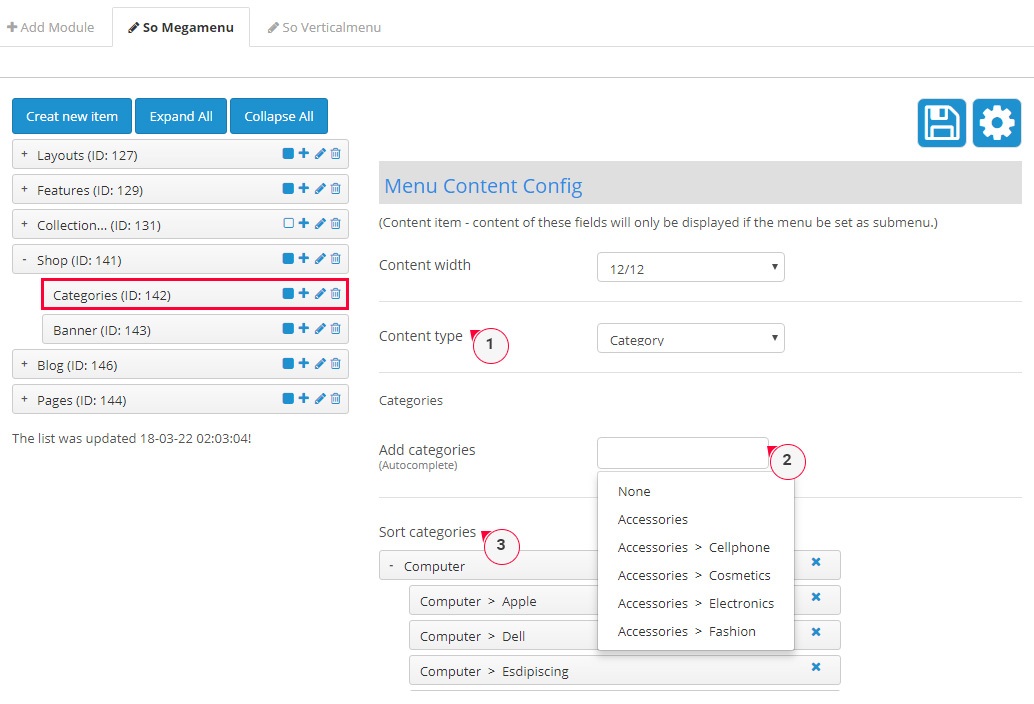
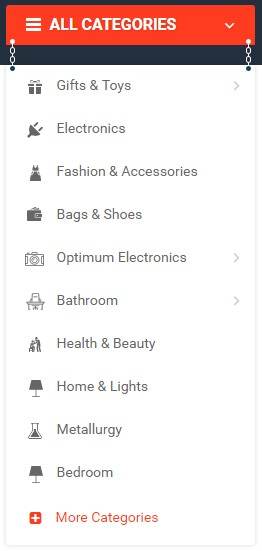
Usually, Opencart top menu displays Categories. Navigate to Catalog › Categories, select the category you would like to translate, click the Edit icon and insert translation into corresponding language tab of the category:
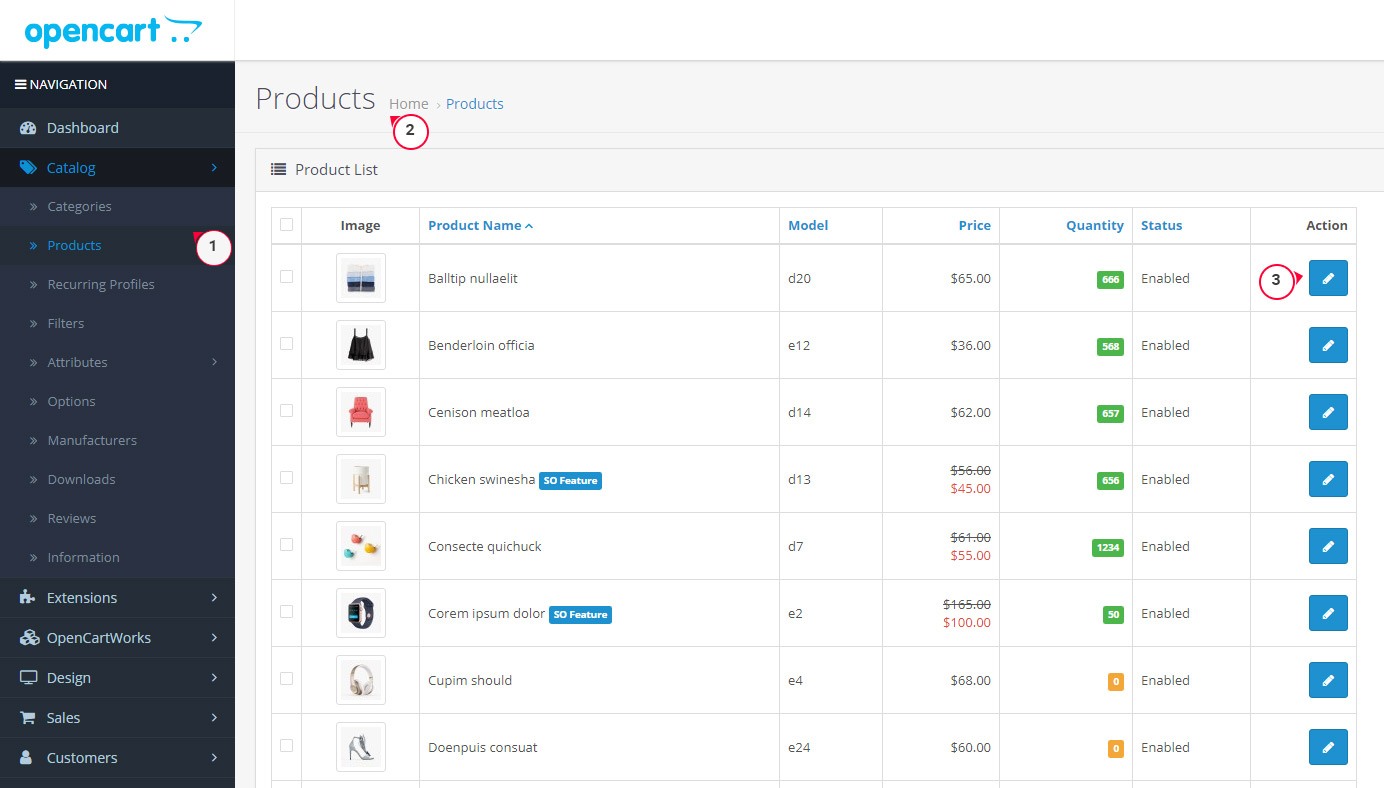
Navigate to Catalog -> Products to start products translation. Select the product you would like to translate, click the Edit icon next to it and insert translations into the General tab of a product:
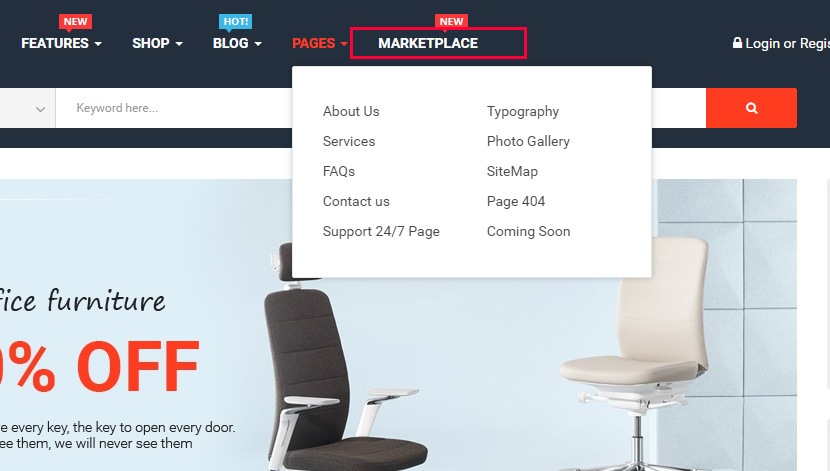
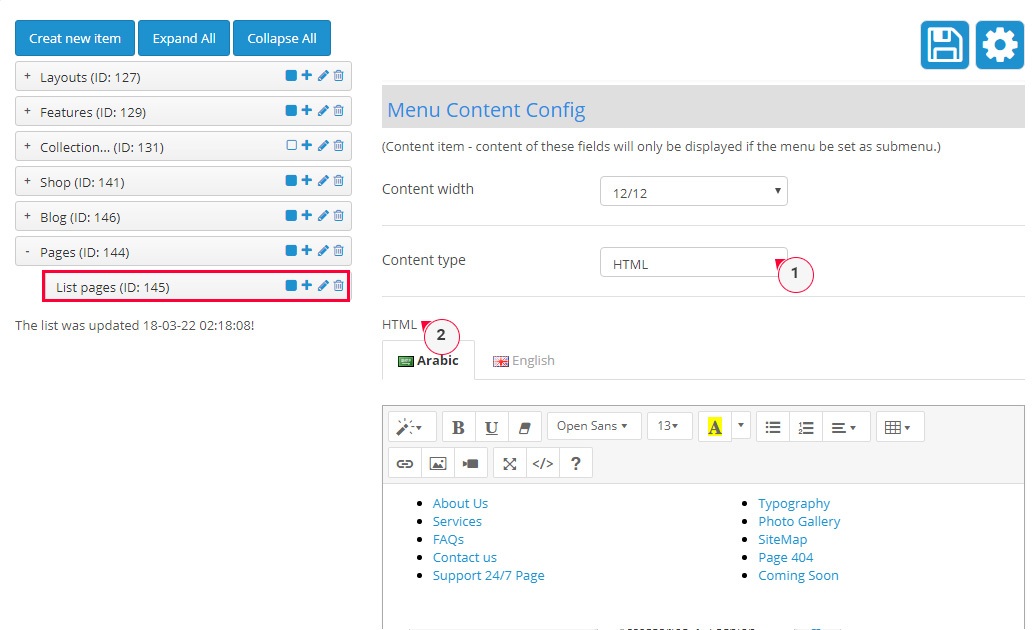
In case you would like to translate one of content pages on the site, open the Catalog -> Information tab, select the page required and insert translations into the corresponding language tab of content editor.
Navigate to Opencartworks -> So Themes Config to start translation, insert translations into the content:
Note
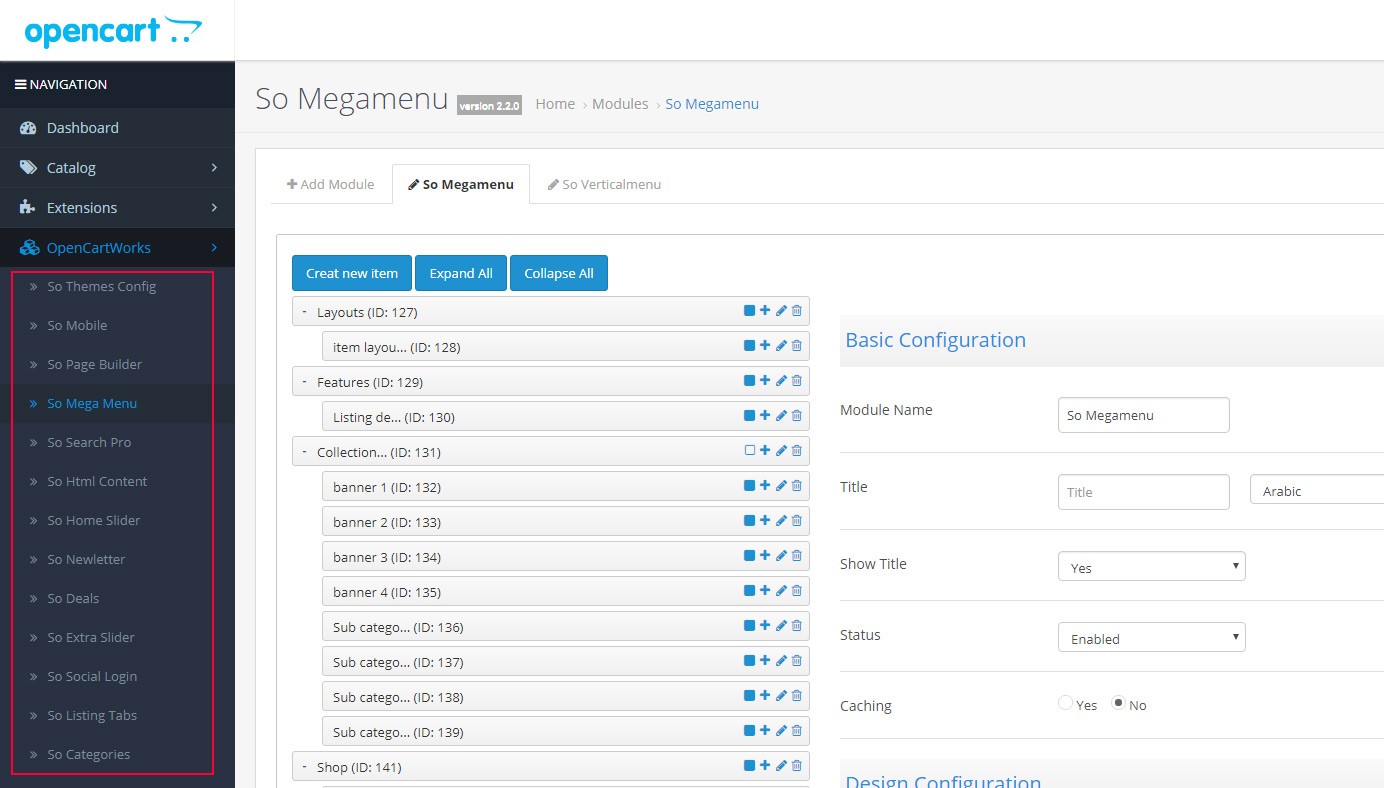
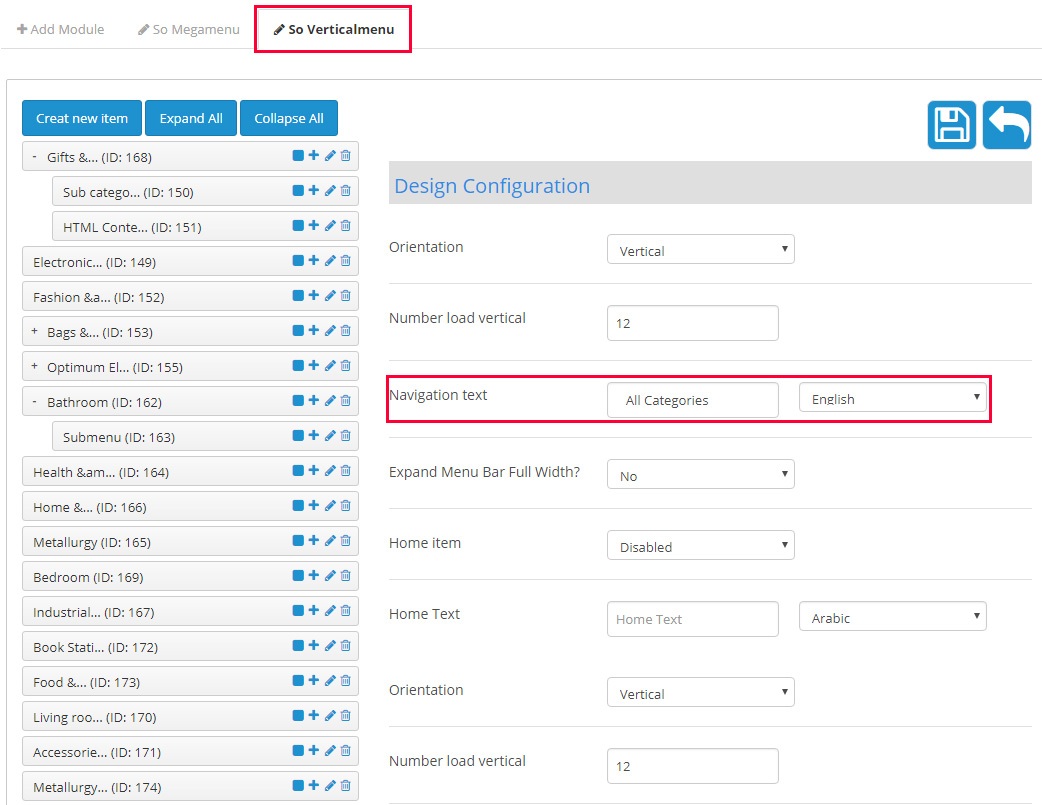
Because there are so many modules, Select the module you would like to translate. Insert translations into the content
Refresh the front-end with the Ctrl/Cmd+F5 hotkeys to check the changes.
3. How to use translate Language in Module
If the module has language files for English and you want to translate them for Spanish, then at the very first copy all the language files from English language directory and paste
all of them in Spanish directory in the same structure as it was in English language.
Extract the language archive file which you downloaded into your PC: patch_language_v3.x
We filter out language files of theme and modules:
To your language: replace "en-gb" with the name of the language (English, German...).
Upload admin and catalog folders you replaced into your OpenCart folder
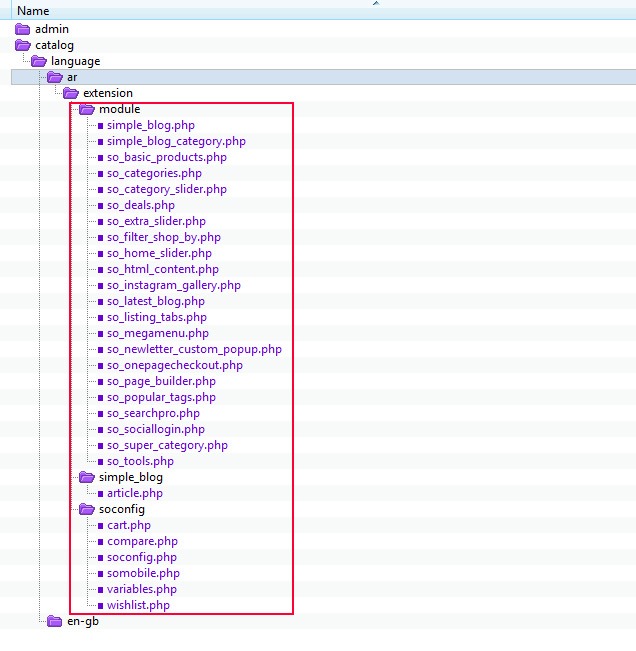
Then please go to catalog => language => extension => you make translates language all files below
For example, there is a file in module directory for English language called foo.php then copy this into the module directory of Spanish language.
Suppose Enlish file has these keyword to be translated as below screenshot.
Refresh the front-end with the Ctrl/Cmd+F5 hotkeys to check the changes.
Install Simple Blog
Go to Admin › Simple Blog › articles . Missing Database Tables for this Extension, Click 'Install simple blog'
You must create a new author, new category, new article
Go to Admin › Simple Blog › Setting › General Setting. set values properties for for simple blog. Click Save
To view simple blogs outside you address type index.php?route=extension/simple_blog/article or Admin > Menu Simple blog > General Setting > Simple Blog Seo Keyword Heading (This name will be as seo keyword when simple blog is clicked)
Create page blogs :
Design › Layouts › Create new blog layout › set route: extensions/simple_blog/%
add module for content postion (see Layout default)
Install Purpletree Multivendor
Install this theme successfully
Download Multivendor module from Click here.Install/configure it following their guide.
Please configure the multivendor :
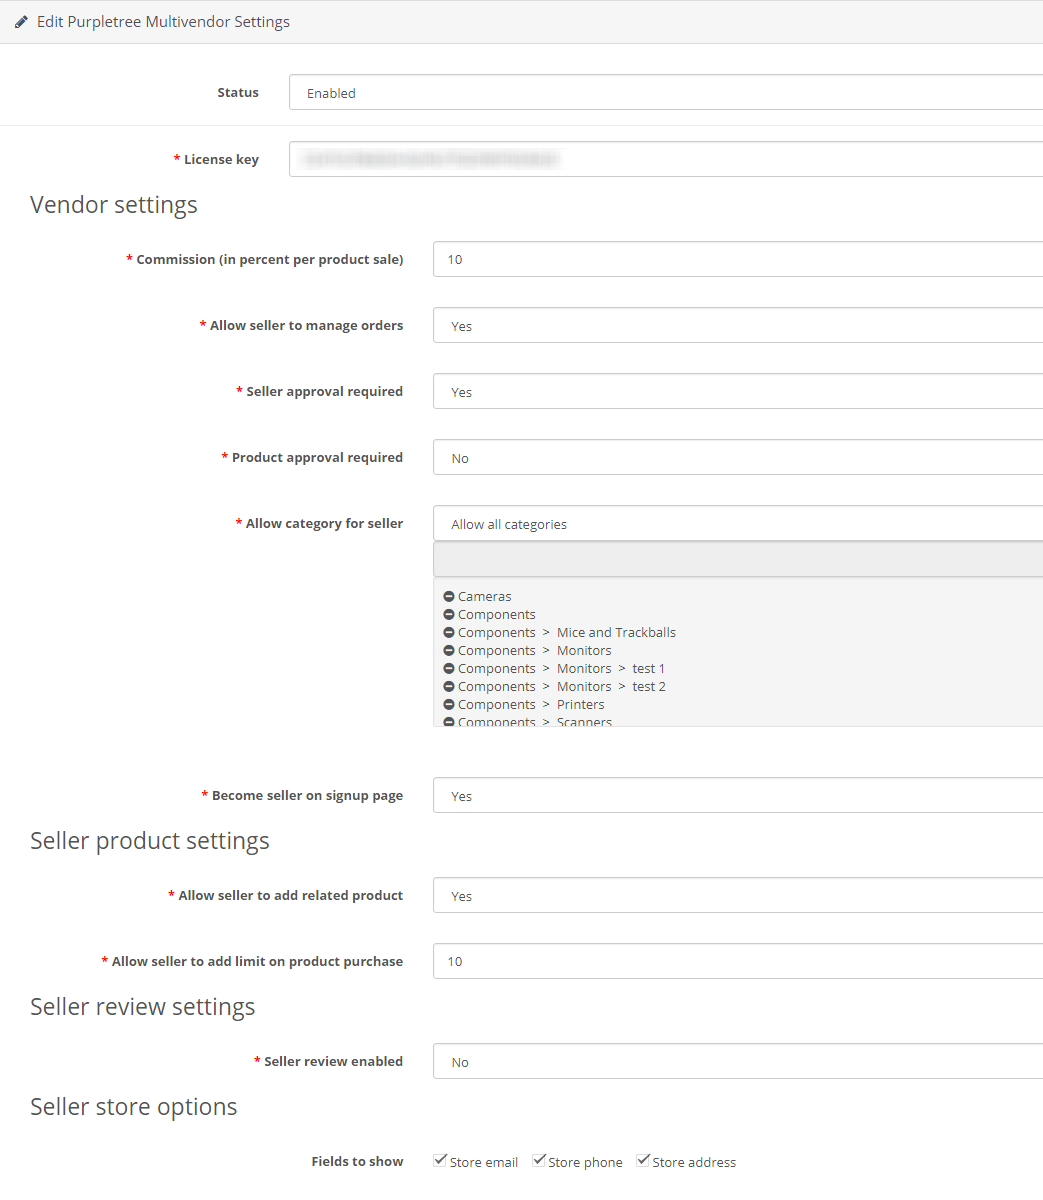
Go to Admin › Extensions › Module > Click 2 module (Purpletree Multivendor Settings, Purpletree Seller Panel )
Module Purpletree Multivendor Settings
Module Purpletree Seller Panel : config show enable
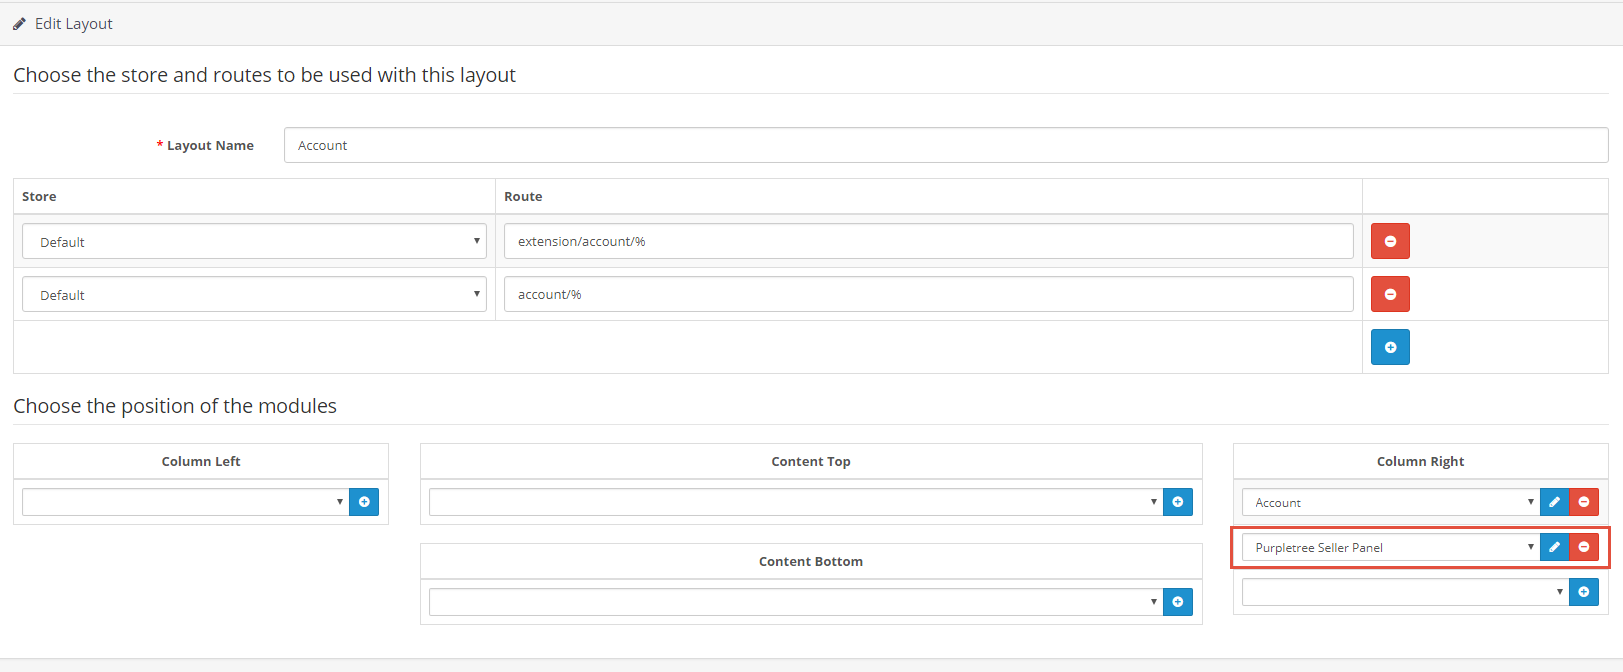
Go to Admin › Design › Layouts › Account › Column Right : add module Purpletree Seller Panel
Install the file so3_emarket_purpletree_multivendor_v108.ocmod.zip
Go to Admin > Extensions > Modification and click on the Blue Refresh button to apply changes..
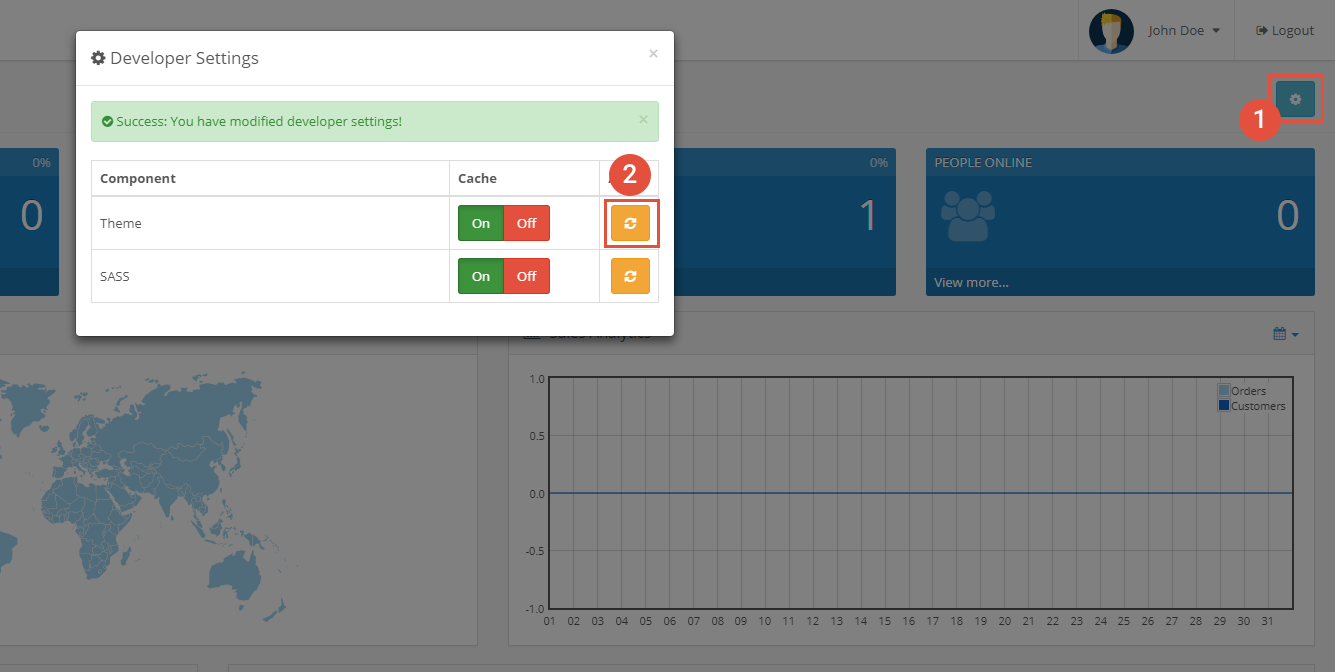
Once done, clear the cache. Dashboard > Click gear icon to clear cache
Refresh your store's front page you should see the theme installed successfully.
Slider Revolution Responsive Opencart
Note
Download Slider Revolution Opencart form
Click Here and Read Slider Revolution Documentation
Unzip the download package of Slider Revolution. Upload admin, catalog, image & system file in your root directory.(Note: If you are an existing revslider 2.3 user , please rename your system>config>revslider folder)
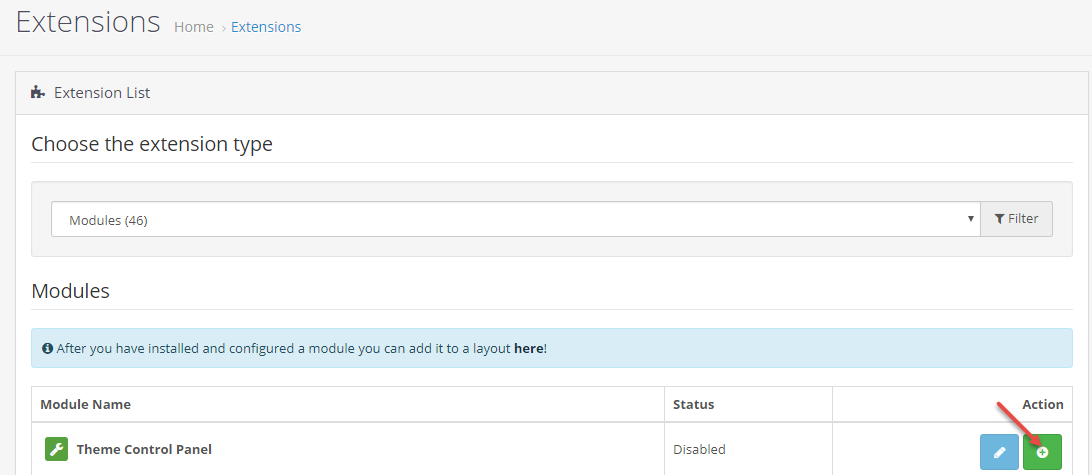
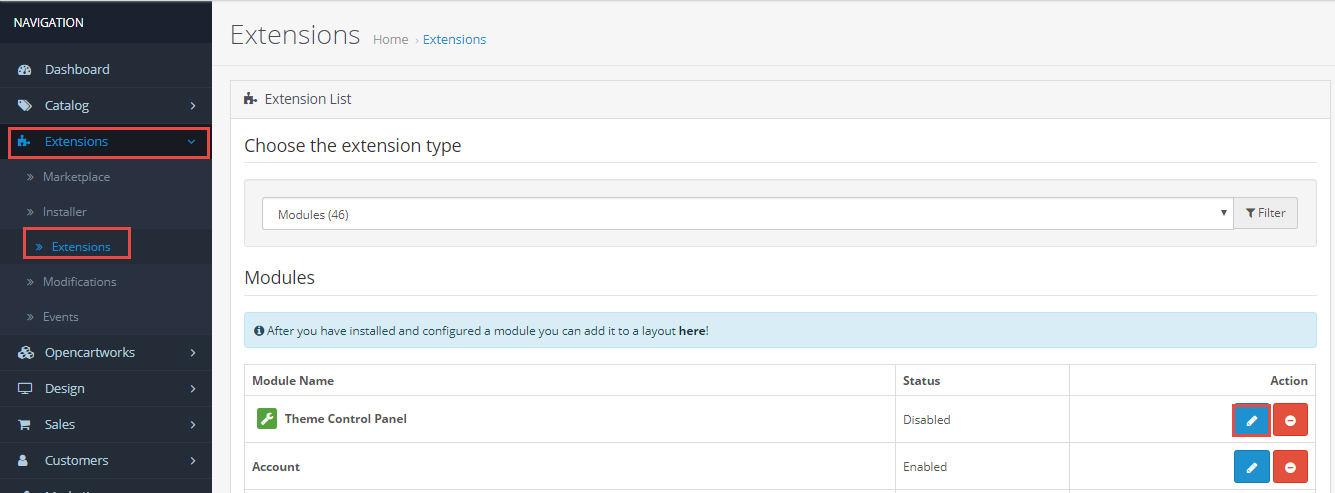
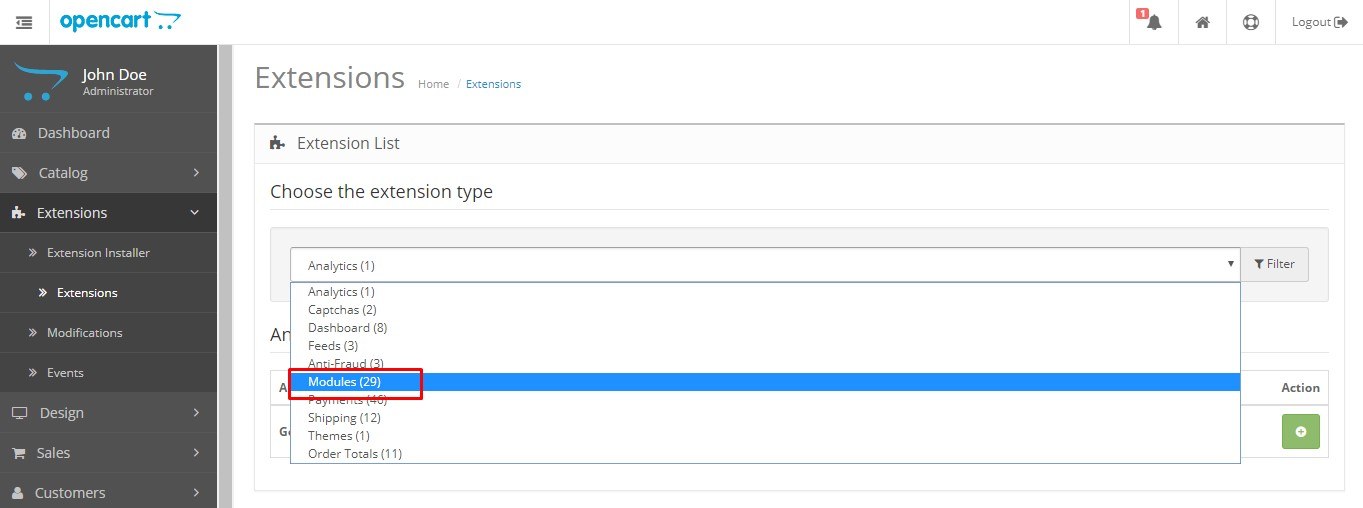
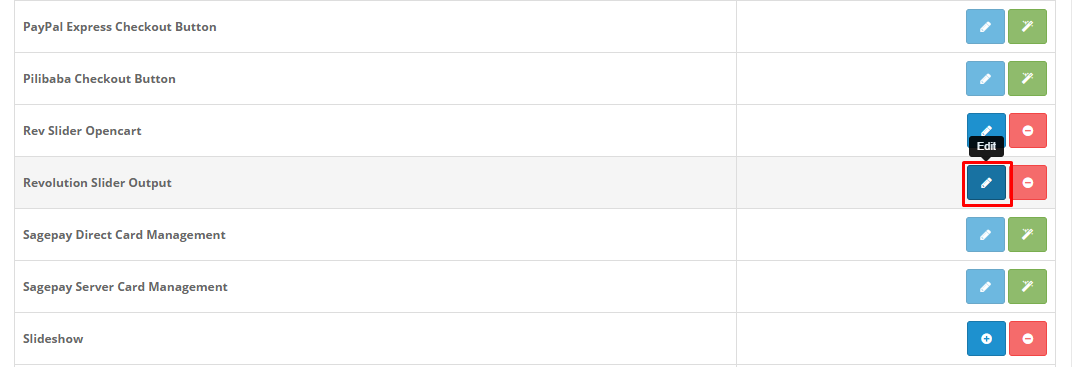
Navigate Extensions > Extensions , Select Modules on extension type.
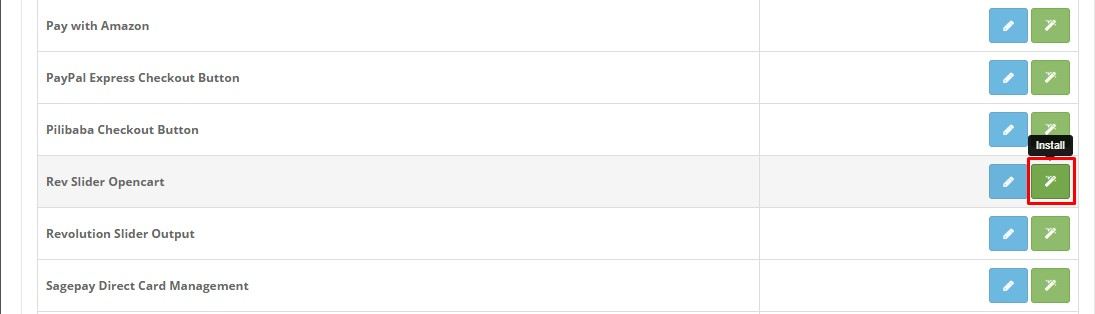
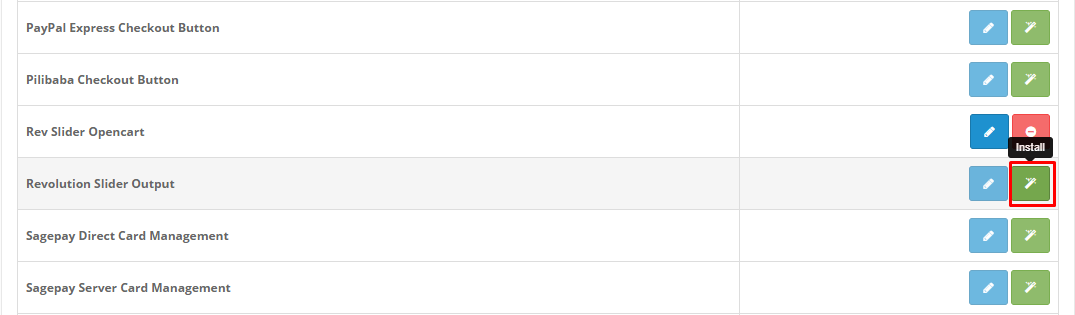
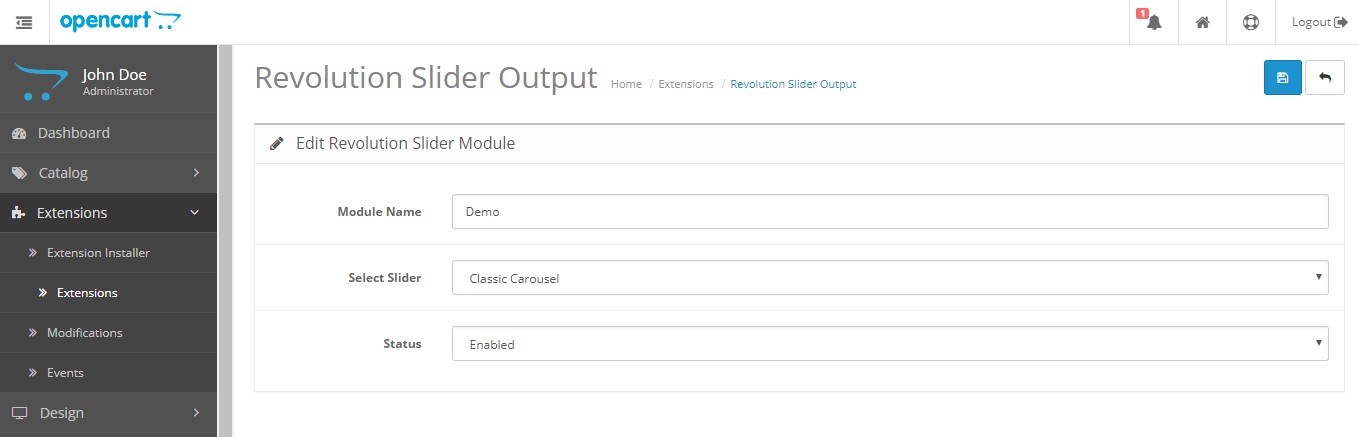
Install Revolution Slider OpenCart & Revolution Slider Output This will take some time.please wait untill it finishes installation.
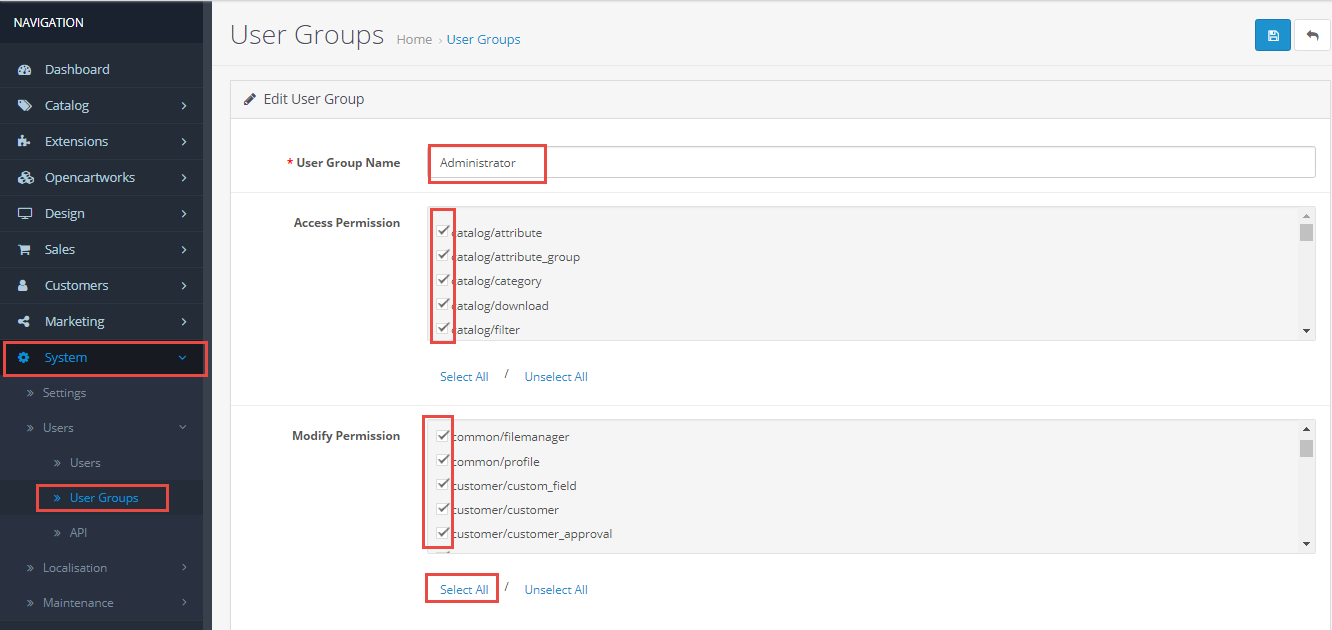
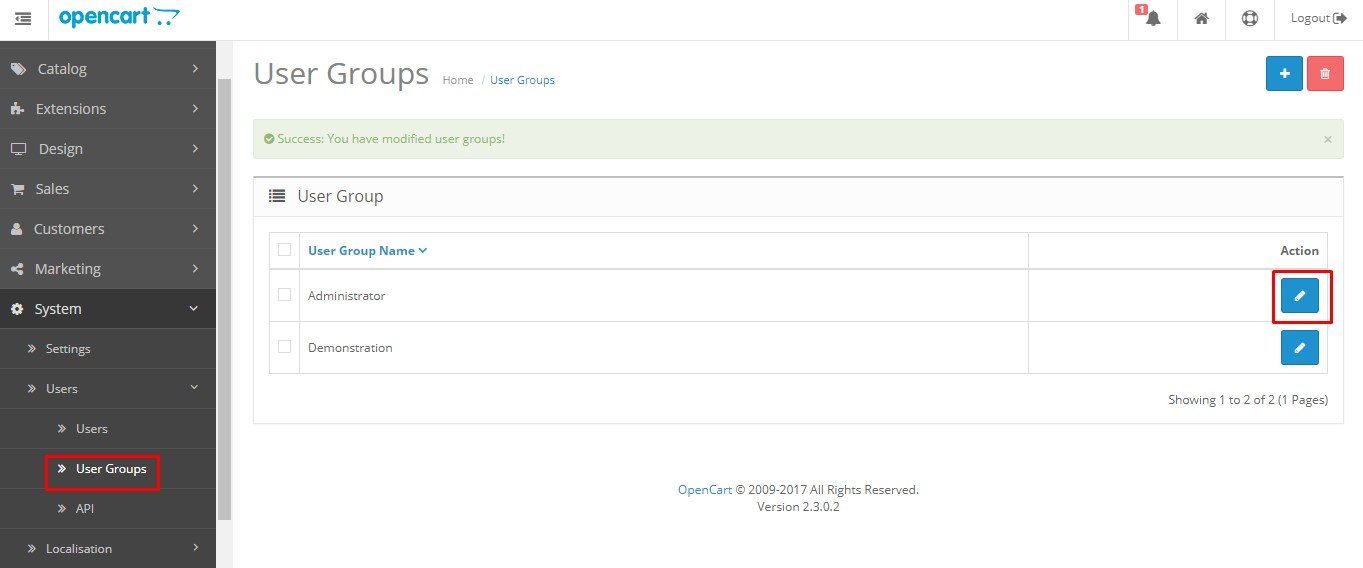
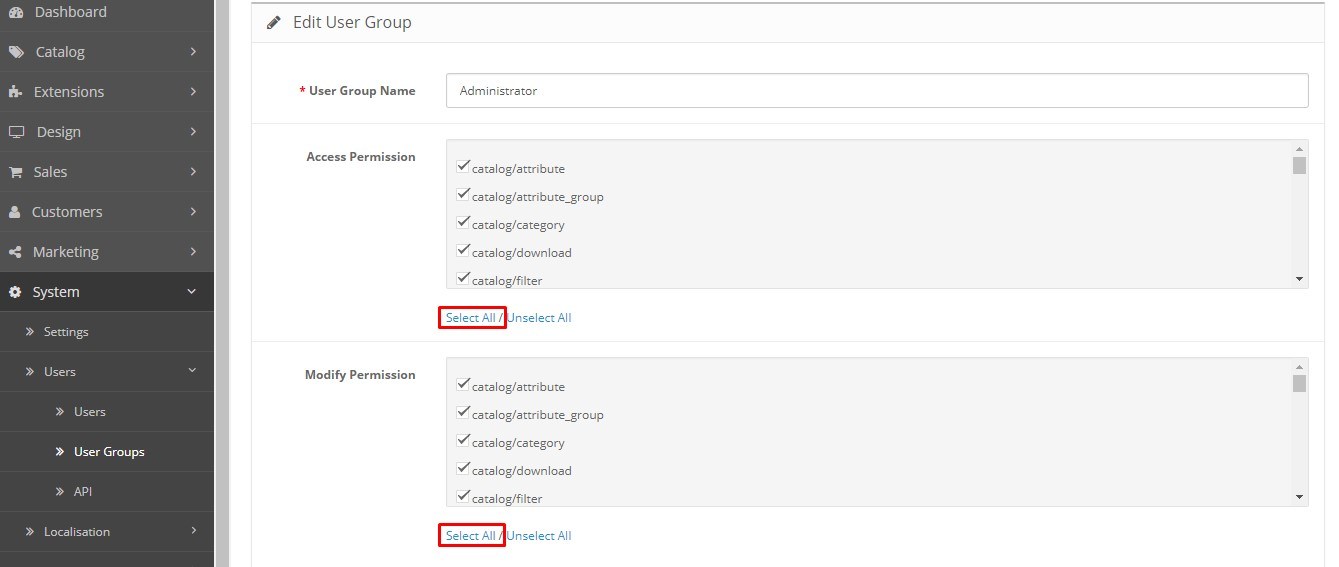
Navigate System > Users > User Groups, then click on Edit button of Administration.
Click on Select All both Access Permission and Modify Permission, then Save these settings.
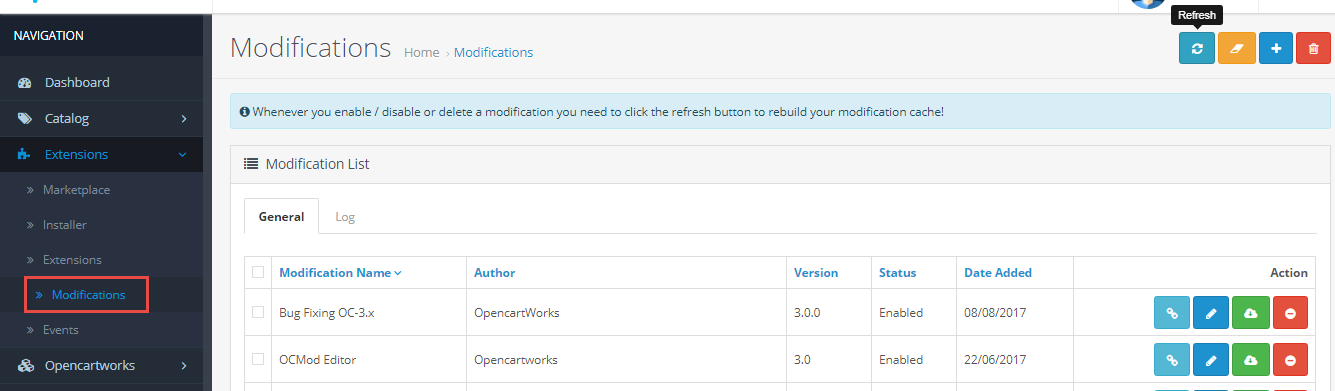
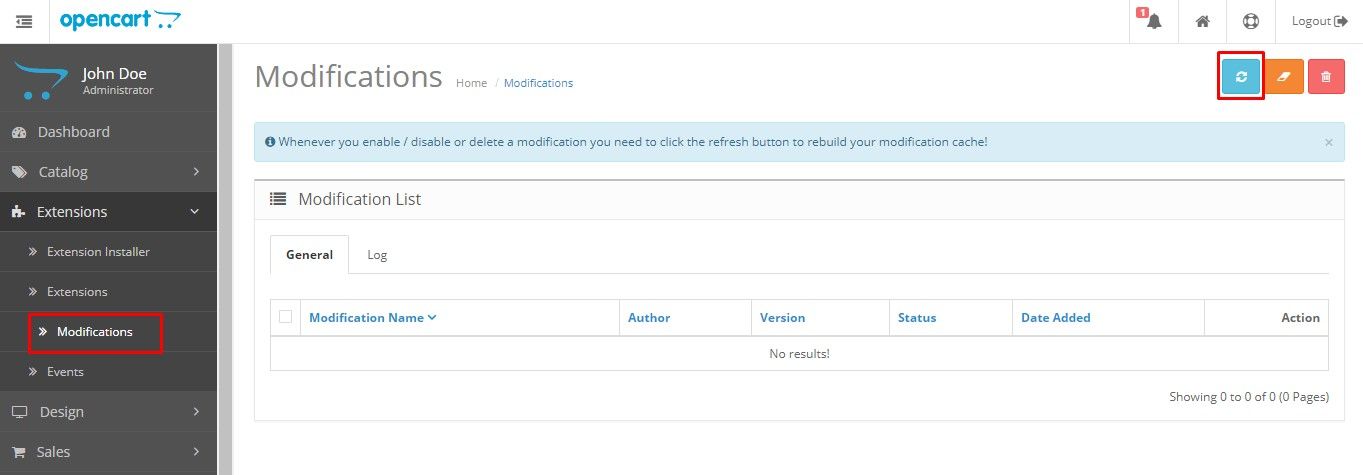
Navigate Extensions > Modifications, then click on Refresh button.
Refresh the front-end with the Ctrl/Cmd+F5 hotkeys to check the changes.
Extract the archive file on your machine that you’ve downloaded from CodeCanyon. We included install packet and document in this file. Please choose folder compatibility with version of Opencart.
Upload the 4 folders found inside (admin, catalog, tshirtecommerce, vqmod)
to your OpenCart root installation and merge them with the existing ones.
Navigate Extensions > Extensions , Select Modules on extension type.find T-Shirt eCommerce Module and click on the green Install button.
Navigate System > Users > User Groups, then click on Edit button of Administration.
Click on Select All both Access Permission and Modify Permission, then Save these settings.
Navigate Extensions > Modifications, then click on Refresh button.
Refresh the front-end with the Ctrl/Cmd+F5 hotkeys to check the changes.
1. Minify / gzip the CSS, Javascript and Jquery files, enable browser caching
This is the most important part when optimize OpenCart speed that you need to minify CSS, javascript and other files using gzip/ Enable GZIP Compression, enable browser caching.
Secondly, rename htaccess.txt to .htaccess in your OpenCart directory.
Then, open the .htaccess file and add the following code underneath the ReWrite rules
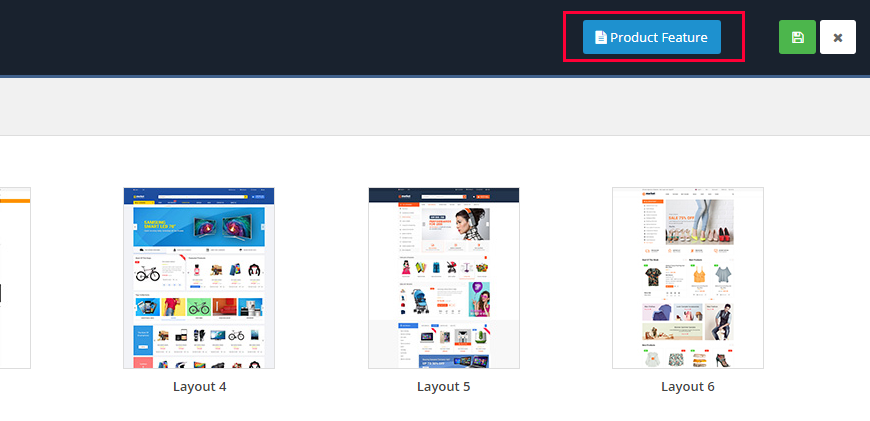
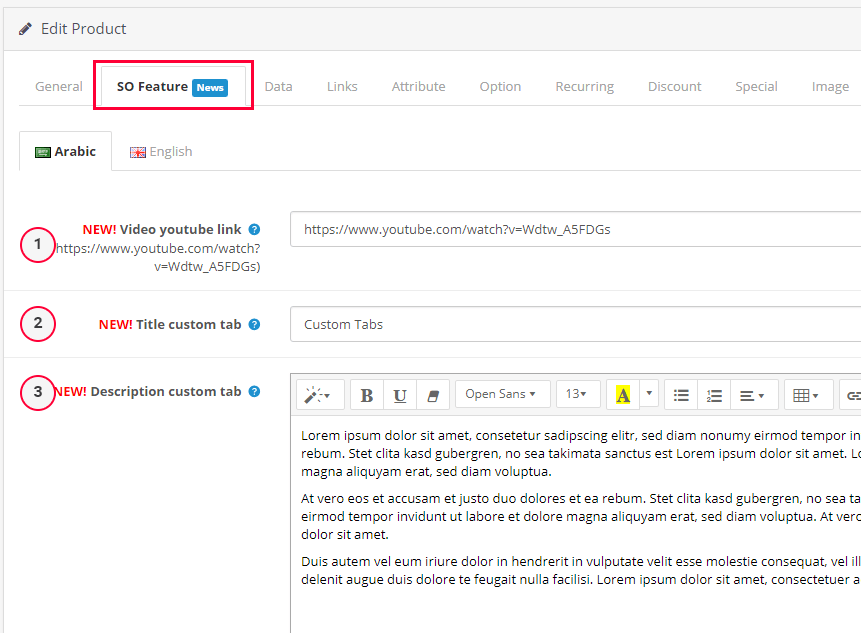
Go to admin › OpenCartWorks › So Themes Config › Button Product Feature
Click on product to create features product. Any product added config features will have labels so feature
Main General Tabs
Tab General
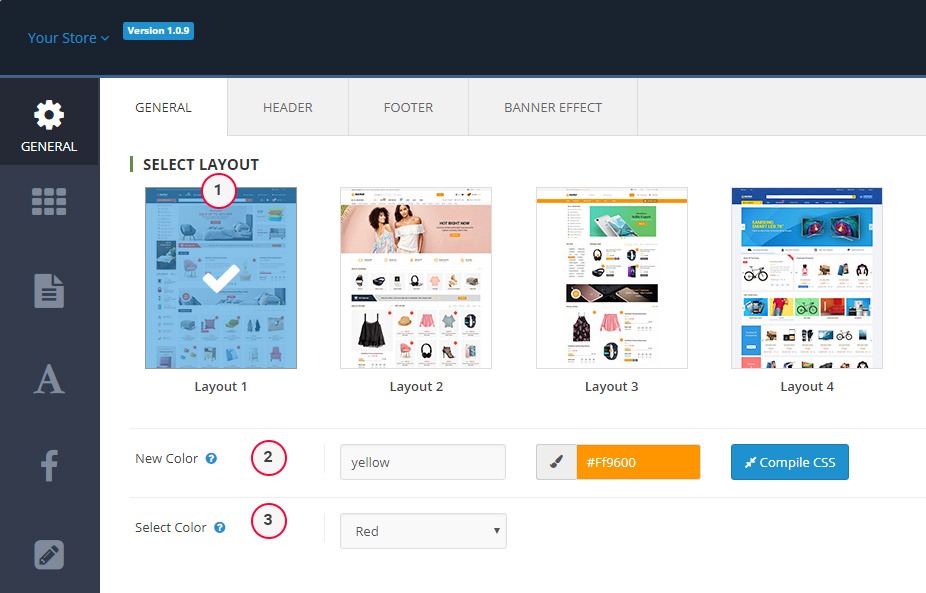
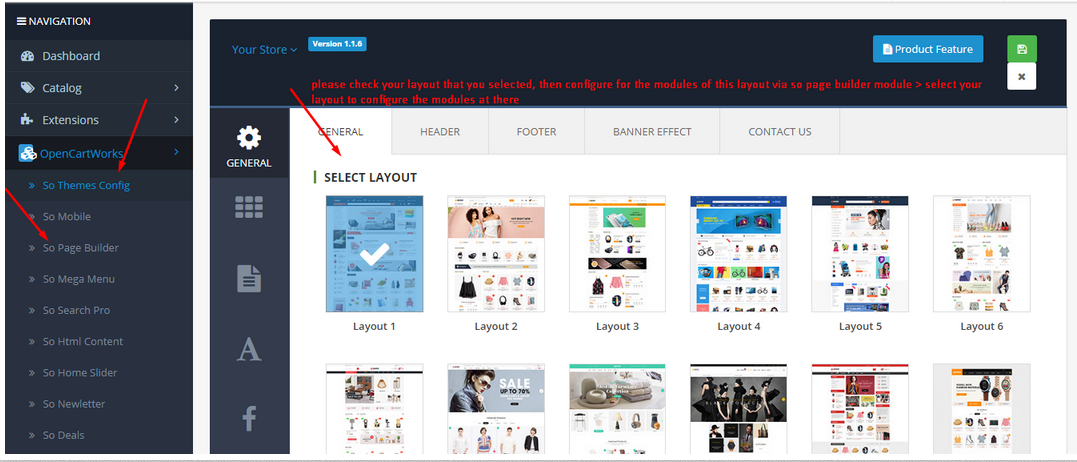
Go to OpenCartWorks › So Themes Config › General Tab
1.Select Layout - Choose the layout that you like. Click button Apply Default Setting Choose the Layout
New Color - Set name color (do not uppercase letters) and fill color. Continue Click button Compile CSS.
Select Color - Select the color you just created › Click button Save
2.Sticky Menu on Top - When the user scrolls the page, Sticky Menu to the top of the browser window during scrolling
Status - Option (yes|no)
Select Block on header - Choose your parts you want to show on the sticky Menu
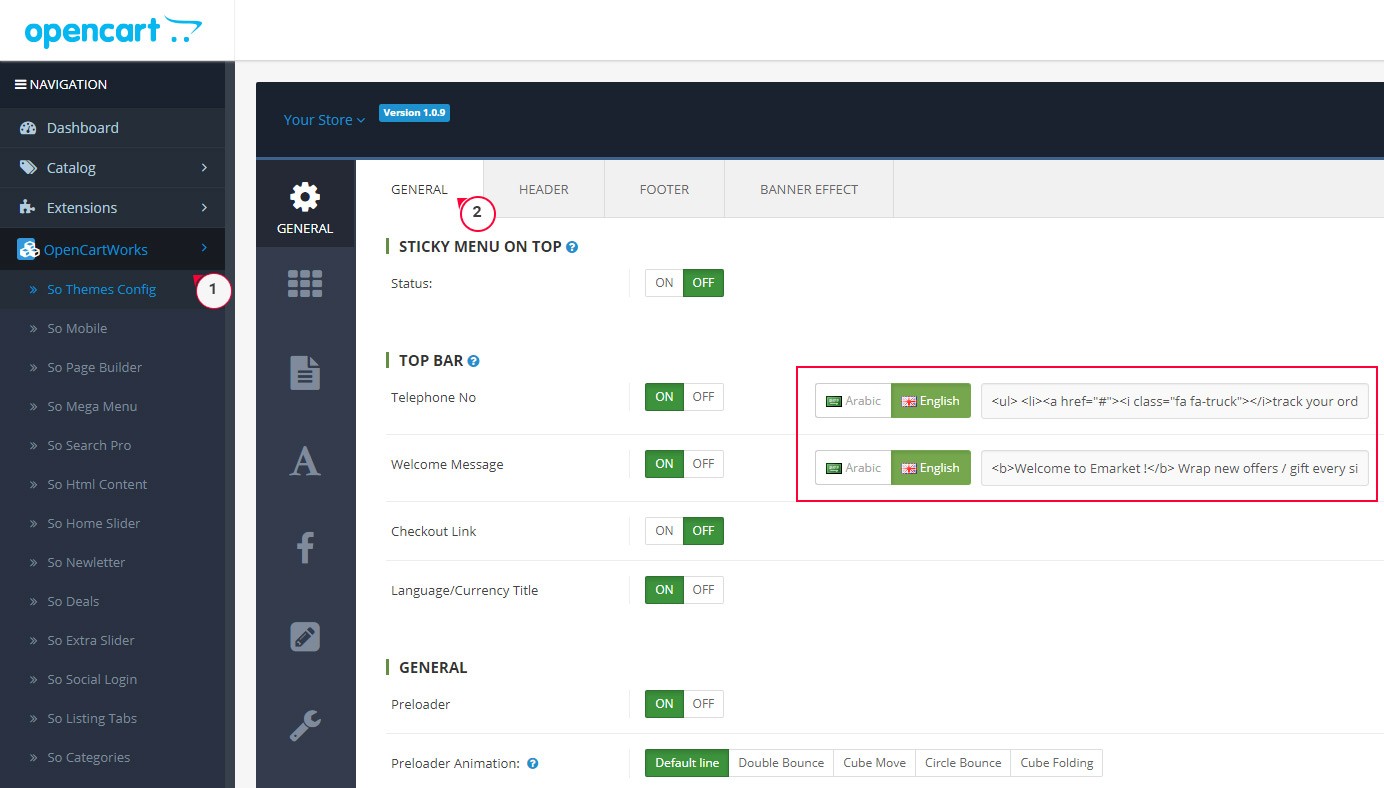
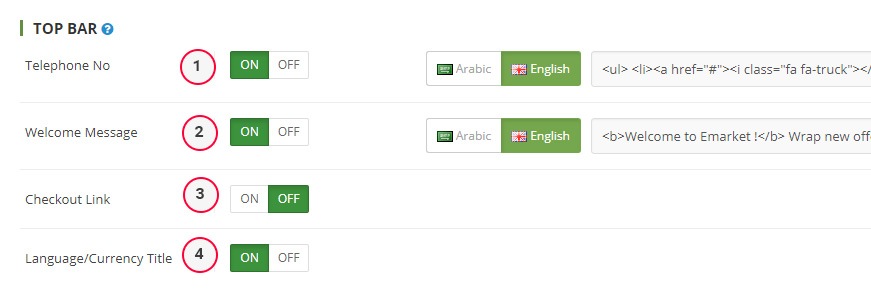
3.Top Bar
Telephone No - is the content of Telephone
Welcome Message - is the content of Welcome Message
Checkout Link - show the link checkout
Language/Currency - show the Language/Currency
View Frontend:
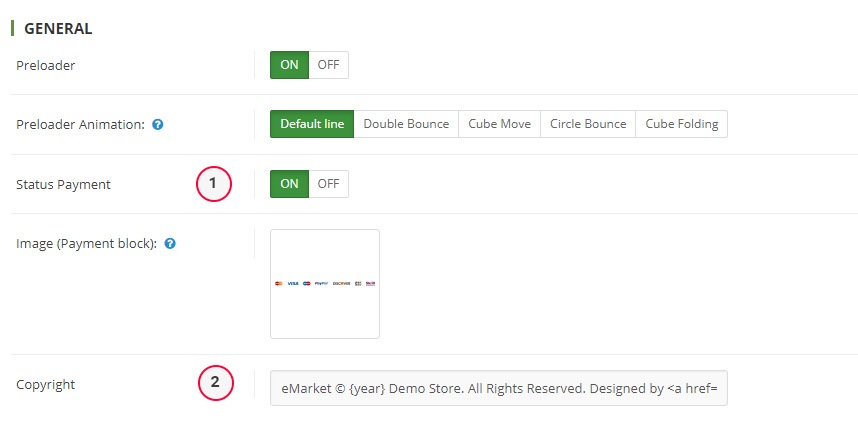
4.General
Preloader - want to show the Preloader
Preloader Animation - Choose the preloader that you like
Status Payment - want to show the Payment
Image (Payment block) - Choose a image path
Copyright - It is the content to Copyright
View Frontend:
Tab Header & Footer
Choose the type of Header that you like, to pair with home page
Tab Banner
Hover over image below to see effect.Choose the banner that you like
Layout Tab
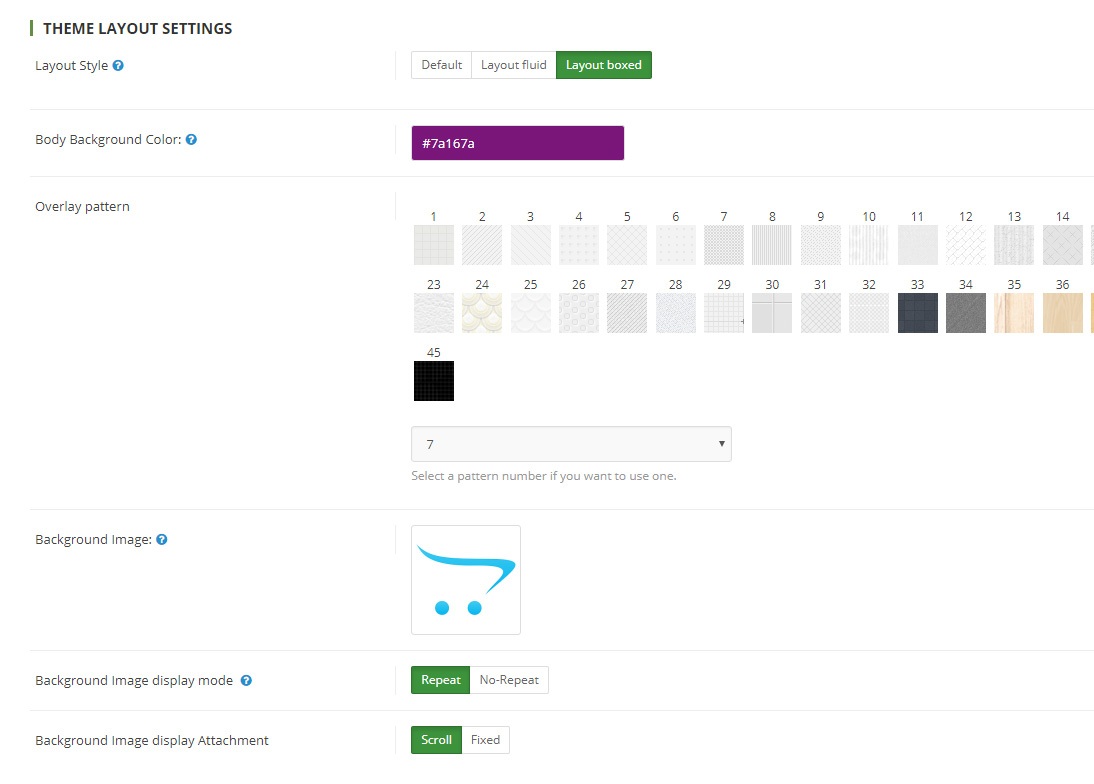
Go to admin › OpenCartWorks › So Themes Config › Layout Tab › With the boxed layout you can choose additional options such as custom background images, patterns and solid colors
Layout Style - Select one in option (Default|Layout fluid|Layout boxed)
Body Background Color - Set background color for Mainbody
Overlay pattern - Set pattern image for Mainbody
Background Image: - Set background image for Mainbody
Background Image display mode - Set background image display mode
Background Image display Attachment - Set background image display attachment
View Frontend: Layout Style = boxed
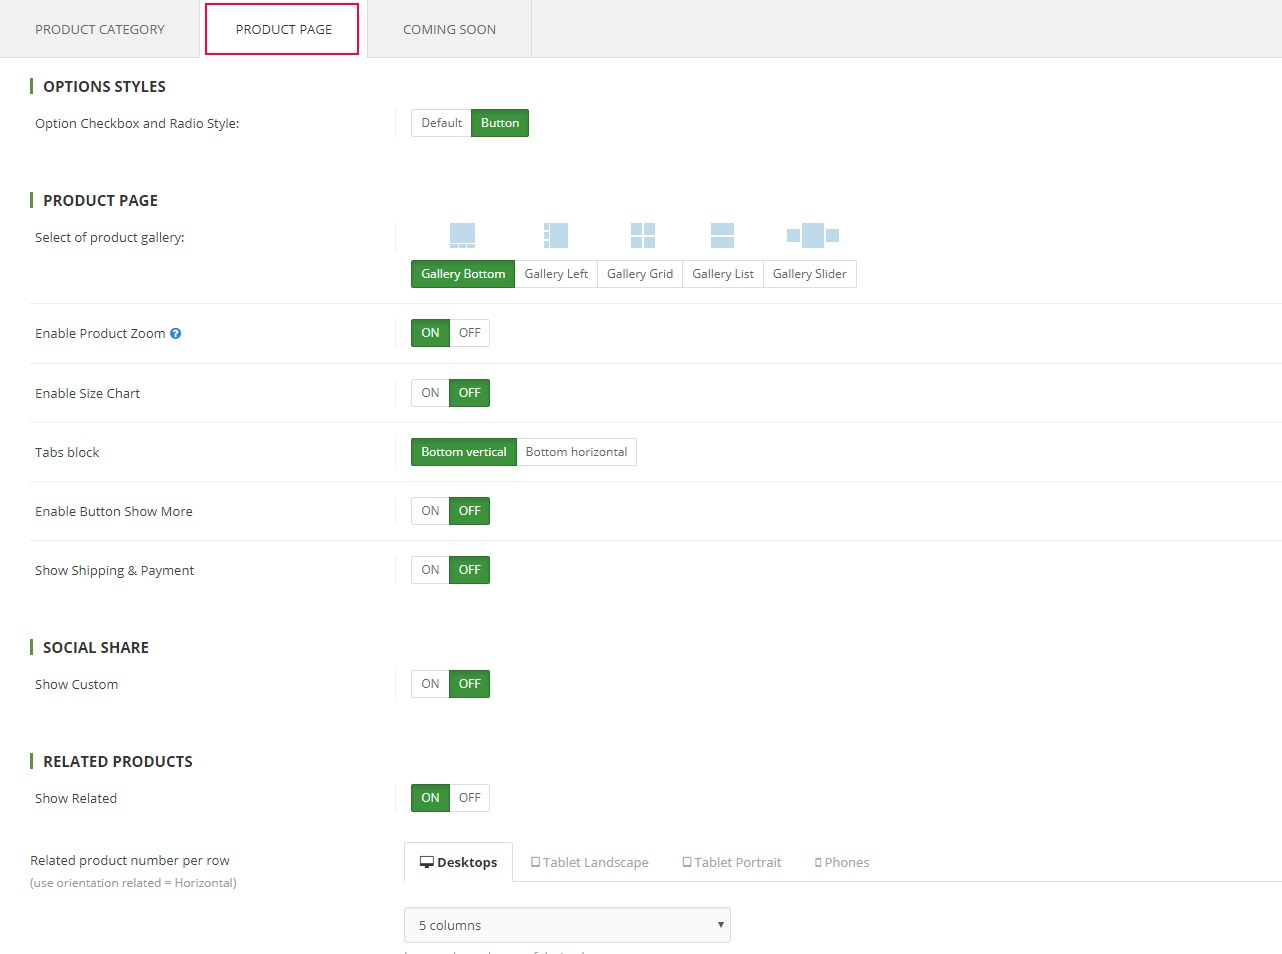
Page Tab
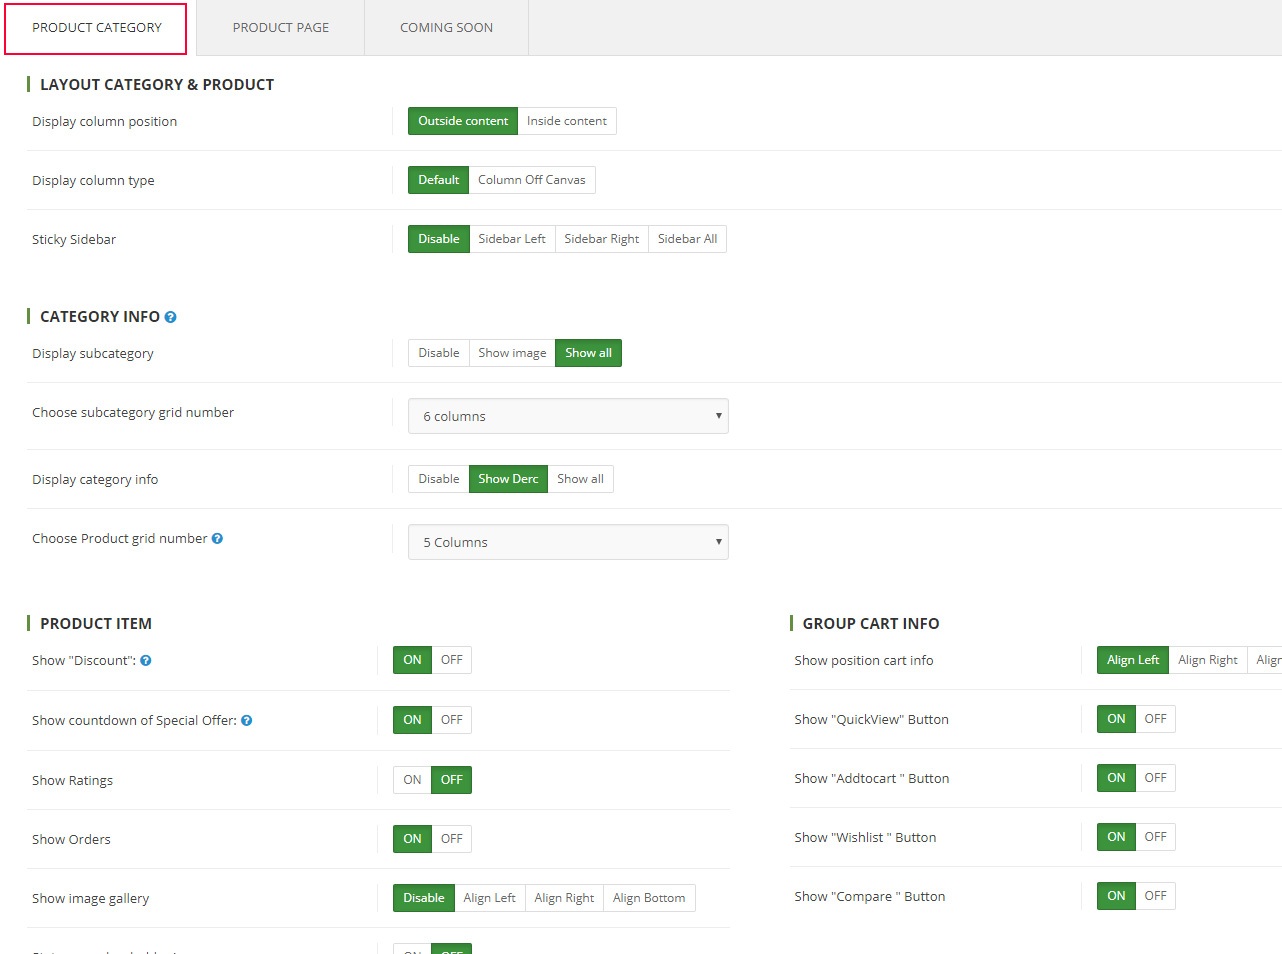
Product Category
Go to admin › OpenCartWorks › So Themes Config › Page Tab › Product Category
1.Layout Category & Product
Display column position - Select one in option ( Outside content| Inside content)
Display column type - Add page content inside this div if you want the side nav to push page content to the right
Sticky Sidebar - Attach sidebar to the page when the user scrolls such that the element is always visible
2.Category Info
Display subcategory - You want to show the subcategory
Choose subcategory grid number - Quantity is displayed subcategory
Display category info - You want to show description category
Choose Product grid number - Column number display page category
3.Product Item
Show "Discount" - Options (yes/no)
Show countdown - Show countdown of Special Offer product
Show Ratings - Options (yes/no)
Show Orders - show order number of product
Show image gallery - Slider image gallery
Status use placeholder images - Options(yes/no)
4.Group Cart
Show position cart info - select align (Left|Right|Center|Bottom) position group cart
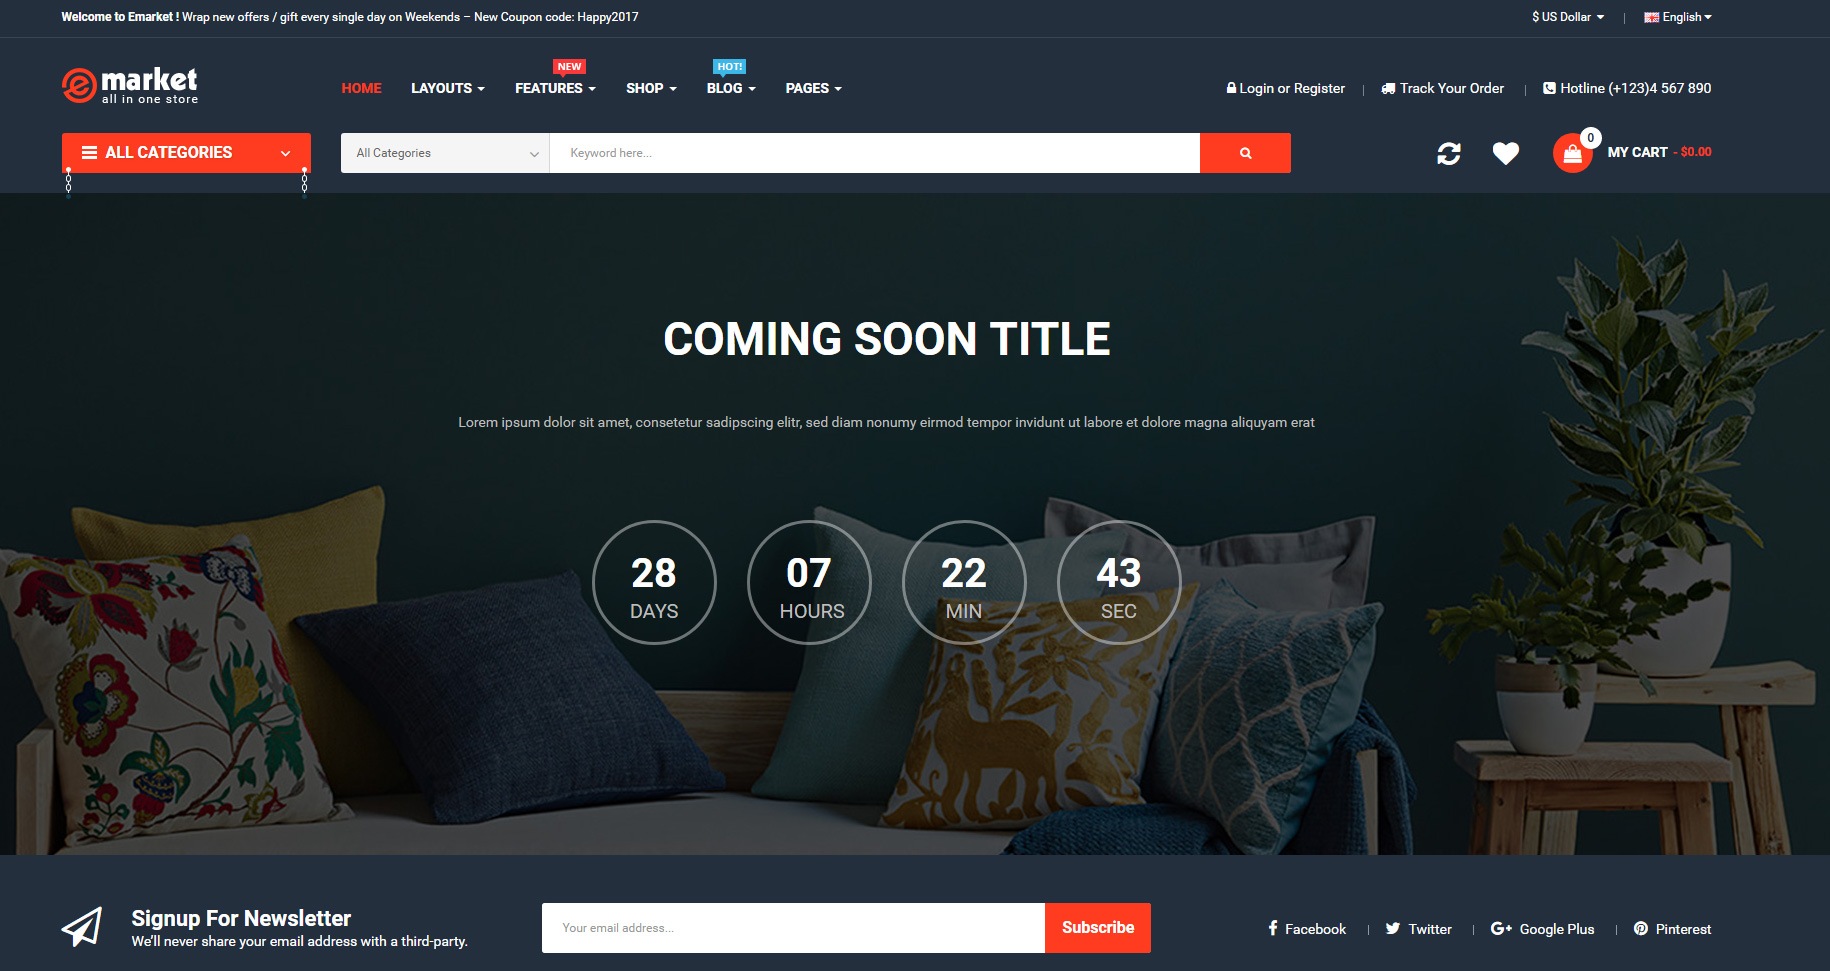
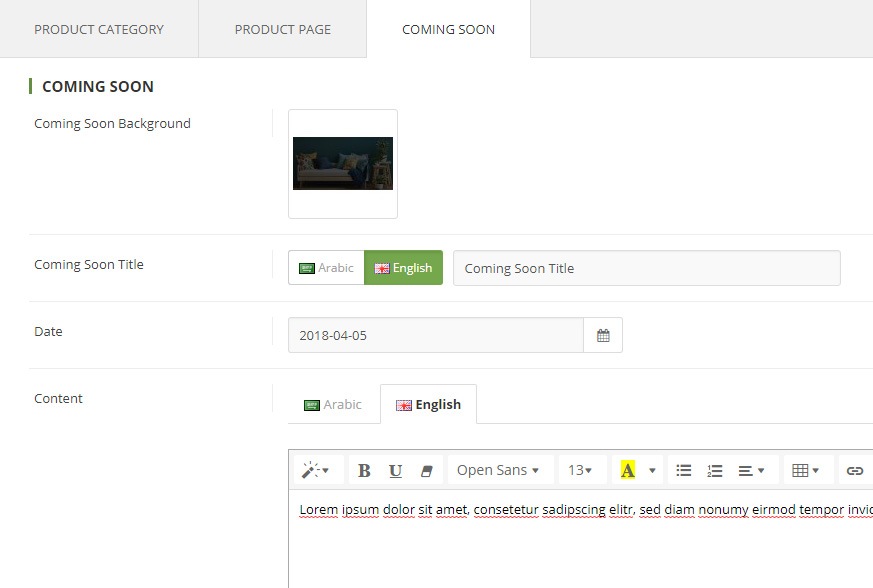
Go to admin › OpenCartWorks › So Themes Config › Page Tab › Coming Soon
Coming Soon Background - Set background image for Coming Soon
Coming Soon Title - is the heading of Coming Soon
Date - is the dates of coming soon
Content - is the content of coming soon
View Frontend:
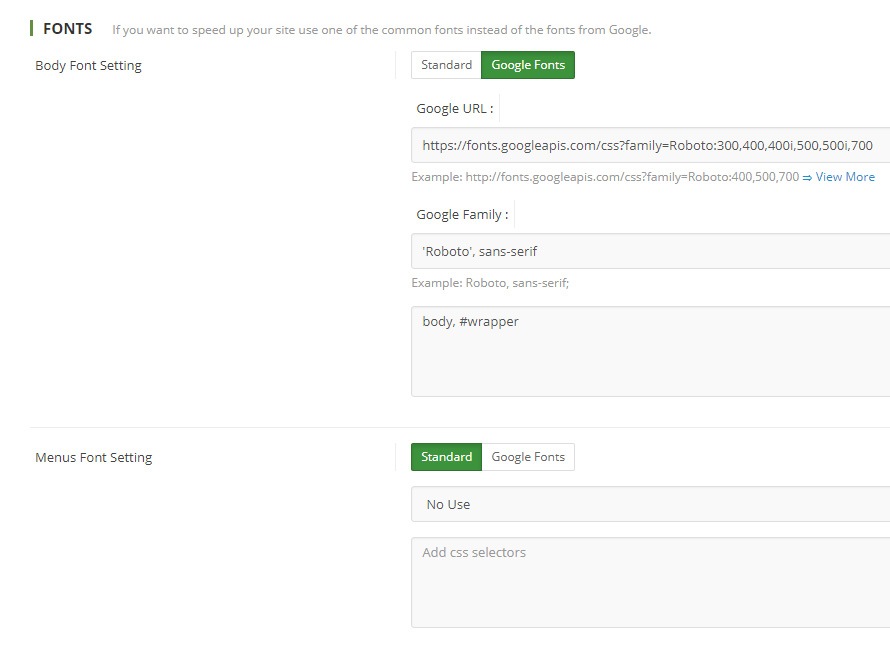
Font tab
Go to admin › OpenCartWorks › So Themes Config › font Tab
Font Setting standard - It is the default fonts of the system
Font Setting Google Fonts - It is the Google fonts, fast, and open through great typography.
Google URL - Example: http://fonts.googleapis.com/css?family=Roboto:400,500,700 ⇒ View More
Google Family - Example: Roboto, sans-serif;
Add css selectors - is the css selectors of setting
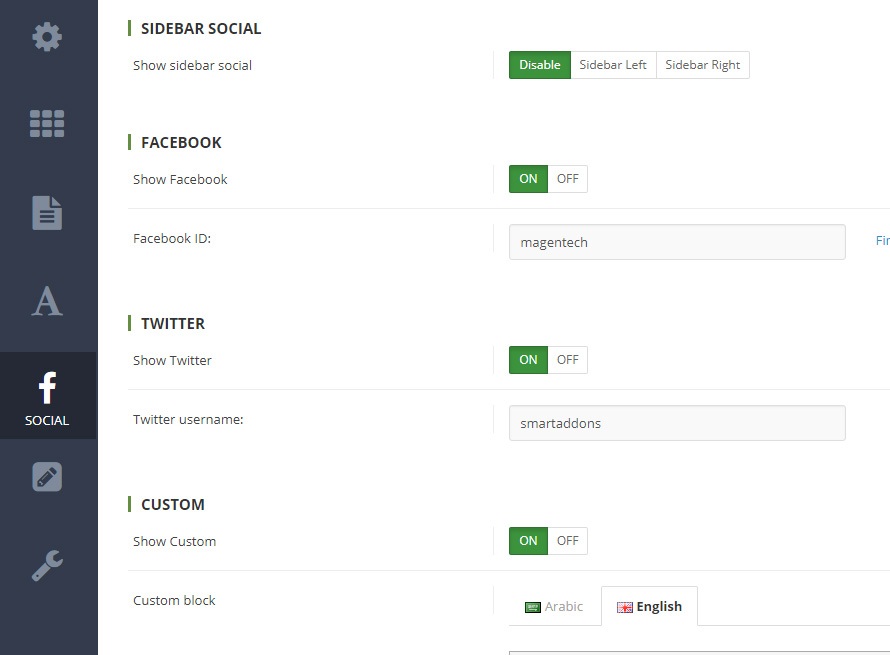
Social Tab
Go to admin › OpenCartWorks › So Themes Config › social Tab
Show sidebar social - It is the default fonts of the system
Show Facebook - Options (yes/no)
Facebook ID - is the Account Facebook. For example: Facebook ID = MagenTech (https://www.facebook.com/MagenTech)
Show Twitter - Options (yes/no)
Twitter username - is the Twitter username
Show Custom - Options (yes/no)
Custom block - is the content of custom block
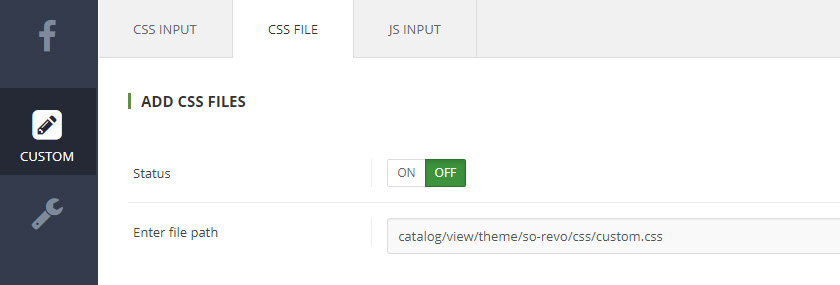
Custom Tab
Go to admin › OpenCartWorks › So Themes Config › custom Tab
CSS Input - It is the css code direct
CSS File - add file css, Enter file path file css
JS File - add file js, Enter file path file js
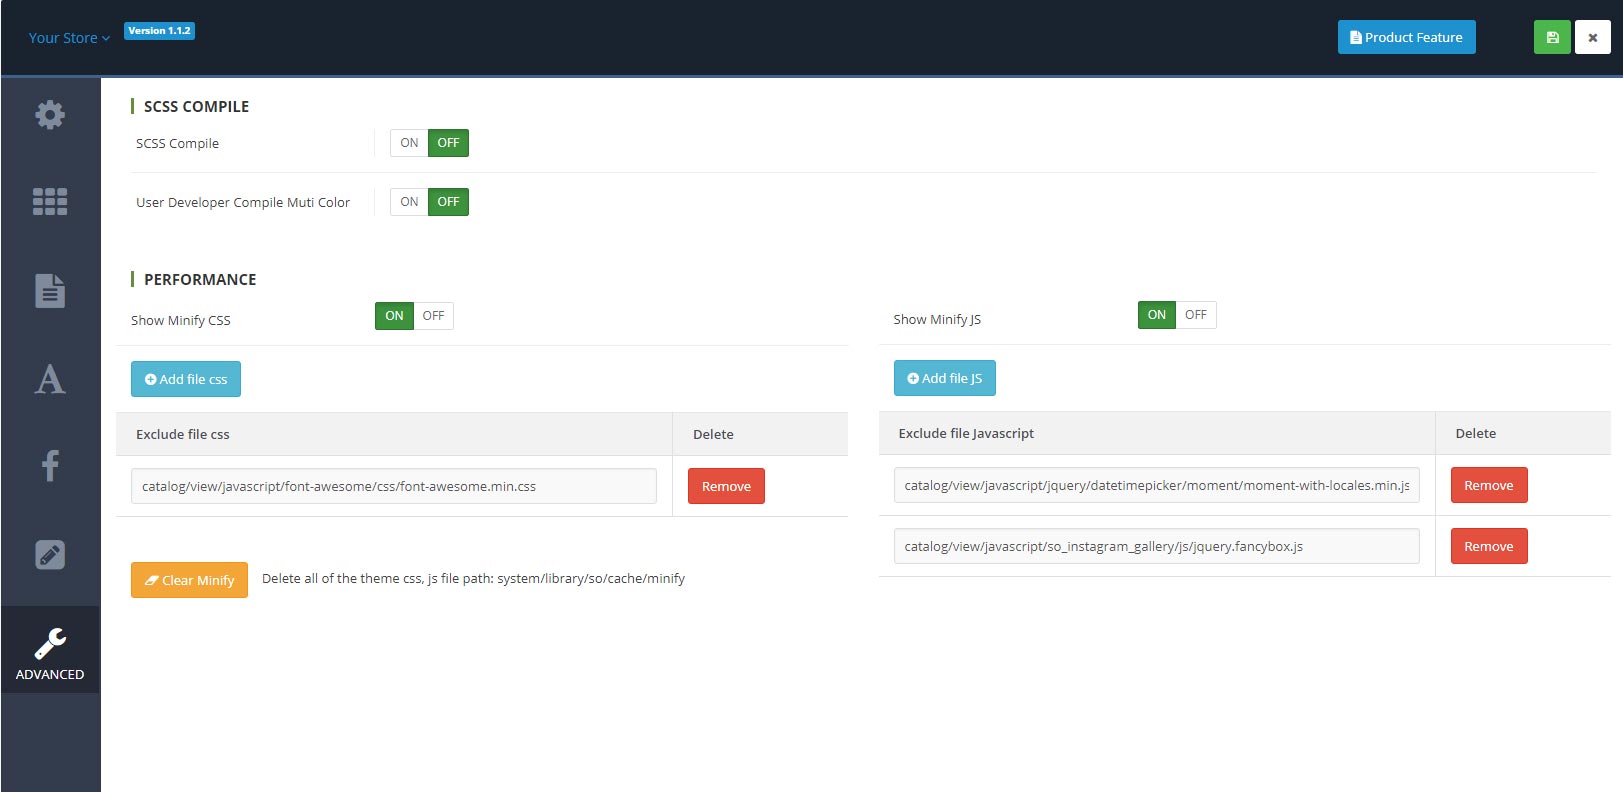
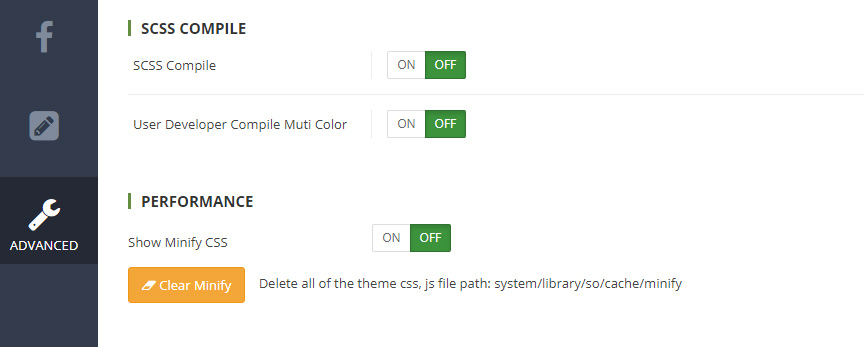
Advanced Tab
Go to admin › OpenCartWorks › So Themes Config › Advanced Tab
SCSS Compile - Compile scss source for get css styles using
User Developer Compile Muti Color - Only user developer
Show Minify CSS - compress all css to only one file
Show Minify JS - compress all js to only one file
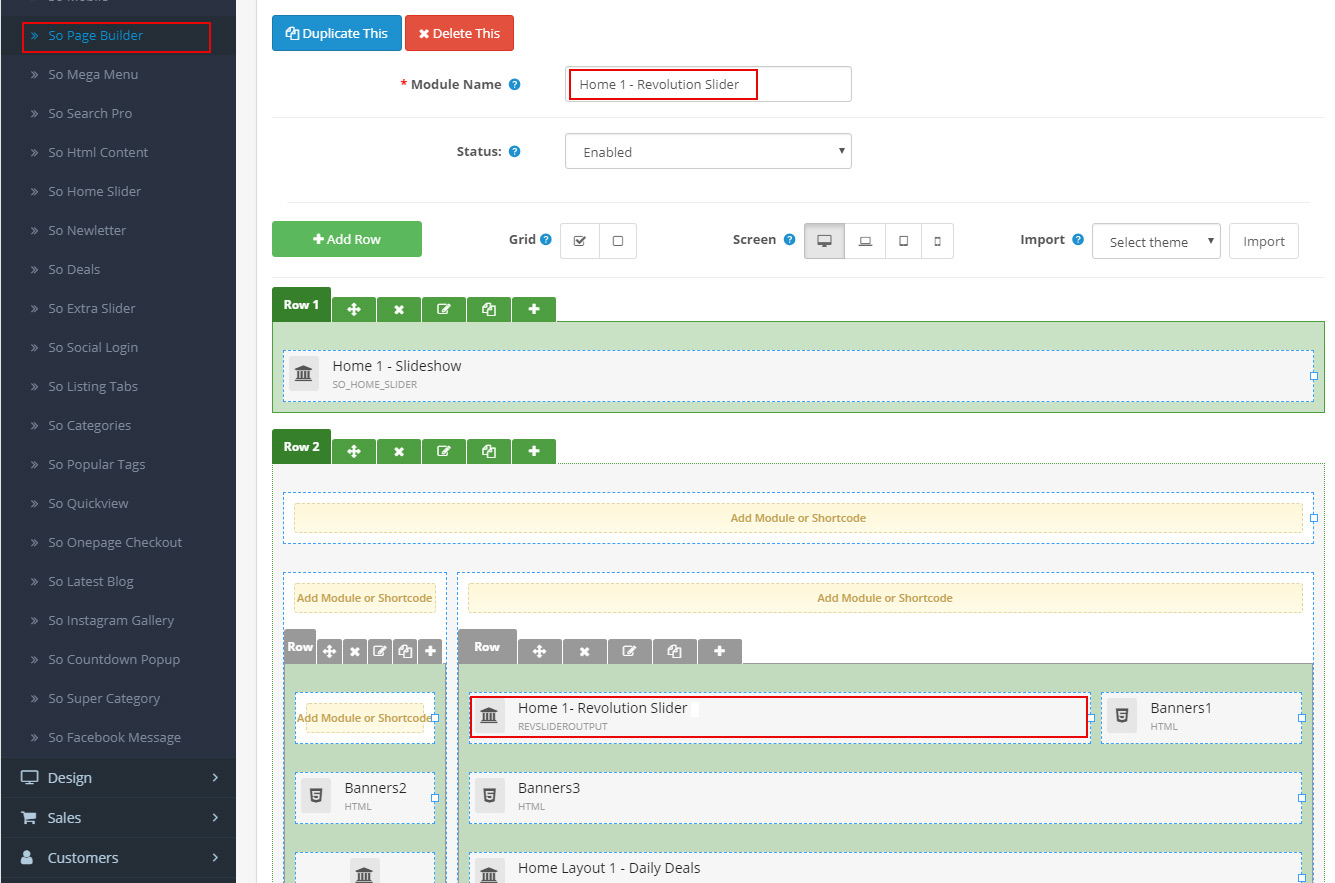
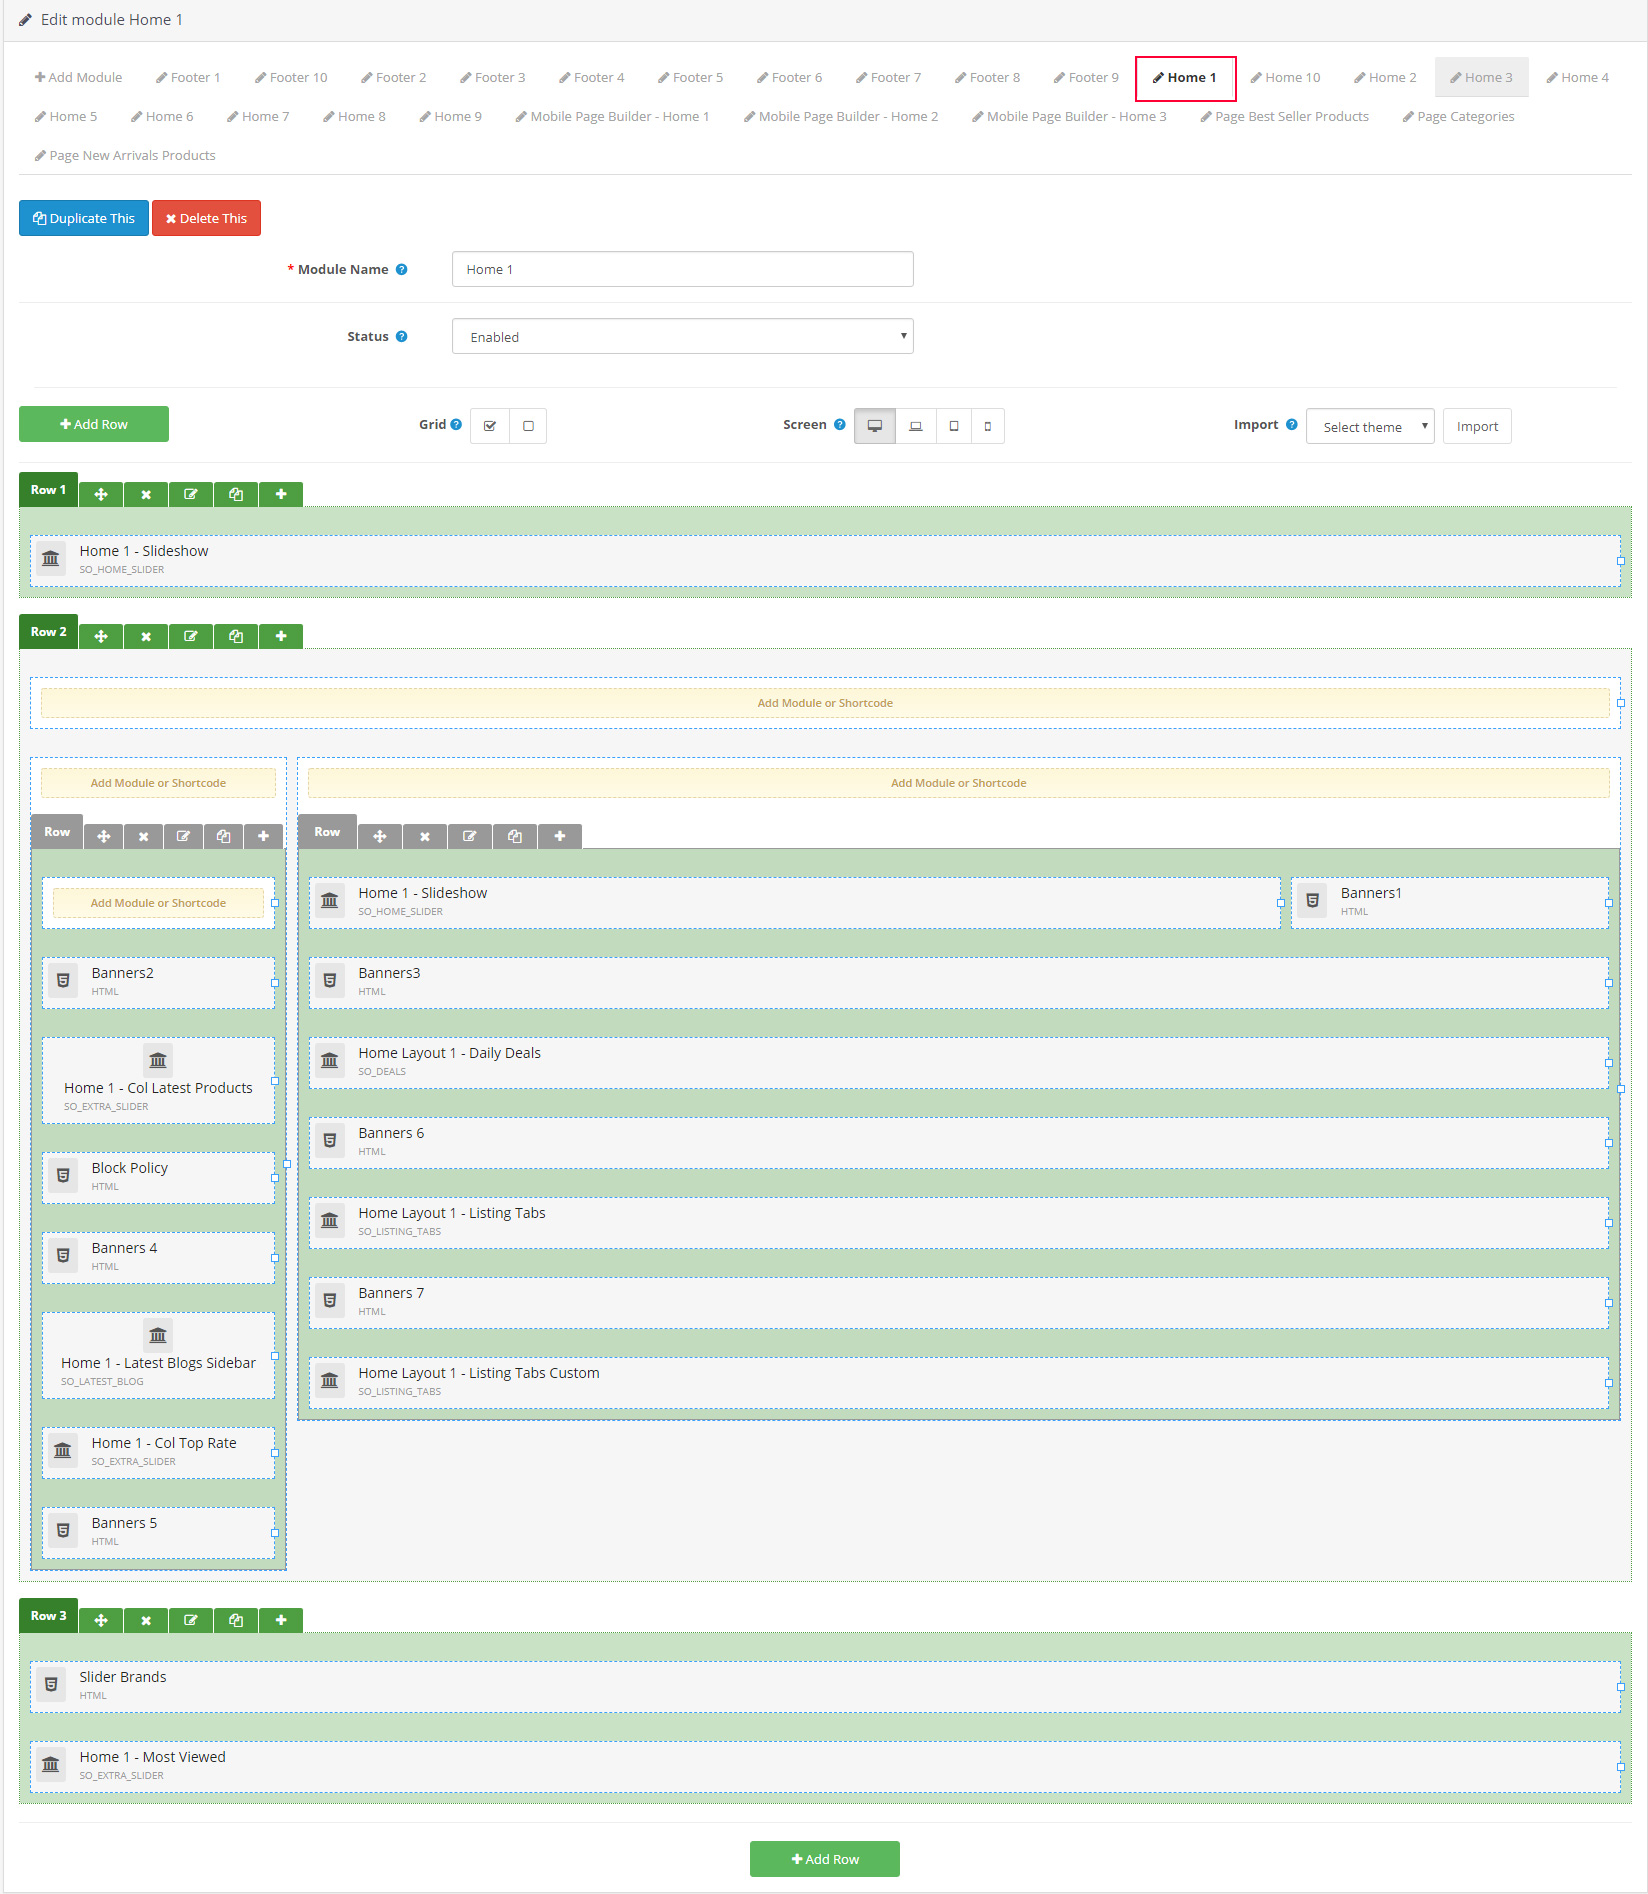
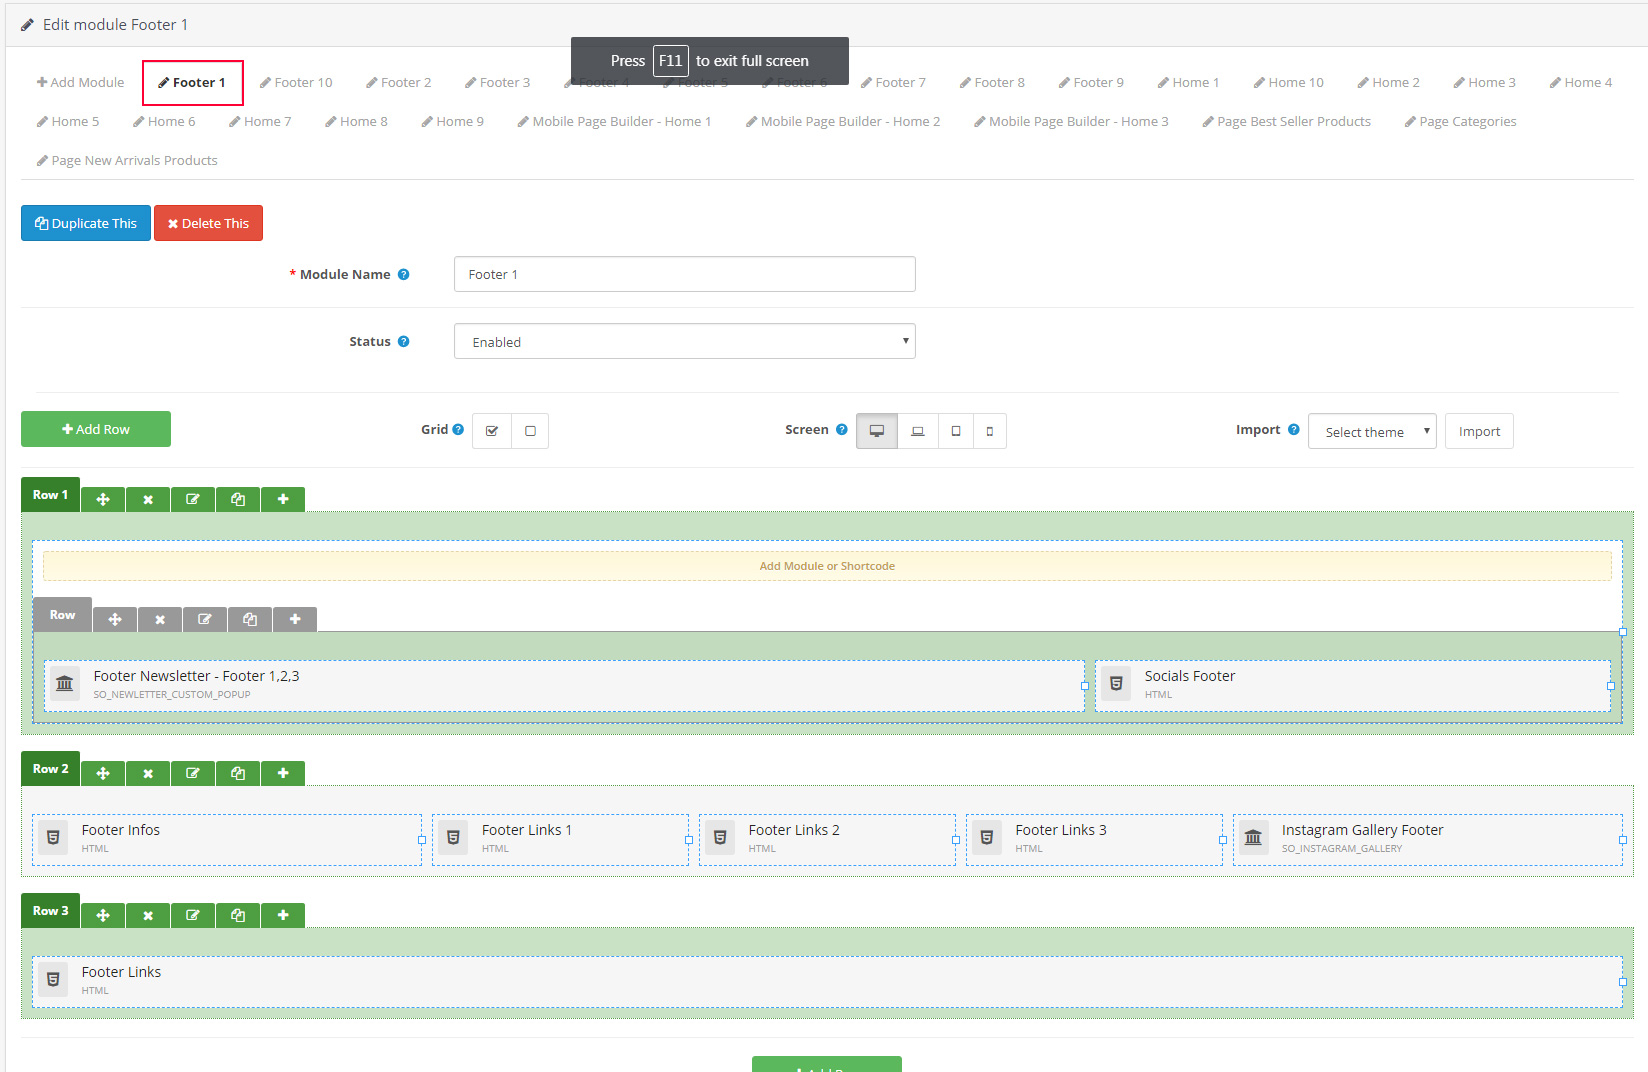
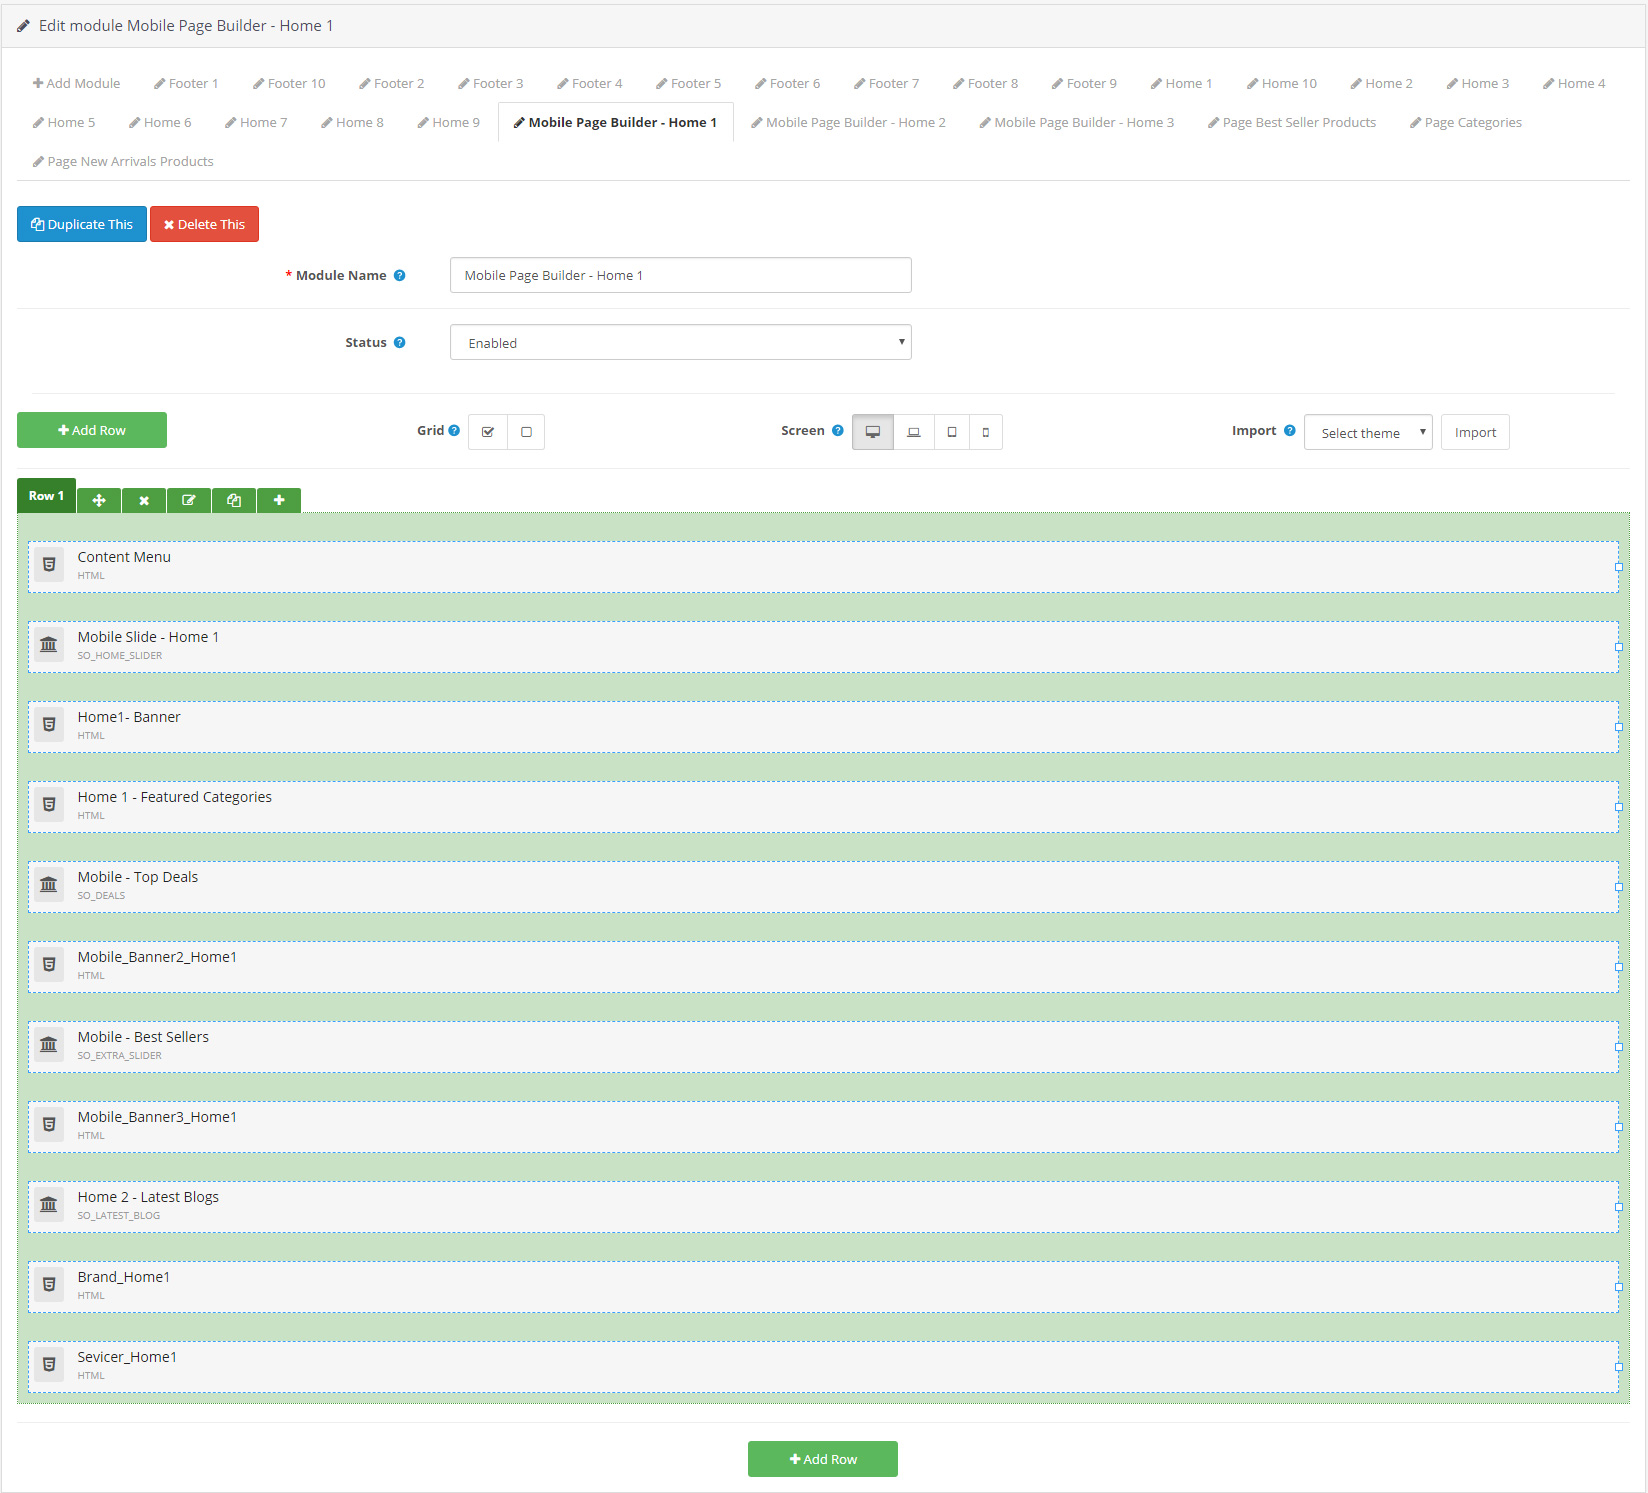
Please check your layout, header, footer in So Theme Config then you can configure the modules of that layout via so page builder module. Select your home layout, footer layout to configure modules, blocks...
General Tab
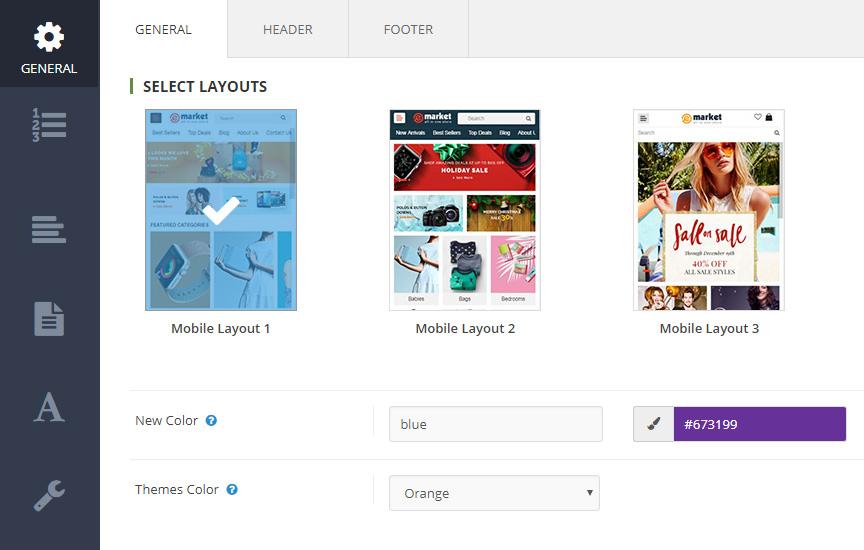
Go to admin › OpenCartWorks › So Mobile › General
1.Select Layout - Choose the layout that you like. Click button Apply Default Setting Choose the Layout
New Color - Set name color (do not uppercase letters) and fill color. Continue Click button Compile CSS.
Select Color - Select the color you just created › Click button Save
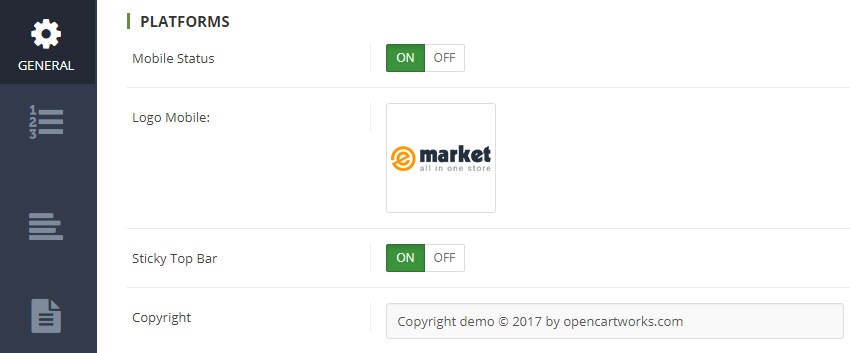
2.Platforms
Mobile Status On - use layout mobile/ Off - use layout responsive
Logo Mobile - Choose a image path
Sticky Top Bar - Attach sidebar to top the page when the user scrolls
Copyright - It is the content to Copyright
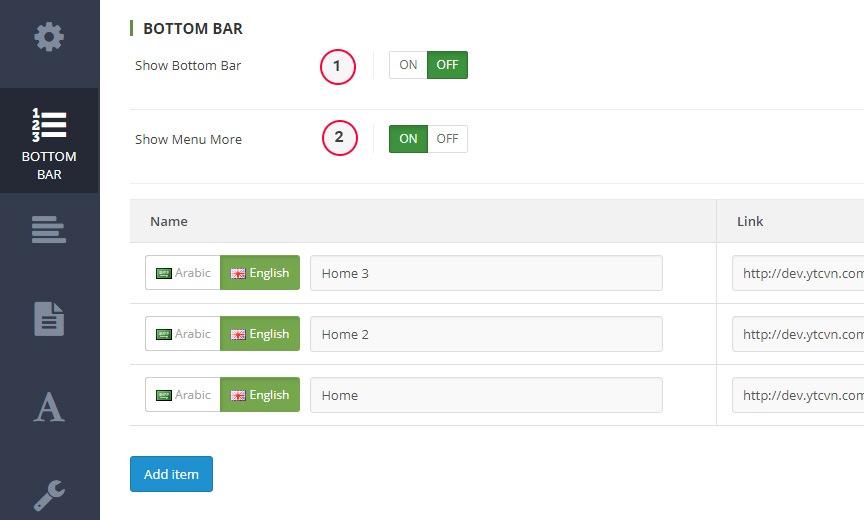
Bottom Bar Tab
Go to admin › OpenCartWorks › So Mobile › Bottom Bar
Show Bottom Bar - Options (yes/no)
Show Menu More - Options (yes/no)
View Frontend:
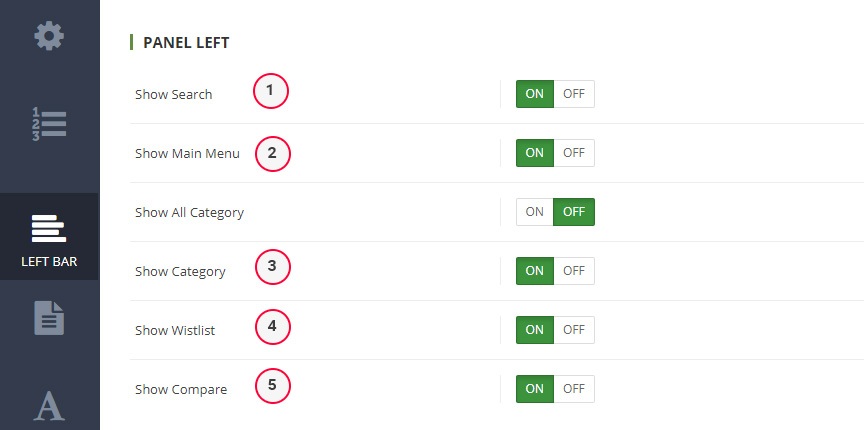
Panel Left Tab
Go to admin › OpenCartWorks › So Mobile › Left Bar
Show Search - Options (yes/no)
Show Main Menu - Options (yes/no)
Show All Category - Options (yes/no)
Show Category - Options (yes/no)
Show Wistlist - Options (yes/no)
Show Compare - Options (yes/no)
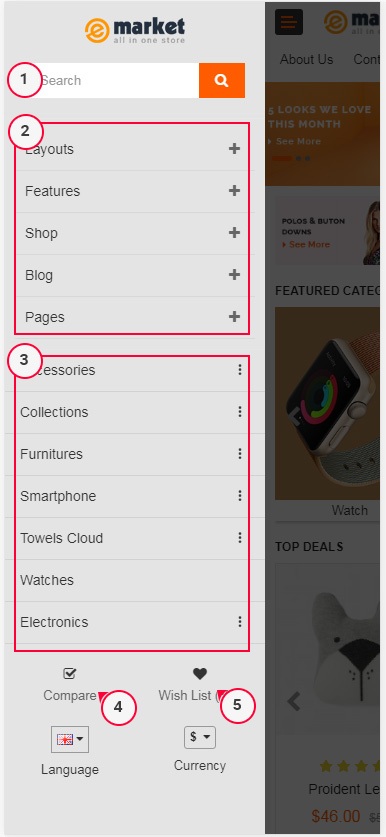
View Frontend:
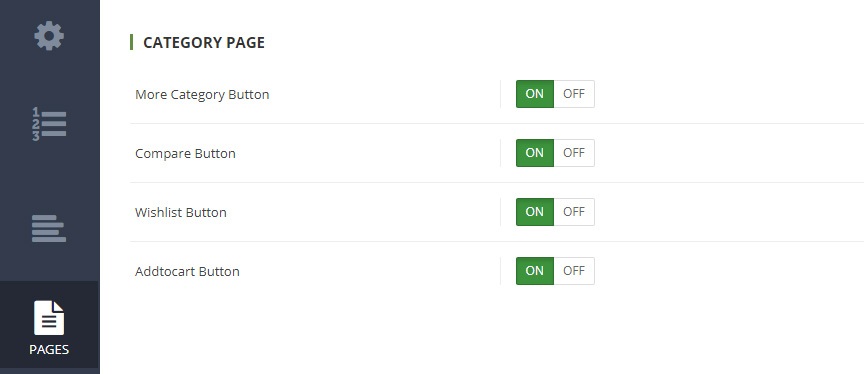
Category Page Tab
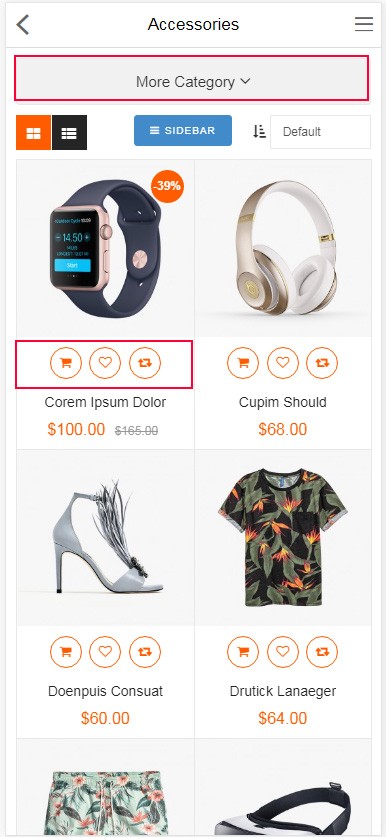
Go to admin › OpenCartWorks › So Mobile › Page
More Category Button - Options (yes/no)
Compare Button - Options (yes/no)
Wishlist Button - Options (yes/no)
Addtocart Button - Options (yes/no)
View Frontend:
Fonts Tab
Go to admin › OpenCartWorks › So Mobile › font Tab
Font Setting standard - It is the default fonts of the system
Font Setting Google Fonts - It is the Google fonts, fast, and open through great typography.
Google URL - Example: http://fonts.googleapis.com/css?family=Roboto:400,500,700 ⇒ View More
Google Family - Example: Roboto, sans-serif;
Add css selectors - is the css selectors of setting
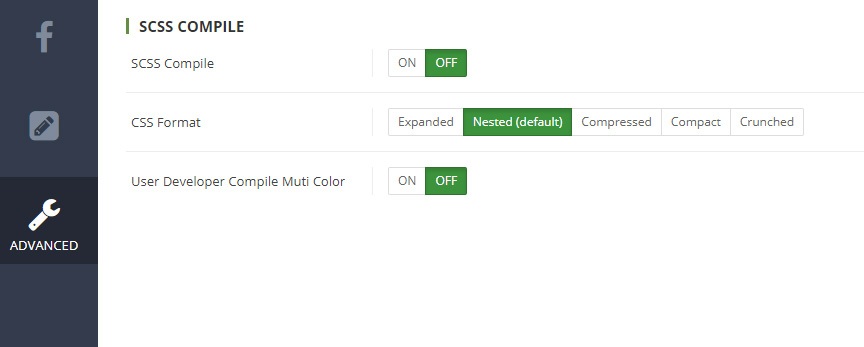
Advanced Tab
Go to admin › OpenCartWorks › So Mobile › Advanced
SCSS Compile - Compile scss source for get css styles using
User Developer Compile Muti Color - Only user developer
Extension Configuration
There are two ways to configure Extensions of this Theme:
Option 1: Go to Admin Control Panel => OpenCartWorks => So Page Builder => Select the Layout you want.