Sj JoomShop


Sj JoomShop - Elegant Joomla JoomShopping Template

System Requirements: here

SP Page Builder Component

JoomShopping Component

Download Packages from our store: here

This template uses Helix ultimate - Framework . You can refer to the Helix ultimate function: here

By using this package, you will see your website exactly as our Demo with sample data. This is applied when you need a fresh Joomla with our template

The following steps will guide to install a quickstart package of SmartAddons Joomla Template(refer sj basic4 quickstart): Click here
1. Install the template

To install template please refer:

Note Enable Plugin System - Helix Ultimate Framework and YT Shortcodes Plugin :Go to System >> Manage >> Plugins >> search with key "sj" and "ytshortcode", "System - Helix Ultimate Framework".

2. Install the extensions

To install extension please refer: The extensions package include of all our Modules and Plugins.(eg: unzip sj_joomshop_extensions_j4x_v4.0.0.zip file to install the each moudule/plugin.)

3. Install Component

To Install SP Page Builder Component, Joomshop Component, you can follow these steps:

Step 1: Please go to System => Install => Extensions

Step 2: Choose file SP Page Builder.zip that you have downloaded and then Click on the button Upload & Install to install the uploaded package.

4. Import the .json files

To import the .json files Template Layout, you can follow these steps:

Step 1: Please go to System => Templates => Site Template Styles

Step 2: Choose Styles sj_Silk - Default and then Click on the button Template & Options to advanced tab and choose the Import & Export tab.

Step 3: Unzip the template package (eg name: sj_joomshop_template_j4x_v4.0.0.zip) to get the json file: "options.json"

Step 4: click the "Import setting" button select the file: "options.json" and then Save

Please go to System => Manage => Languages to install the language that you wanto use.

Then go toSystem => Manage => Content Languages and click "New" button to crete the New Content Language.

Position Layout


Header Configuration

1. Logo position

Frontend

To configure Logo, please go to System/Templates/Site Template Styles/sj_joomshop => Templates Options/Basic tab => Logo

2. Menu position

Frontend

Please go to System/Templates/Site Template Styles/sj_joomshop => Templates Options/Navigation tab => Menu Builder and select your Main menu here

3. Search position

Frontend

Please go to System/Manage/Site Modules =>Click New button to create a new module => Select SJ Jshopping Search module.

4. Top1 position

Frontend

4.1. Please go to System/Manage/Site Modules =>Click New button to create a new module => Select Login module.

4.2. Please go to System/Manage/Site Modules =>Click New button to create a new module => Select Jshopping Cart module.

4.3. Please go to System/Manage/Site Modules =>Click New button to create a new module => Select Jshopping Wishlist module.

Custom

4.4. Please go to System/Manage/Site Modules => Click New button to create a new module => Select Custom module.

Backend Settings:

Module

Copy & Paste the code html into your editor:

<div class="block-location"><a href="#">Location</a></div>			
					

5. Top2 position

Frontend

Please go to System/Manage/Site Modules => Click New button to create a new module => Select SJ Mega Menu module.

  • Backend Settings: Module/ Sj Mega Menu Options/ Advanced
  • Section1

    7. Position1

    Frontend

    Please go to System/Manage/Site Modules => Click "New" button to create a new module >> Select "Custom" module.

    Backend Settings:

    Module/ Options

    Copy & Paste the code into your editor:

    <div class="image-slider-home">[yt_content_slider style="default" margin="0" items_column0="1" items_column1="1" items_column2="1" items_column3="1" items_column4="1" type_change="fade" transitionin="fadeIn" transitionout="fadeOut" arrows="yes" arrow_position="arrow-default" pagination="yes" autoplay="yes" autoheight="no" hoverpause="yes" lazyload="no" loop="no" speed="0.6" delay="4" ] [yt_content_slider_item src="images/slideshow/slider-1.jpg" caption="no" link="#" ] Add Content Here [/yt_content_slider_item] [yt_content_slider_item src="images/slideshow/slider-2.jpg" caption="no" link="#" ] Add Content Here [/yt_content_slider_item] [yt_content_slider_item src="images/slideshow/slider-3.jpg" caption="no" link="#" ] Add Content Here [/yt_content_slider_item][/yt_content_slider]</div>			
    					

    Section2

    8. Position2

    Frontend

    Please go to System/Manage/Site Modules => Click "New" button to create a new module >> Select "Custom" module.

    Backend Settings:

    Module

    Copy & Paste the code into your editor:

    <div class="block-policy">
    <ul class="inner">
    <li class="item">
    <div class="pl_icon"><img src="images/icon/icon-rocket.png" alt="Free Shipping" /></div>
    <a title="Free Shipping" href="#">Free Shipping</a>
    <p>on orders over $49</p>
    </li>
    <li class="item">
    <div class="pl_icon"><img src="images/icon/icon-money.png" alt="Money Guarantee" /></div>
    <a title="Money Guarantee" href="#">Money Guarantee</a>
    <p>30 days money back</p>
    </li>
    <li class="item">
    <div class="pl_icon"><img src="images/icon/icon-support.png" alt="Online Support" /></div>
    <a title="Online Support" href="#">Online Support</a>
    <p>24/24 on day</p>
    </li>
    <li class="item">
    <div class="pl_icon"><img src="images/icon/icon-gift.png" alt="Gift Promotion" /></div>
    <a title="Gift Promotion" href="#">Gift Promotion</a>
    <p>money back guarantee</p>
    </li>
    <li class="item">
    <div class="pl_icon"><img src="images/icon/icon-payment.png" alt="Payment Method" /></div>
    <a title="Payment Method" href="#">Payment Method</a>
    <p>online 24/24 on day</p>
    </li>
    </ul>
    </div>			
    					

    Section3

    9. Position3

    Frontend

    Please go to System/Manage/Site Modules => Click "New" button to create a new module >> Select "Custom" module.

    Backend Settings:

    Module

    Copy & Paste the code into your editor:

    <div class="banner home-banner1">
    <div class="row">
    <div class="item col-xs-12 col-sm-4 col-md-4 col-lg-4 col-xl-4"><a href="#" rel="banner"><img src="images/banners/banner-home1.jpg" alt="" /></a></div>
    <div class="item col-xs-12 col-sm-4 col-md-4 col-lg-4 col-xl-4"><a href="#" rel="banner"><img src="images/banners/banner-home2.jpg" alt="" /></a></div>
    <div class="item col-xs-12 col-sm-4 col-md-4 col-lg-4 col-xl-4"><a href="#" rel="banner"><img src="images/banners/banner-home3.jpg" alt="" /></a></div>
    </div>
    </div>			
    					

    Section4

    10. Position4

    Frontend

    Backend Settings

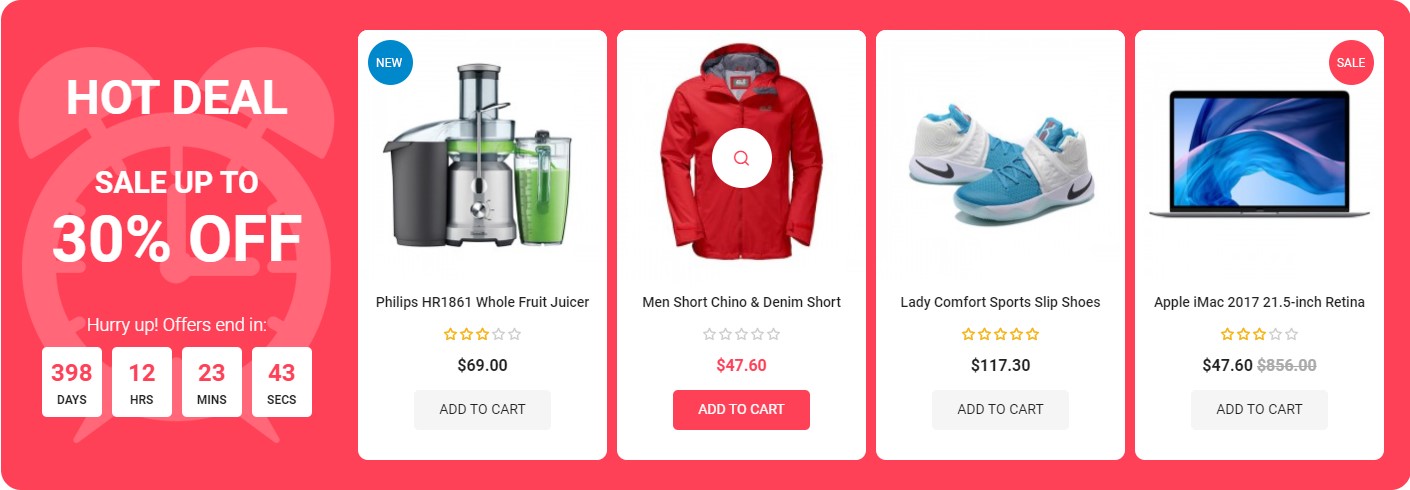
    Please go to System/Manage/Site Modules => Click New button to create a new module => Select Sj Products for JoomShopping module.

  • Backend Settings: Source Options/ Product Options/ Image Options/ Advanced
  • Note enter the content html below for "pre-text" in Advanced tab:

    					<div class="block-countdown">
    	<div class="text-deal">
    		<span class="text-lv1">Hot deal</span>
    		<span class="text-lv2">Sale up to</span>
    		<span class="text-lv3">30% off</span>
    	</div>
    	<div class="num-deal">
    		<span class="text-count">Hurry up! Offers end in:</span>
    		<span id="block-clock">2021/10/05</span>
    	</div>
    </div>


    Section5

    11. Position5

    Frontend

    Backend Settings

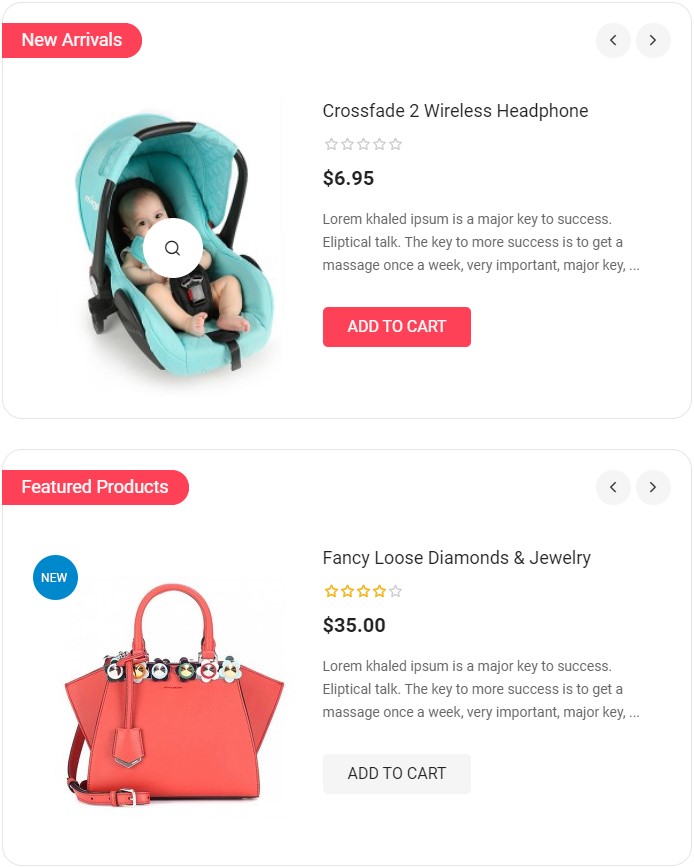
    Please go to System/Manage/Site Modules => Click New button to create a new module => Select Sj Slider for JoomShopping module.

  • Backend Settings: Module/ Source Options/ Product Options/ Image Options/ Effect Options/ Advanced
  • Dupplicate this module for "position5"

    12. Position6

    Dupplicate this module for "position6"

    Section7

    13. Position7

    Frontend

    Please go to System/Manage/Site Modules => Click "New" button to create a new module >> Select "Custom" module.

    Backend Settings:

    Module/ Advanced

    Copy & Paste the code into your editor:

    <p>[yt_content_slider style="default" margin="0" items_column0="10" items_column1="7" items_column2="5" items_column3="3" items_column4="2" type_change="fade" transitionin="fadeIn" transitionout="fadeOut" arrows="no" arrow_position="arrow-default" pagination="no" autoplay="no" autoheight="no" hoverpause="no" lazyload="no" loop="yes" speed="0.6" delay="4" ] [yt_content_slider_item src="images/joomshop/cate-1.jpg" caption="yes" link="index.php?option=com_jshopping&amp;view=products&amp;category_id=1,2,3,7,8,6,4" ] Smartphone [/yt_content_slider_item] [yt_content_slider_item src="images/joomshop/cate-2.jpg" caption="yes" link="index.php?option=com_jshopping&amp;view=products&amp;category_id=1,2,3,7,8,6,4" ] Laptop [/yt_content_slider_item] [yt_content_slider_item src="images/joomshop/cate-3.jpg" caption="yes" link="index.php?option=com_jshopping&amp;view=products&amp;category_id=1,2,3,7,8,6,4" ] Sofa&amp; Chair [/yt_content_slider_item] [yt_content_slider_item src="images/joomshop/cate-4.jpg" caption="yes" link="index.php?option=com_jshopping&amp;view=products&amp;category_id=1,2,3,7,8,6,4" ] Washing Machine [/yt_content_slider_item] [yt_content_slider_item src="images/joomshop/cate-5.jpg" caption="yes" link="index.php?option=com_jshopping&amp;view=products&amp;category_id=1,2,3,7,8,6,4" ] Jewelry [/yt_content_slider_item] [yt_content_slider_item src="images/joomshop/cate-6.jpg" caption="yes" link="index.php?option=com_jshopping&amp;view=products&amp;category_id=1,2,3,7,8,6,4" ] Men's Fashion [/yt_content_slider_item] [yt_content_slider_item src="images/joomshop/cate-7.jpg" caption="yes" link="index.php?option=com_jshopping&amp;view=products&amp;category_id=1,2,3,7,8,6,4" ] Perfume [/yt_content_slider_item] [yt_content_slider_item src="images/joomshop/cate-8.jpg" caption="yes" link="index.php?option=com_jshopping&amp;view=products&amp;category_id=1,2,3,7,8,6,4" ] Cosmetics [/yt_content_slider_item] [yt_content_slider_item src="images/joomshop/cate-9.jpg" caption="yes" link="index.php?option=com_jshopping&amp;view=products&amp;category_id=1,2,3,7,8,6,4" ] Sport Shoes [/yt_content_slider_item] [yt_content_slider_item src="images/joomshop/cate-10.jpg" caption="yes" link="index.php?option=com_jshopping&amp;view=products&amp;category_id=1,2,3,7,8,6,4" ] Handbags [/yt_content_slider_item] [/yt_content_slider]</p>			
    					

    Section8

    14. Position8

    Frontend

    Backend Settings

    Please go to System/Manage/Site Modules => Click New button to create a new module => Select Sj Products for JoomShopping module.

  • Backend Settings: Source Options/ Product Options/ Image Options/ Advanced
  • Note enter the content html below for "posttext" option in Advanced tab:

    					<div class="box-banner"><a href="#" rel="banner"><img src="images/banners/banner-pro1.jpg" alt=""></a></div>
    
    					
    Dupplicate this module for this position

    Frontend

    Please go to System/Manage/Site Modules => Click "New" button to create a new module >> Select "Custom" module.

    Backend Settings:

    Module/ Options/ Advanced

    Copy & Paste the code into your editor:

    <p>[yt_content_slider style="default" margin="15" items_column0="7" items_column1="5" items_column2="4" items_column3="2" items_column4="1" type_change="fade" transitionin="fadeIn" transitionout="fadeOut" arrows="no" arrow_position="arrow-default" pagination="no" autoplay="no" autoheight="no" hoverpause="yes" lazyload="no" loop="yes" speed="0.6" delay="4" ] [yt_content_slider_item src="images/joomshop/brand-1.jpg" caption="yes" link="#" ] Add Content Here [/yt_content_slider_item] [yt_content_slider_item src="images/joomshop/brand-2.jpg" caption="yes" link="#" ] Add Content Here [/yt_content_slider_item] [yt_content_slider_item src="images/joomshop/brand-3.jpg" caption="yes" link="#" ] Add Content Here [/yt_content_slider_item] [yt_content_slider_item src="images/joomshop/brand-4.jpg" caption="yes" link="#" ] Add Content Here [/yt_content_slider_item] [yt_content_slider_item src="images/joomshop/brand-5.jpg" caption="yes" link="#" ] Add Content Here [/yt_content_slider_item] [yt_content_slider_item src="images/joomshop/brand-6.jpg" caption="yes" link="#" ] Add Content Here [/yt_content_slider_item] [yt_content_slider_item src="images/joomshop/brand-2.jpg" caption="yes" link="#" ] Add Content Here [/yt_content_slider_item] [/yt_content_slider]</p>			
    					

    Section9

    15. Position9

    Frontend

    Please go to System/Manage/Site Modules => Click "New" button to create a new module >> Select "Custom" module.

    Backend Settings:

    Module/ Options/ Advanced

    Copy & Paste the code into your editor:

    <p>[yt_content_slider style="default" margin="0" items_column0="5" items_column1="4" items_column2="4" items_column3="3" items_column4="1" type_change="fade" transitionin="fadeIn" transitionout="fadeOut" arrows="no" arrow_position="arrow-default" pagination="no" autoplay="no" autoheight="no" hoverpause="no" lazyload="no" loop="no" speed="0.6" delay="4" ] [yt_content_slider_item src="images/joomshop/prom-1.jpg" caption="yes" link="#" ] <span class="txt_sale">Sale up to 50% off</span><span class="txt_title">Save up to 10$ per day</span>[/yt_content_slider_item] [yt_content_slider_item src="images/joomshop/prom-2.jpg" caption="yes" link="#" ]<span class="txt_sale">Sale up to 50% off</span><span class="txt_title">Get Over 20$ in saving</span>[/yt_content_slider_item] [yt_content_slider_item src="images/joomshop/prom-3.jpg" caption="yes" link="#" ]<span class="txt_sale">Sale up to 50% off</span><span class="txt_title">Sale up to 50% off</span>[/yt_content_slider_item] [yt_content_slider_item src="images/joomshop/prom-4.jpg" caption="yes" link="#" ]<span class="txt_sale">Sale up to 50% off</span><span class="txt_title">Plus Gift Set With Deal</span>[/yt_content_slider_item] [yt_content_slider_item src="images/joomshop/prom-5.jpg" caption="yes" link="#" ]<span class="txt_sale">Sale up to 50% off</span><span class="txt_title">Save up to 10$ per day</span>[/yt_content_slider_item] [/yt_content_slider]</p>			
    					

    Note: enable "Prepare Content" option in Options tab of module.

    Section10

    16. Position10

    Frontend

    Please go to System/Manage/Site Modules => Click "New" button to create a new module >> Select "Custom" module.

    Backend Settings:

    Module/ Options/ Advanced

    Copy & Paste the code into your editor:

    <p>[yt_testimonial yt_title="" column="1" display_avatar="yes" border="none" background="" title_color="#222" ] [yt_testimonial_item author="Johny Walker" position="" avatar="images/joomshop/tes-1.jpg" ] Lorem ipsum dolor sit amet, consectetur adipiscing elit, sed do eiusmod tempor incididunt ut labore et dolore magna aliqua. Ut enim ad minim veniam, quis nostrud exercitation ullamco laboris nisi ut aliquip ex ea commodo consequat. [/yt_testimonial_item] [yt_testimonial_item author="Cleopatra" position="" avatar="images/joomshop/tes-2.jpg" ] Lorem ipsum dolor sit amet, consectetur adipiscing elit, sed do eiusmod tempor incididunt ut labore et dolore magna aliqua. Ut enim ad minim veniam, quis nostrud exercitation ullamco laboris nisi ut aliquip ex ea commodo consequat. [/yt_testimonial_item] [yt_testimonial_item author="Adelaide" position="" avatar="images/joomshop/tes-3.jpg" ] Lorem ipsum dolor sit amet, consectetur adipiscing elit, sed do eiusmod tempor incididunt ut labore et dolore magna aliqua. Ut enim ad minim veniam, quis nostrud exercitation ullamco laboris nisi ut aliquip ex ea commodo consequat. [/yt_testimonial_item] [yt_testimonial_item author="Venus" position="" avatar="images/joomshop/tes-4.jpg" ] Lorem ipsum dolor sit amet, consectetur adipiscing elit, sed do eiusmod tempor incididunt ut labore et dolore magna aliqua. Ut enim ad minim veniam, quis nostrud exercitation ullamco laboris nisi ut aliquip ex ea commodo consequat. [/yt_testimonial_item] [/yt_testimonial]</p>			
    					

    Note: enable "Prepare Content" option in Options tab of module.

    Section11

    17. Position11

    Frontend

    Backend Settings

    Please go to System/Manage/Site Modules => Click New button to create a new module => Select Menu module.

  • Backend Settings: Module/ Advanced
  • Bottom Section

    18. Bottom1

    Frontend

    Backend Settings

    Please go to System/Manage/Site Modules => Click New button to create a new module => Select AcyMailing module.

  • Backend Settings: Module/ Advanced
  • 19. Bottom2

    Frontend

    Please go to System/Manage/Site Modules => Click "New" button to create a new module >> Select "Menu" module.

    Backend Settings:

    Module

    20. Bottom3

    Frontend

    Please go to System/Manage/Site Modules => Click "New" button to create a new module >> Select "Menu" module.

    Backend Settings:

    Module

    21. Bottom4

    Frontend

    Please go to System/Manage/Site Modules => Click "New" button to create a new module >> Select "Menu" module.

    Backend Settings:

    Module

    22. Bottom5

    Frontend

    Please go to System/Manage/Site Modules => Click "New" button to create a new module >> Select "Custom" module.

    Backend Settings:

    Module/ Options

    Copy & Paste the code into your editor:

    <ul class="socials">
    <li><a title="Facebook" href="http://www.facebook.com/SmartAddons.page" target="_blank" rel="noopener noreferrer"><span class="fa fa-facebook">Facebook</span></a></li>
    <li><a title="Twitter" href="https://twitter.com/smartaddons" target="_blank" rel="noopener noreferrer"> <span class="fa fa-twitter">Twitter</span></a></li>
    <li><a title="Rss" href="#" target="_blank" rel="noopener noreferrer"> <span class="fa fa-rss">rss</span></a></li>
    <li><a title="Pinterest" href="http://www.pinterest.com/smartaddons/" target="_blank" rel="noopener noreferrer"> <span class="fa fa-pinterest">Pinterest</span></a></li>
    <li><a title="youtube" href="#" target="_blank" rel="noopener noreferrer"> <span class="fa fa-youtube">youtube</span></a></li>
    <li><a title="Google+" href="#" target="_blank" rel="noopener noreferrer"> <span class="fa fa-wordpress">wordpress</span></a></li>
    <li><a title="Google" href="https://plus.google.com/+Smartaddons/posts" target="_blank" rel="noopener noreferrer"> <span class="fa fa-google-plus">google+</span></a></li>
    <li><a title="Linkedin" href="http://www.linkedin.com/in/smartaddons" target="_blank" rel="noopener noreferrer"> <span class="fa fa-linkedin">linkedin</span></a></li>
    </ul>			
    					

    Footer Section

    23. Footer1

    Frontend

    Please go to System/Templates/Site Template Styles/sj_joomshop => Basic Tab => Footer

    Backend Settings:

    Template

    24. Footer2

    Please go to System/Manage/Site Modules => Click "New" button to create a new module >> Select "Custom" module.

    Frontend

    Backend Settings:

    Module/ Advanced

    Copy & Paste the code into your editor:

    <p><img class="mark-lazy" src="images/joomshop/payment.png" alt="Payment" data-src="images/joomshop/payment.png" /></p>	


    1. Create new SP Page Builder

    Please go to Components => SP Page Builder => Click New button => Enter the Title: Home Page

    Please go to Menus => Main menu => Click New button => Enter the Title: Home Page. Select "SP Page Builder ยป Page: home page"

    Backend Settings

    Please refer configure our template for joomla 3.x here

    Thank you so much for purchasing this template. If you have any questions that are beyond the scope of this help file, please send us via: Submit a Ticket

    Thanks so much!