Shopify Theme User Guide
- Created: 18/06/2020
- Email: http://www.smartaddons.com/support/tickets/
Firstly, a huge thanks for purchasing this theme, your support is truly appreciated!
This document covers the installation and use of this theme, reveals some answers to common problems and issues. We encourage you to read throughout this document if you are experiencing any difficulties. If you have any questions that are beyond the scope of document, please feel free to contact us via our Ticket Support System. http://www.smartaddons.com/support/tickets/
Below you will find the documentation for how to use the template.
Getting Started
To install this theme you must create a Shopify account.
For information an overview of Shopify's platform and features please see the Shopify Documentation
Shopify is a hosted ecommerce solution that allows you to set up and run your own online store. Pick an ecommerce website template (preferably from us!), list your products, accept credit card orders, and ship your goods — all with a few clicks of the mouse. With Shopify it's easy to sell online and there's no software to download or maintain.
You can start free trial with Shopify. Click the image below Start your free 14-day trial of Shopify
Read shopify manual before you start
Installation
Dowload
1. Purchase Ss BigSale template from Themeforest.net then you can download theme package.
2. Extract Package that include all files and folders of theme..
3. Find this file: BigSale-1.0.0.zip in the folder BigSale-v1.0.0, then you just need to upload BigSale-1.0.0.zip file to your Shopify store.
I. Install Theme
Video installation tutorial
Look at this video of installation process:
To install the theme:
-
Please log in to your Shopify store, click Online Store, then click Themes.
-
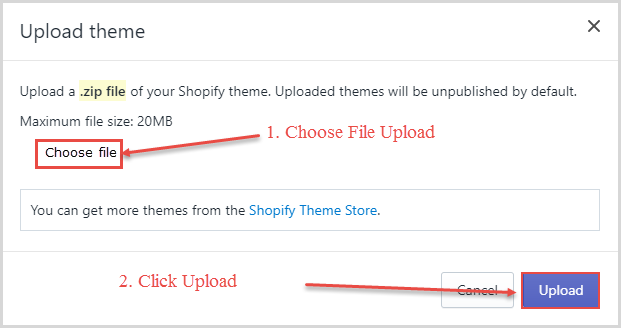
From there, click Upload a theme on the top right-hand corner.

-
The Upload A Theme dialog displays. Click Choose File to select the .zip file you want to upload, then click Upload.
-
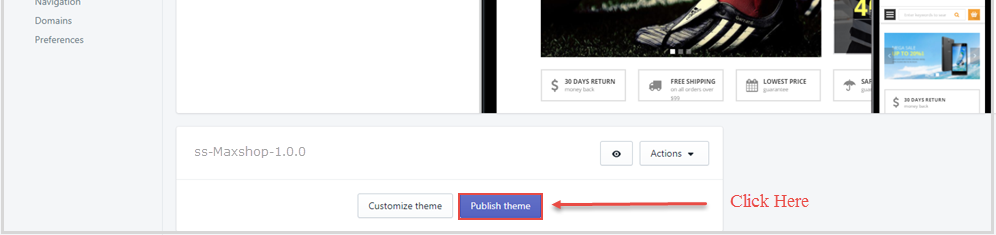
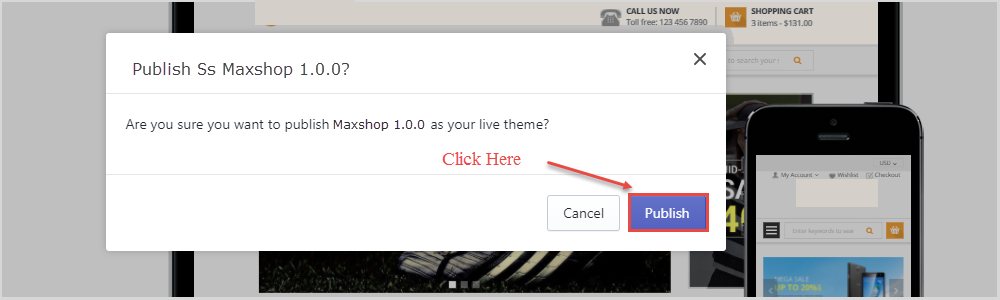
If your store is currently active and is using a different theme, you can select Publish theme button to publish what you have just uploaded to be an active theme.
Install Apps
1. Set Product Review
To have product review feature, you can install this free app below:
Store Setting
I. Checkout
- From your Shopify admin, click Settings => Checkout => Scroll down to the Customer accounts section.
- Check Accounts are optional and click Save.
II. Shipping
To enable shipping calculator, please configure your shipping rates by following below guide:
III. Currency (General)
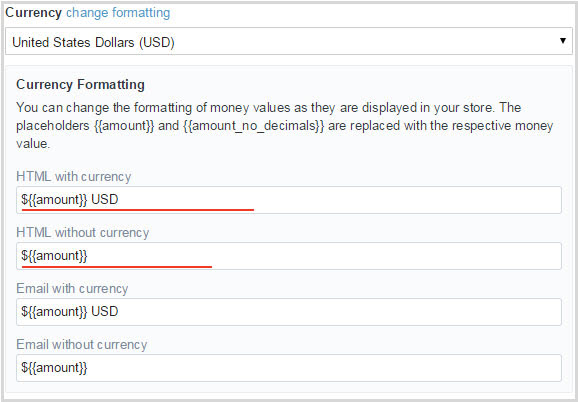
Editing the HTML for currency formatting
- From your Shopify admin, click Settings => Scroll down to Select setting Garenal => change formatting to open the Currency Formatting section:
-
Replace selected text and click Save
-
Currency must be the same

IV. Payments
1. From your shop admin, go to the Settings / Payments
2. Choose a payment gateway to accept payments for orders. The checkout page is working.
Setup of Pages
You will also need to create two pages, one for the textual content that can be placed on the ' Frontpage ' as a welcome message and another for the ' Contact Page ' which you can link to the 'page.contact' template. Linking these pages to the correct template will be covered in their respective sections within this documentation. Here is the link which help you to create custom pages.
Create Contact Us Page
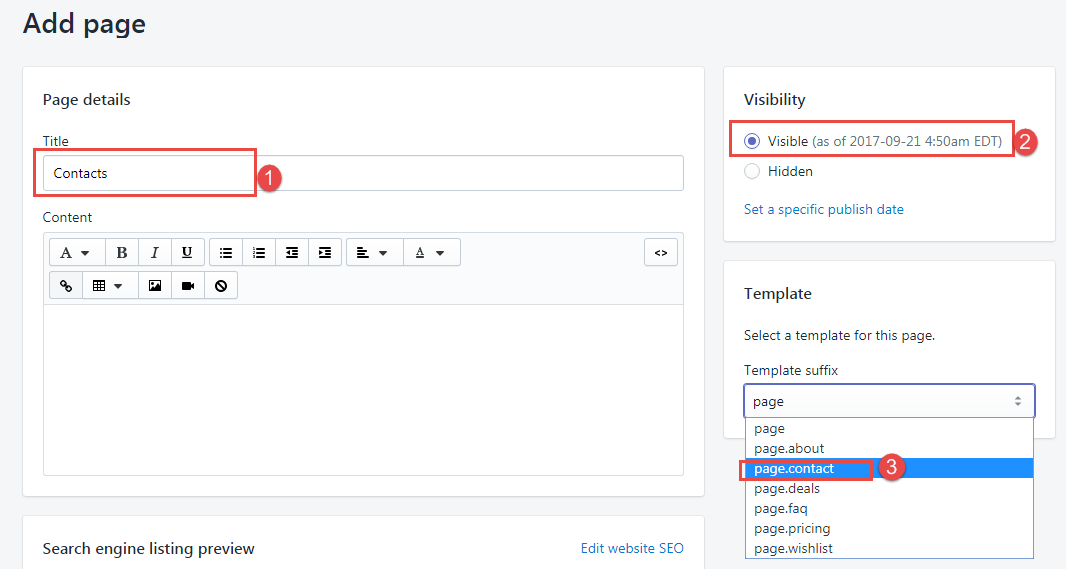
Login to your Shopify admin panel and go to Pages, click Add a page:
1. In the Online Store / Pages, find and click button "Add a page"

2. Write in the Title field page name => Select Visible => Select Template: page.contact => Click save
Setting Customize
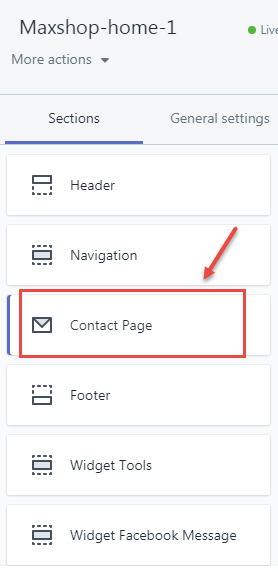
After you create Contact Us page successfully, please go to Themes > Customize theme > Click Contact us which you just created at navigation to show Section for this.
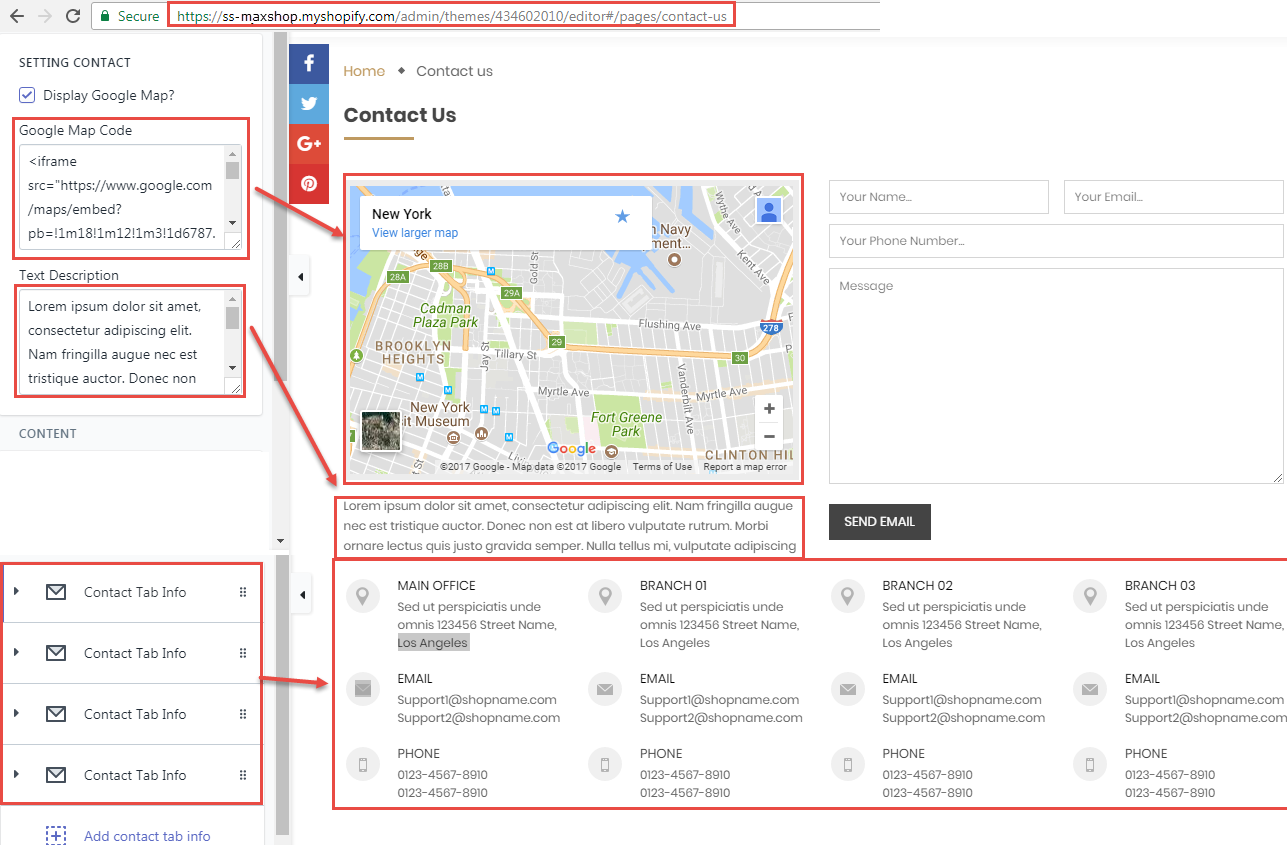
At this Section, you can start adjusting like in this image below:
Then, paste the embedded code of Google Map into the field Google Map Code and put the content that you'd like to show as the below image.
Edit/add fields to the Contact Form
This is the contact form we are going to add/ edit:

To add/edit contact field, please follow below guide:
Create Wishlist Page
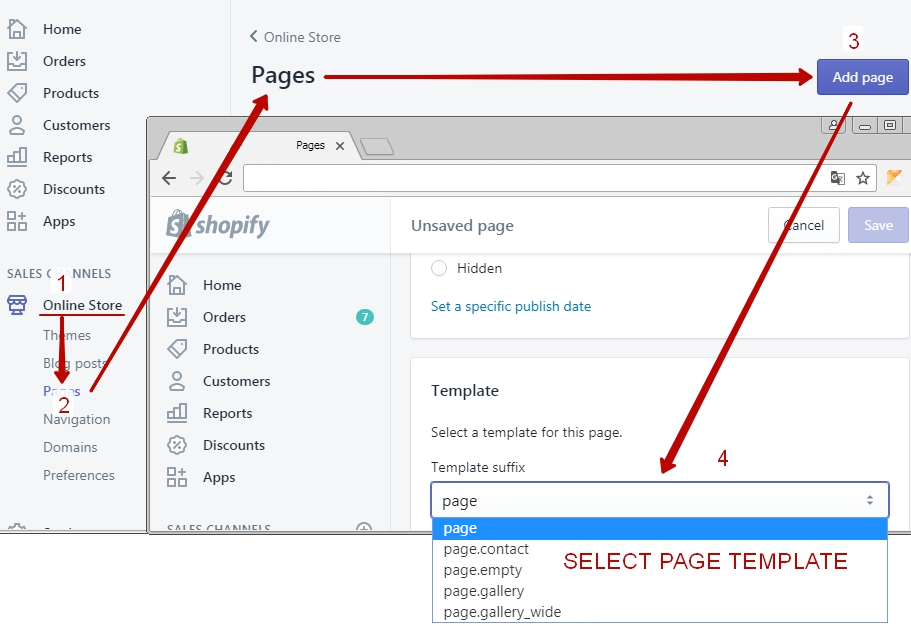
1. From the pages tab, click the Add a page, then click page.
2. From your Shopify admin, click Online Store button. You will be taken to a new template page.
3. From the template page, enter a Title and choose the Template look like the below image.
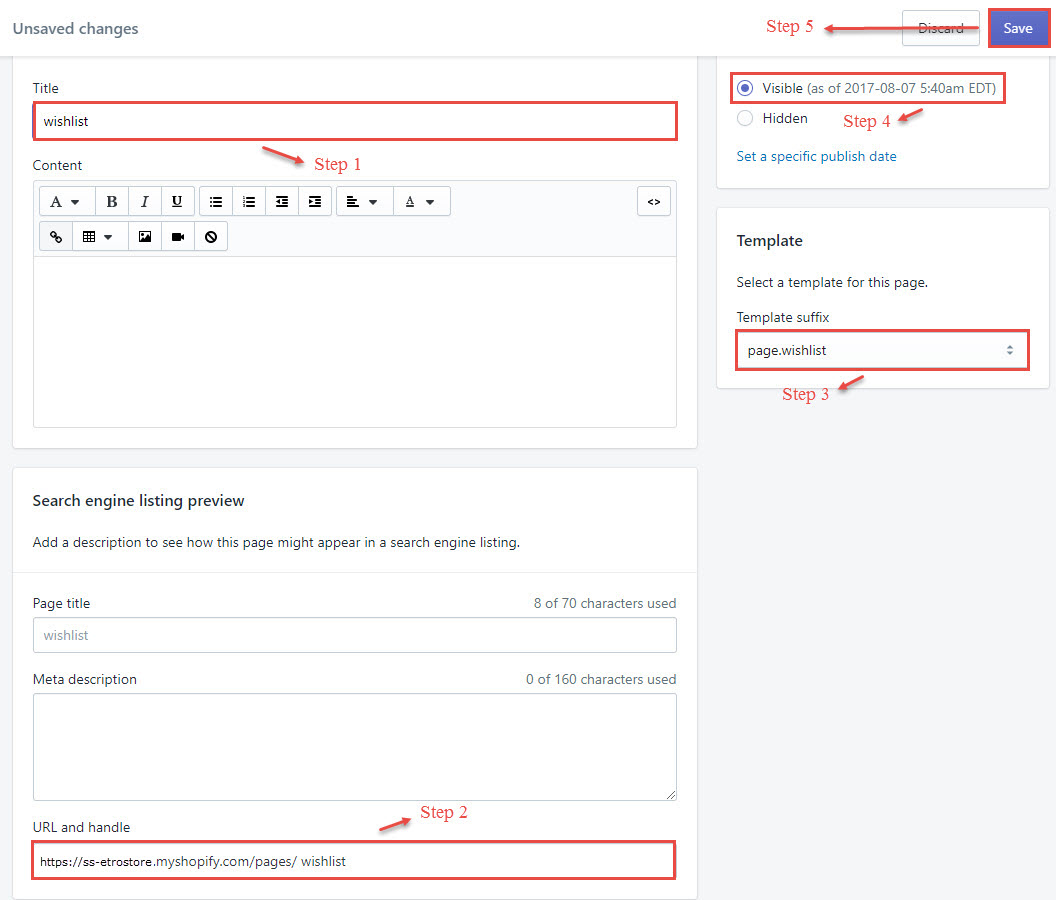
4. Click Save.
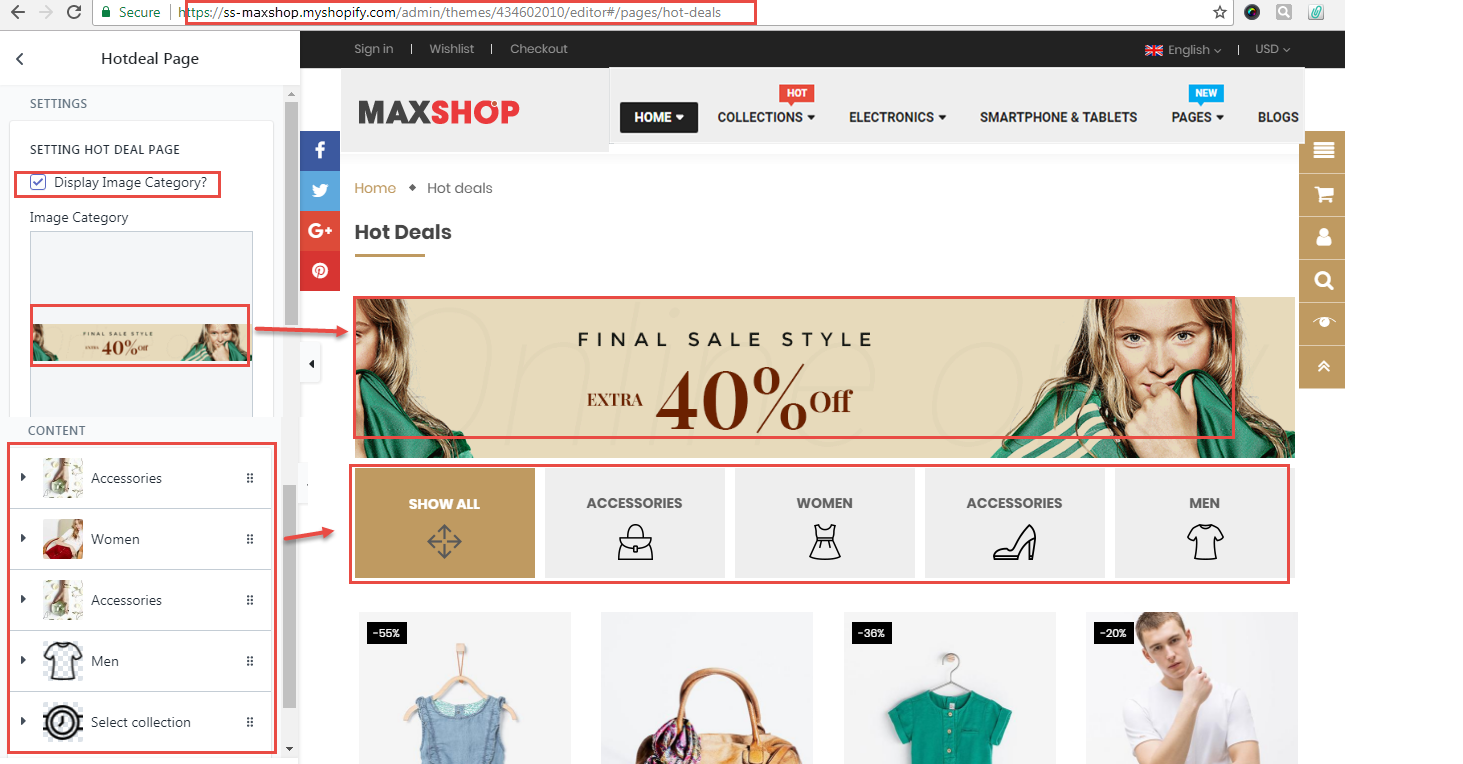
Create Hot Deals Page
1. From the pages tab, click the Add a page, then click page.
2. From your Shopify admin, click Online Store button. You will be taken to a new template page.
3. From the template page, enter a Title and choose the Template look like the below image.
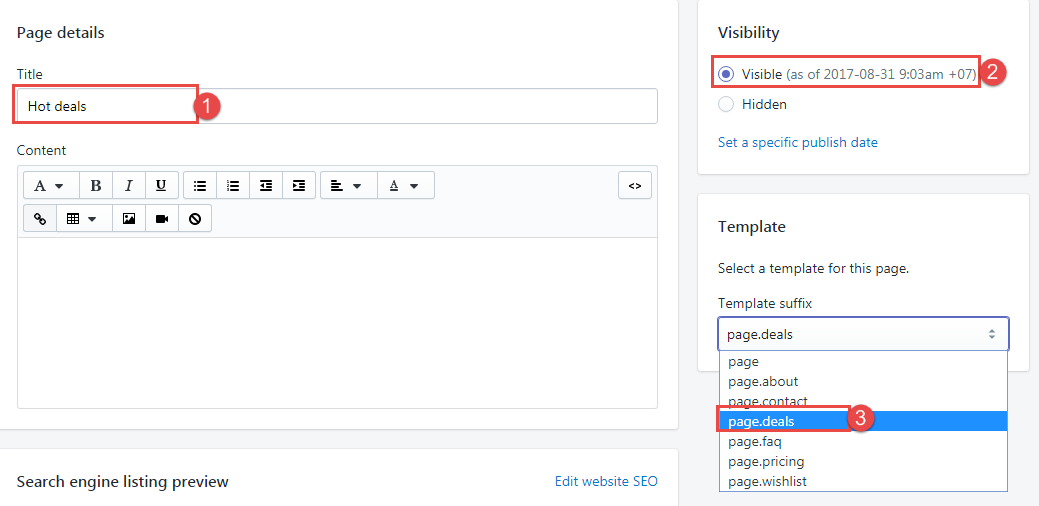
4. Click Save.
5. From your Shopify admin, click Online Store, then click Themes. Click Customize theme for the theme you want to customize. In General Settings Tab -> Hotdeal Page.
- Backend setting:
Create About Us Page
1. From the pages tab, click the Add a page, then click page.
2. From your Shopify admin, click Online Store button. You will be taken to a new template page.
3. From the template page, enter a Title and choose the Template look like the below image.
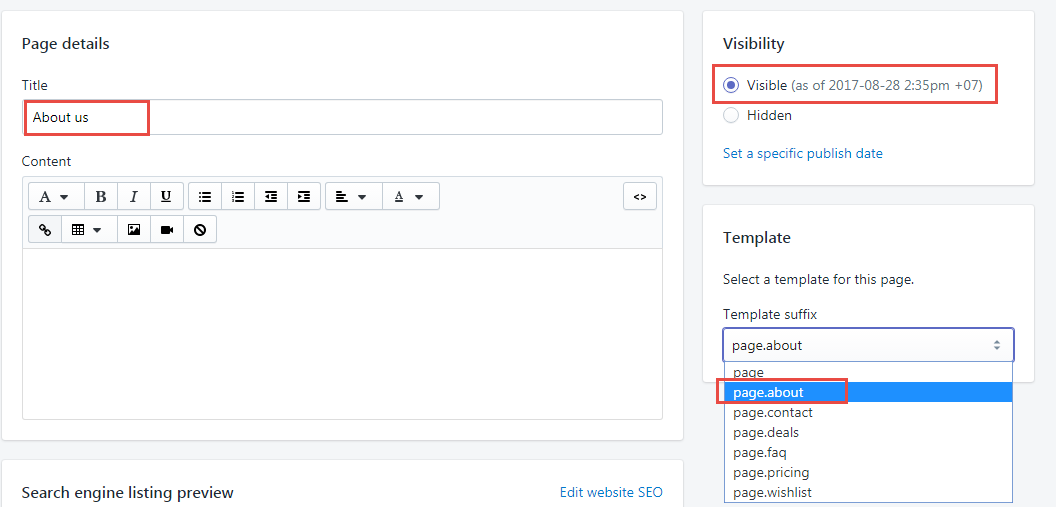
4. Click Save.
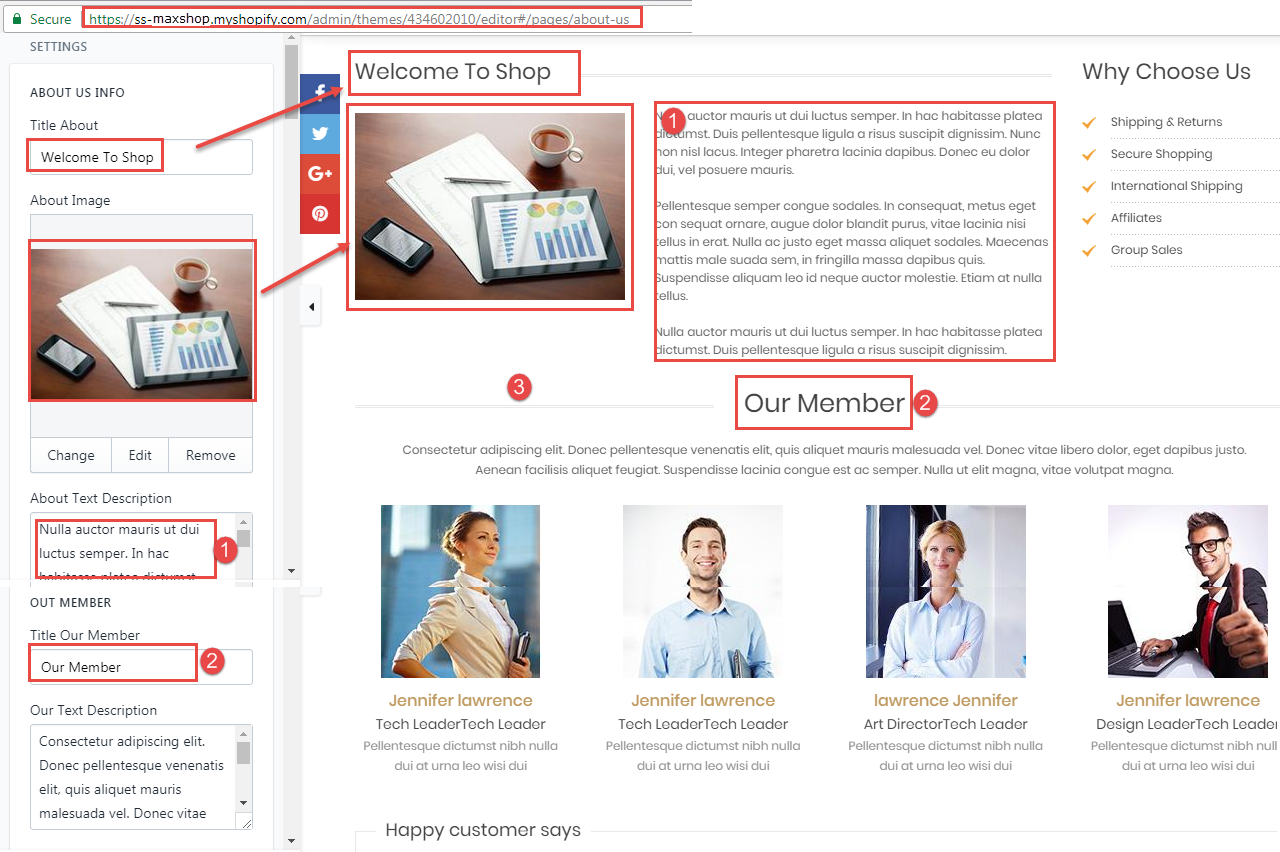
5. From your Shopify admin, click Online Store, then click Themes. Click Customize theme for the theme you want to customize. In General Settings Tab -> About Us Page.
- Backend setting:
Create FAQs Page
1. From the pages tab, click the Add a page, then click page.
2. From your Shopify admin, click Online Store button. You will be taken to a new template page.
3. From the template page, enter a Title and choose the Template look like the below image.
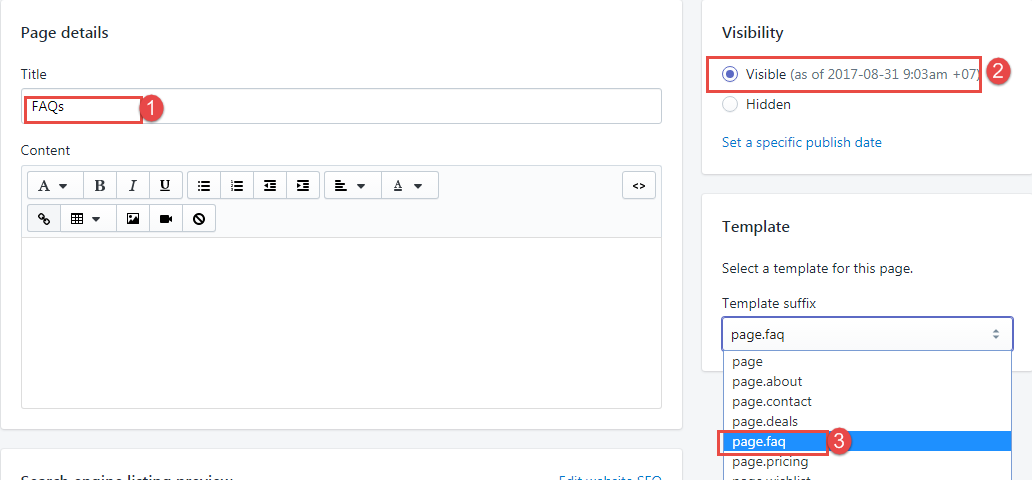
4. Click Save.
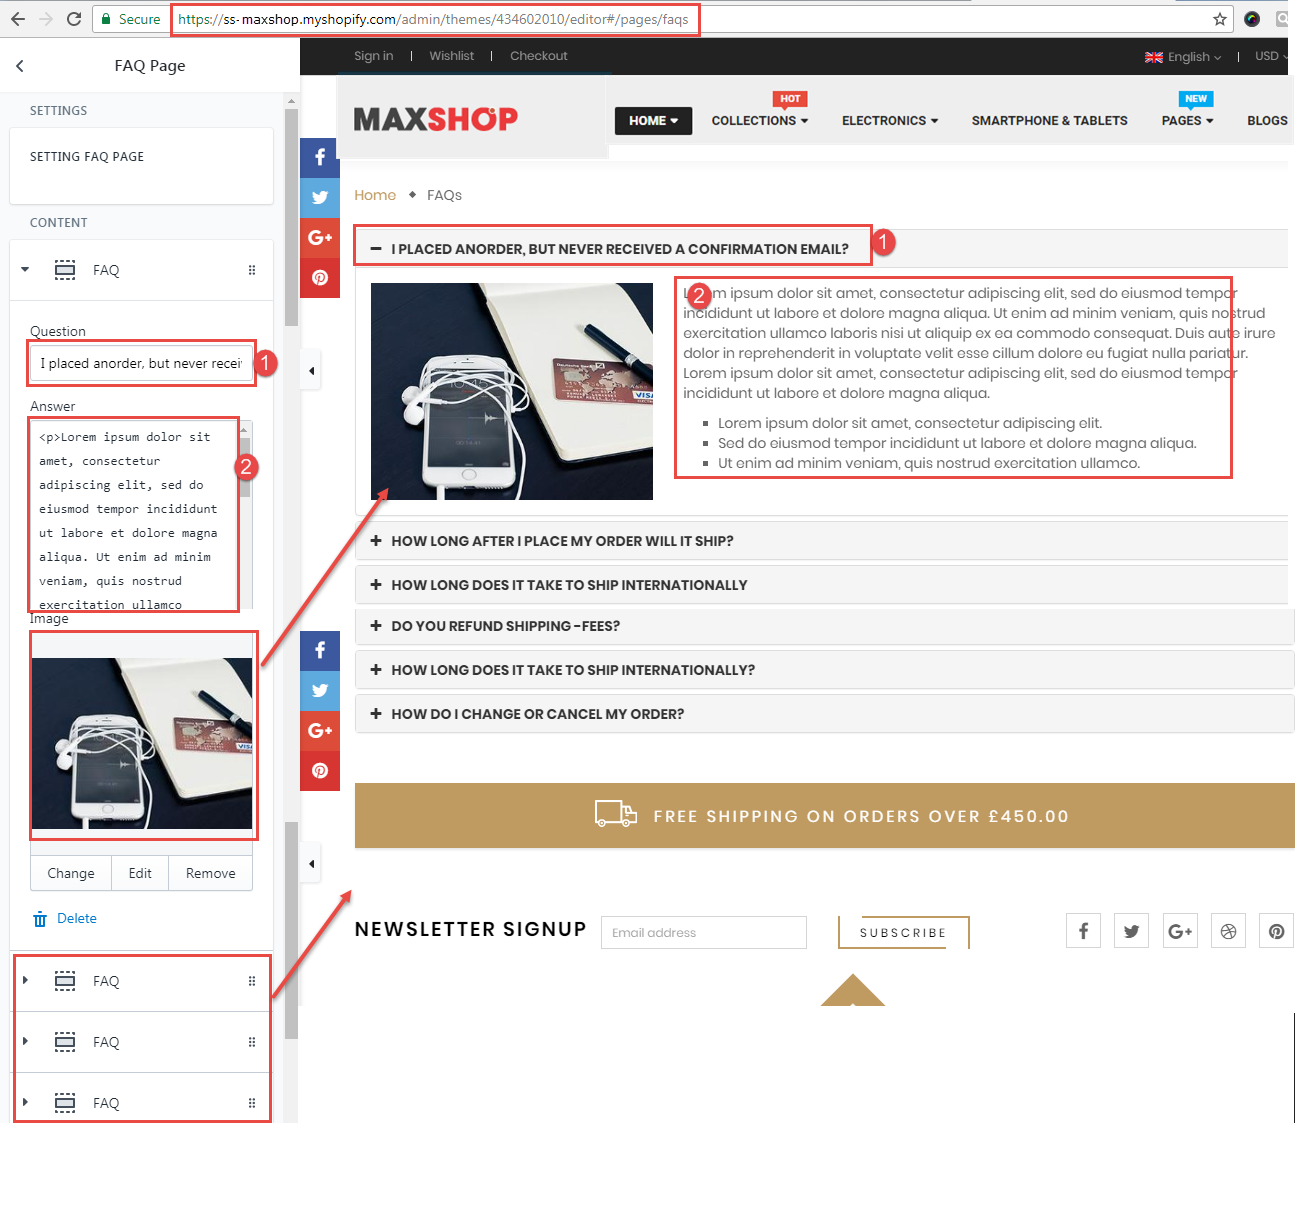
5. From your Shopify admin, click Online Store, then click Themes. Click Customize theme for the theme you want to customize. In General Settings Tab -> About Us Page.
- Backend setting:
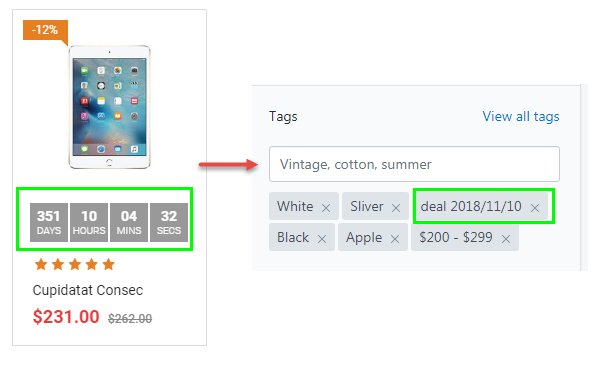
Create Countdown Product
From the Admin, click Products tab => Select product you want, then add tag (Countdown Deal (deal year/ month/ day)).
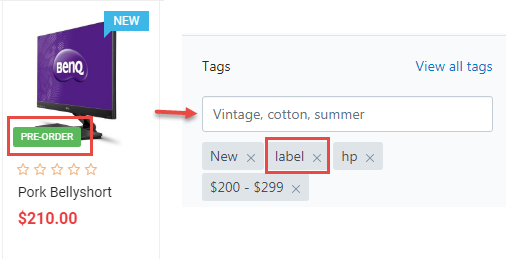
Create Countdown Product
From the Admin, click Products tab => Select product you want, then add tag (Label (label,label2)).
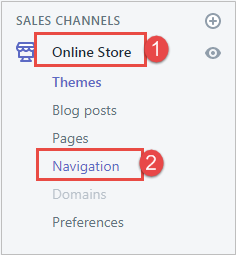
Setup Navigation
From your shop admin, go to the Online Store / Navigation
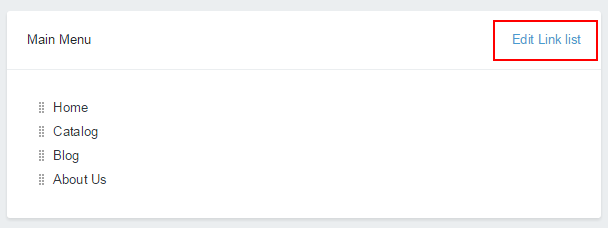
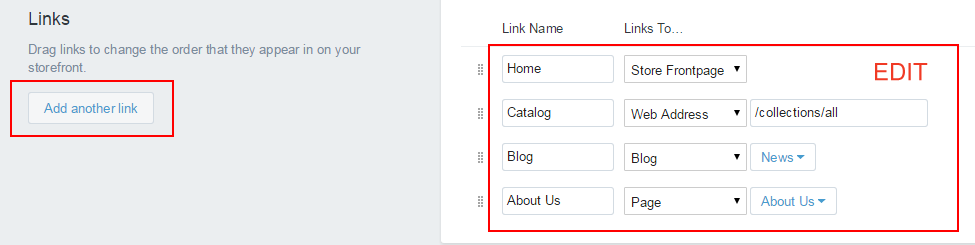
1. Create a Link List In Menu
You can read document Menu Link Link Here Or follow the instructions below:
Main Menu
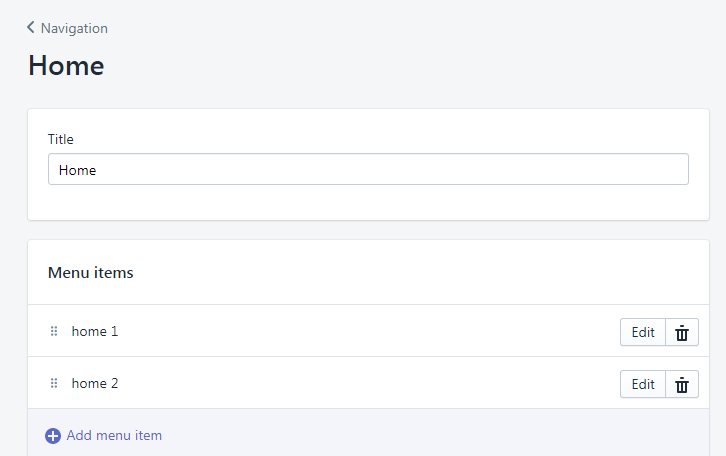
2. Create Simple Drop-down Menu
Please go to Shopify admin => Online Store => Navigation => Home
3. Create Mega Drop-down Menu
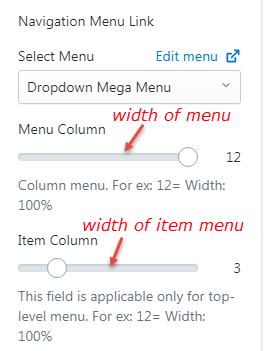
Please go to Shopify admin => Customize => Navigation
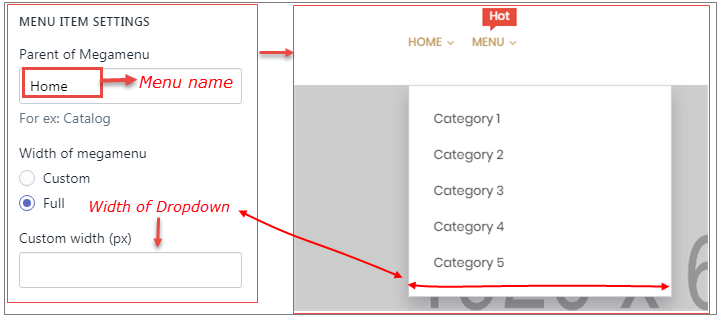
- Create Menu
Please go to Online Store => Navigation => Add new menu
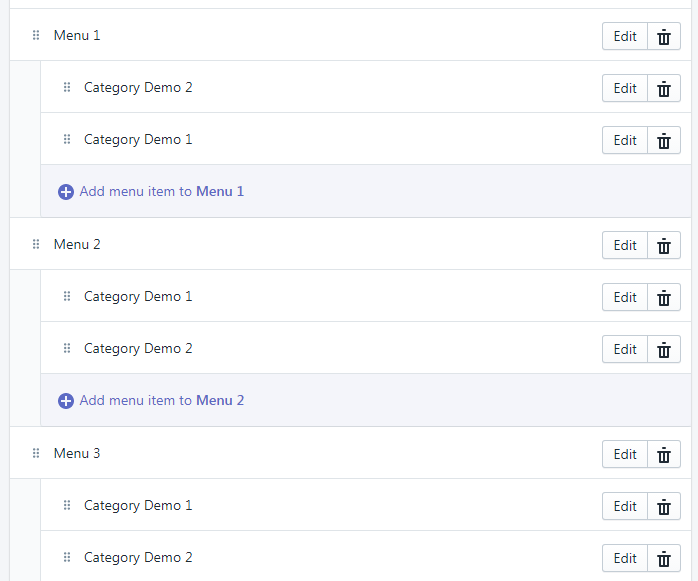
Please go to Online Store => Customize => Navigation => Select the menu you just created
Create Blog
Link setup guide blog Blog Posts Manual
Setup Filter Product
Before you start you must read shopify manual:
1.Products
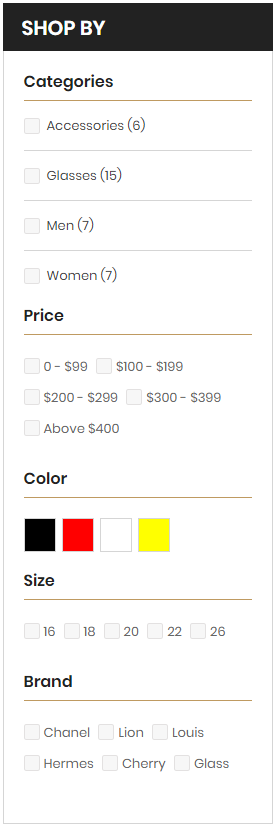
Filter Sidebar Product Overview
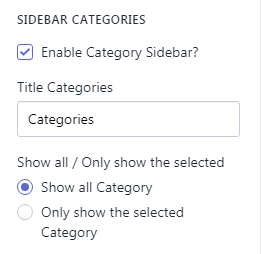
1. Add Category Filter Product
Filter category work with tags. You need write product category in product tags field.
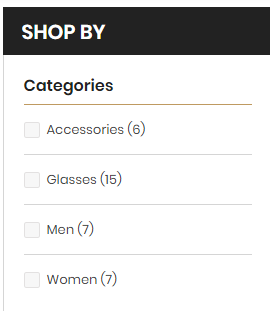
It work for all products in the collection
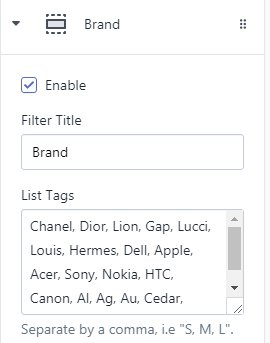
2. Add Variants Product
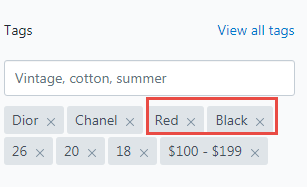
Filters work with tags. You need write category, size, color, vendor, price, tags in product tags field. After that you must write all unique tags in customize theme
3. Add Color Filter Tags
Filter color work with tags. You need write product colors in product tags field.
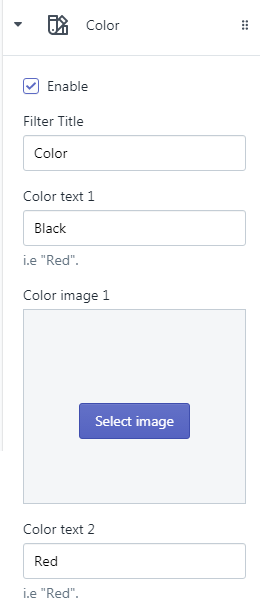
After that you go to the theme editor. In the field "List Colors" you write all color in collections
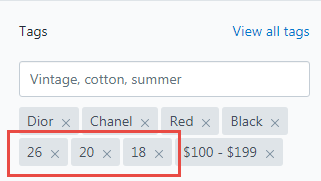
4. Add Size Filter Tags
Filter size work with tags. You need write product sizes in product tags field.
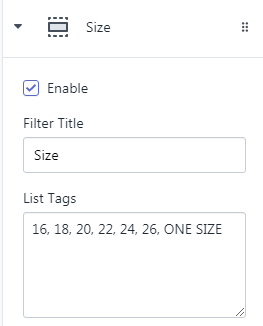
fter that you go to the theme editor. In the field "List Sizes" you write all prices in collections
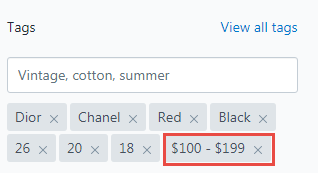
4. Add Price Filter Tags
Filter price work with tags. You need to write product price category in product tags field.
fter that you go to the theme editor. In the field "List Sizes" you write all prices in collections
Theme settings
1. From your Shopify admin, click Online Store, then click Themes.
2. Click Customize theme for the theme you want to customize.
For more information regarding Shopify theme settings, please refer to Theme Setting Guide.
General
From your Shopify admin, click Online Store, then click Themes. Click Customize theme for the theme you want to customize. In General Settings Tab -> General.
TypoGraphy
In General Settings Tab. Click TypoGraphy Tab
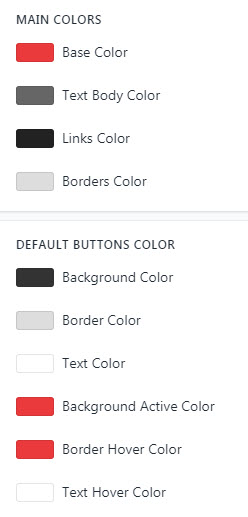
Color
In General Settings Tab. Click Color Tab
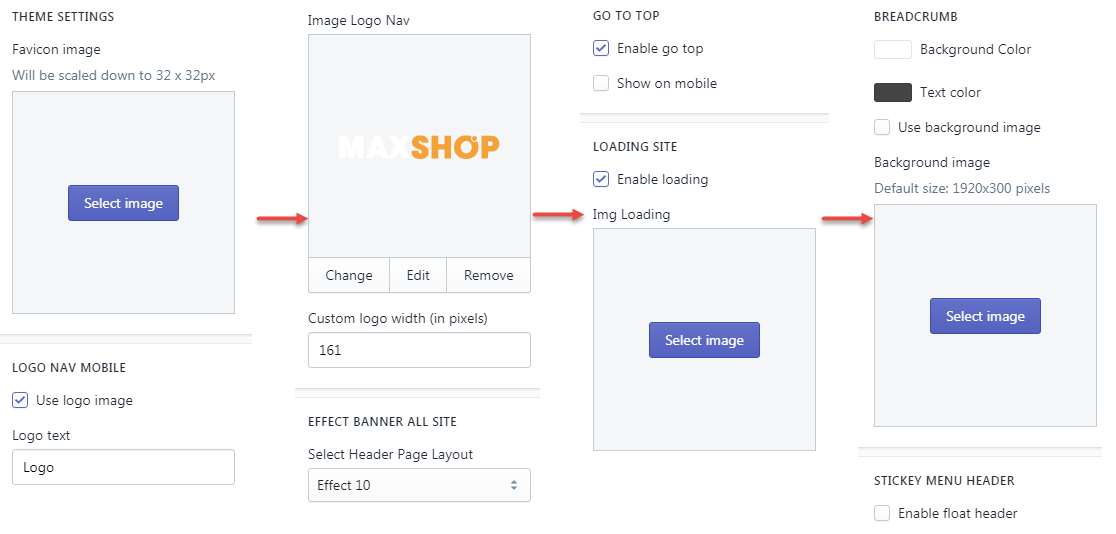
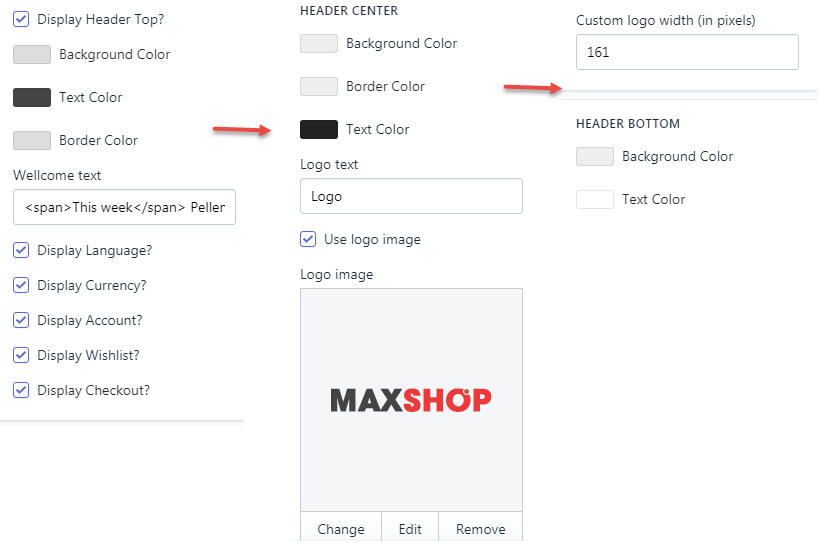
Header
In General Settings Tab. Click Header Tab
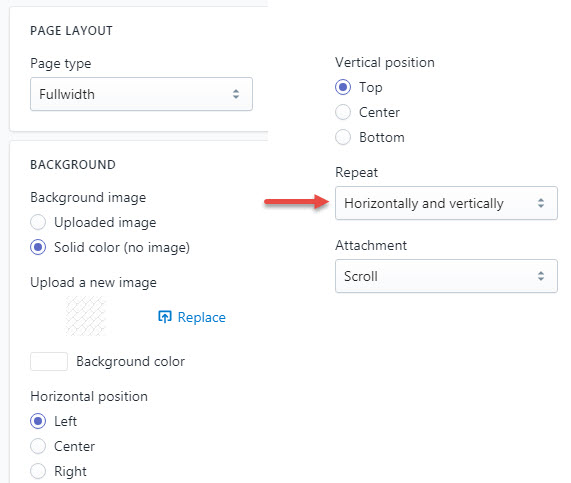
Layout
From your Shopify admin, click Online Store, then click Themes. Click Customize theme for the theme you want to customize. In General Settings Tab -> Layout.
This below box will allow you to choose between using a background color and a background image. If you select the background images, you can upload it using the upload form below.
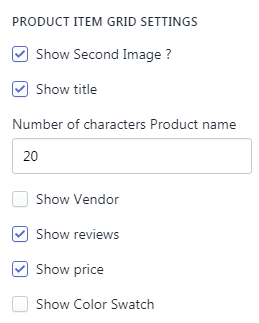
Product Item Settings
From your Shopify admin, click Online Store, then click Themes. Click Customize theme for the theme you want to customize. In General Settings Tab -> Product Grid.
This below box will allow you to choose between using a background color and a background image. If you select the background images, you can upload it using the upload form below.
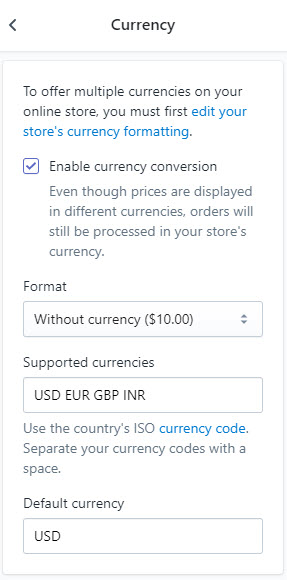
Currency
In General Settings Tab. Click Currency Tab
Social media
In General Settings Tab. Click Social Tab. You can enable/disable social block.
Newletter
In General Settings Tab. Click Newletter Tab. You can enable/disable Newletter Popup.
Credits
- jQuery Library
- Bootstrap v3.2.0
- Flexslider
- OWL Carousel
- Google Maps
FAQs & Support
Need Help?
If you have any questions, please do not hesitate to contact us at http://www.smartaddons.com/support/tickets/. We are happy to help!