SJ SmartSchool
- created: 04/5/2017
- by: SmartAddons
- email: contact@ytcvn.com
Sj SmartSchool - An elegant Joomla 3.7 Joomla template for School, Education websites. With a clean design and dozens of web-development tricks packed, Sj SmartSchool makes your site be smarter and functionality.
System Requirements – Joomla version 3.x
System Requirements: here
Component Requirements
DOWNLOAD
Download Packages from our store: here
Helix3 - Framework
This template uses Helix3 - Framework . You can refer to the Helix3 function: here
Install with Quickstart Package
By using this package, you will see your website exactly as our Demo with sample data. This is applied when you need a fresh Joomla with our template
The following steps will guide to install a quickstart package of SmartAddons Joomla Template: Click hereInstall with Template and Extensions
To install Template for Joomla, please click: here
The extensions package include of Modules, Components and Plugins.
Note: Extensions installation is the same with Template installation as above
Here is list of extensions that are used in the template.
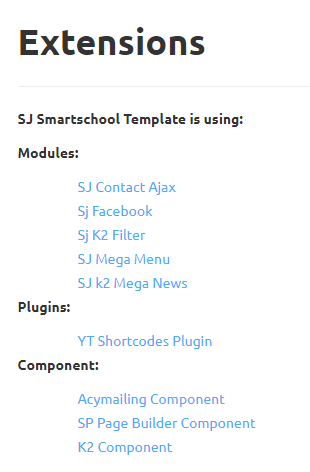
Enable Modules and Plugins: here
To Install Acymailing Component, you can follow these steps:
Step 1: Please go to Extensions => Extension Manager

Step 2: Choose file Acymailing component.zip that you have downloaded and then Click on the button Upload & Install to install the uploaded package.
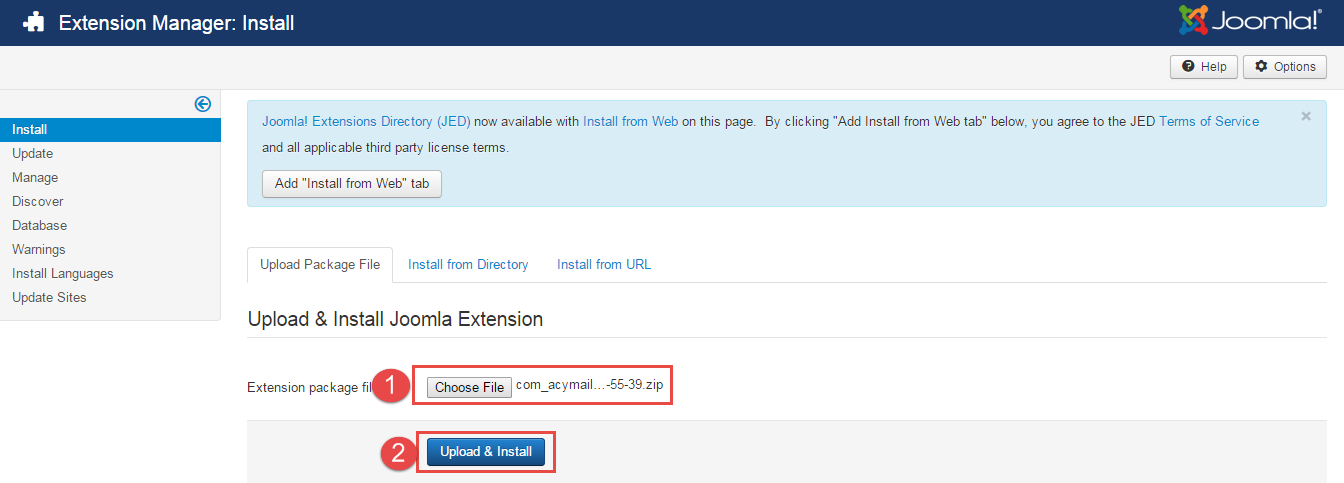
To install SP Page Builder Component you do the same as the installation Acymailing Component.
Install multilingual site in SJ Template
To help you about language problem when you work with SJ Template, please read this post: how to set up a multilingual site in SJ Template.
Layout Position
Template Configuration
Go to Extensions => Template Manager => SJ SmartSchool. All of parameters of this template are divided into the following groups, in which they are explained themselves:
- Basic: backend settings
- Presets: backend settings
- Layout: backend settings
- Menu: backend settings
- Typography: backend settings
- Advanced: backend settings
- Blog: backend settings
Header, Footer Configuration
Header Configuration
1. Top1
Frontend Appearance

Tell Top
To configure Tell Top1, please go to Extensions >> Module Manager >> Click "New" button to create a new module >> Select "HTML" module
Copy & Paste the code into your editor:
<div><a class="hotline" href="tel:0845793280">Tell: 084 - 5793 - 280</a></div>
Language Switcher
To configure Language Switcher, please go to Extensions >> Module Manager >> Click "New" button to create a new module >> Select "Language Switcher" module
Login
To configure Login, please go to Extensions >> Module Manager >> Click "New" button to create a new module >> Select "Login" module
2. Top3
Frontend Appearance

To configure Top1, please go to Extensions >> Module Manager >> Click "New" button to create a new module >> Select "Smart Search" module
Footer Configuration
1. Position: position1
Frontend Appearance

Module: AcyMailing
To configure this module,please go to Extensions >> Module Manager >>Click "New" button to create a new module >> Select "AcyMailing" module.
2. Position: position2
Frontend Appearance

Module: Custom
To configure this module,please go to Extensions >> Module Manager >> Click "New" button to create a new module >> Select "Custom" module.
Copy & Paste the code into your editor:
<ul class="list-social">
<li class="item">[yt_social_icon type="twitter" yt_title="Twitter" color="no" style="default" size="default" link="https://twitter.com/smartaddons" ]</li>
<li class="item">[yt_social_icon type="google-plus" yt_title="Google Plus" color="no" style="default" link="https://plus.google.com/+Smartaddons" ]</li>
<li class="item">[yt_social_icon type="facebook" yt_title="Facebook" color="no" style="default" size="default" link="https://www.facebook.com/SmartAddons.page" ]</li>
</ul>
3. Position: bottom1
Frontend Appearance
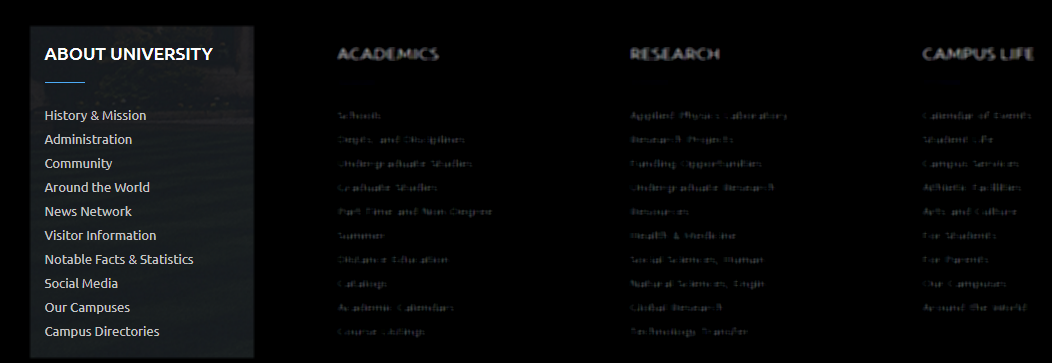
Module: Custom
To configure this module,please go to Extensions >> Module Manager >> Click "New" button to create a new module >> Select "Custom" module.
Copy & Paste the code into your editor:
<ul class="menu"> <li class="item"><a title="" href="#">History & Mission</a></li> <li class="item"><a title="" href="#">Administration</a></li> <li class="item"><a title="" href="#">Community</a></li> <li class="item"><a title="" href="#">Around the World</a></li> <li class="item"><a title="" href="#">News Network</a></li> <li class="item"><a title="" href="#">Visitor Information</a></li> <li class="item"><a title="" href="#">Notable Facts & Statistics</a></li> <li class="item"><a title="" href="#">Social Media</a></li> <li class="item"><a title="" href="#">Our Campuses</a></li> <li class="item"><a title="" href="#">Campus Directories</a></li> </ul>
4. Position: bottom2
Frontend Appearance
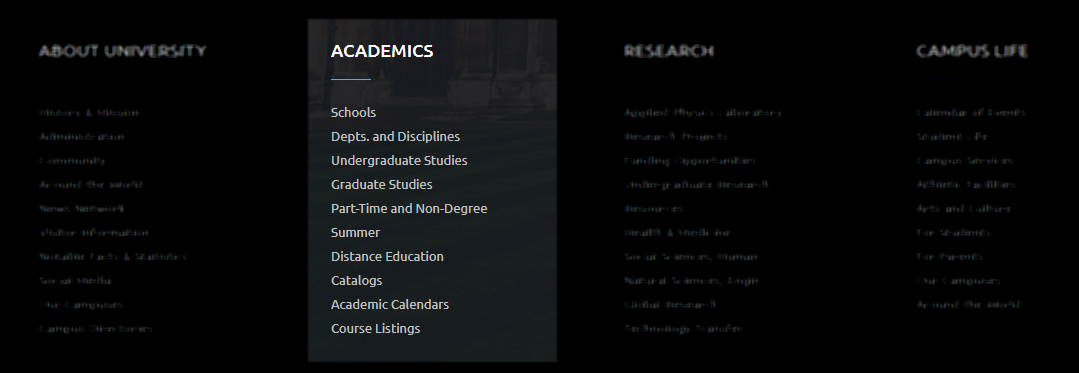
Module: HTML Module
To configure this module,please go to Extensions >> Module Manager >> Click "New" button to create a new module >> Select "HTML" module.
Copy & Paste the code into your editor:
<ul class="menu">
<li class="item"><a title="" href="#">Schools</a></li>
<li class="item"><a title="" href="#">Depts. and Disciplines</a></li>
<li class="item"><a title="" href="#">Undergraduate Studies</a></li>
<li class="item"><a title="" href="#">Graduate Studies</a></li>
<li class="item"><a title="" href="#">Part-Time and Non-Degree</a></li>
<li class="item"><a title="" href="#">Summer</a></li>
<li class="item"><a title="" href="#">Distance Education</a></li>
<li class="item"><a title="" href="#">Catalogs</a></li>
<li class="item"><a title="" href="#">Academic Calendars</a></li>
<li class="item"><a title="" href="#">Course Listings</a></li>
</ul>
5. Position: bottom3
Frontend Appearance

Module: Menu
To configure this module,please go to Extensions >> Module Manager >> Click "New" button to create a new module >> Select "AcyMailing" module.
Copy & Paste the code into your editor:
<ul class="menu"> <li class="item"><a title="" href="#">Applied Physics Laboratory</a></li> <li class="item"><a title="" href="#">Research Projects </a></li> <li class="item"><a title="" href="#">Funding Opportunities</a></li> <li class="item"><a title="" href="#">Undergraduate Research</a></li> <li class="item"><a title="" href="#">Resources</a></li> <li class="item"><a title="" href="#">Health & Medicine</a></li> <li class="item"><a title="" href="#">Social Sciences, Human</a></li> <li class="item"><a title="" href="#">Natural Sciences, Engin</a></li> <li class="item"><a title="" href="#">Global Research</a></li> <li class="item"><a title="" href="#">Technology Transfer</a></li> </ul>
6. Position: bottom4
Frontend Appearance
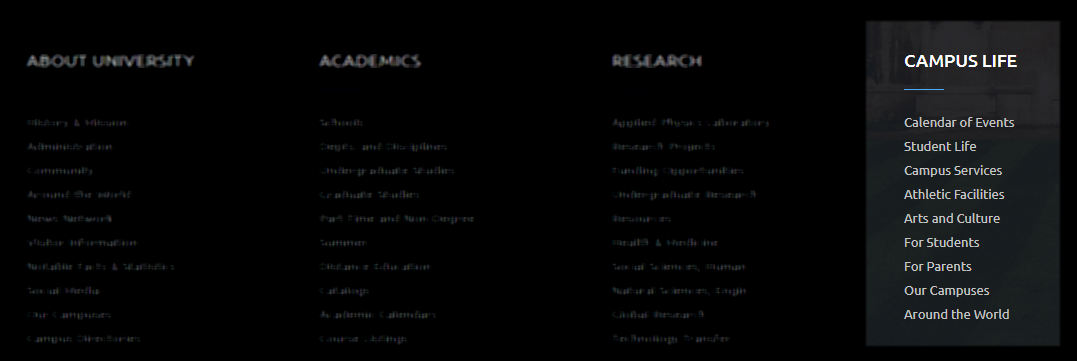
Module: Menu
To configure this module,please go to Extensions >> Module Manager >> Click "New" button to create a new module >> Select "AcyMailing" module.
Copy & Paste the code into your editor:
<ul class="menu">
<li class="item"><a title="" href="#">Calendar of Events</a></li>
<li class="item"><a title="" href="#">Student Life</a></li>
<li class="item"><a title="" href="#">Campus Services</a></li>
<li class="item"><a title="" href="#">Athletic Facilities</a></li>
<li class="item"><a title="" href="#">Arts and Culture</a></li>
<li class="item"><a title="" href="#">For Students</a></li>
<li class="item"><a title="" href="#">For Parents</a></li>
<li class="item"><a title="" href="#">Our Campuses</a></li>
<li class="item"><a title="" href="#">Around the World</a></li>
</ul>
Slider Settings
1. Create new SP Page Builder
Please go to Components => SP Page Builder => Click New button => Enter the Title: Home Page
Backend Settings

To create new rows of Home Page, please click " Add new Row" button
Example: Create a new row
General Tab: backend settings
Style Tab: backend settings
Responsive Tab: backend settings
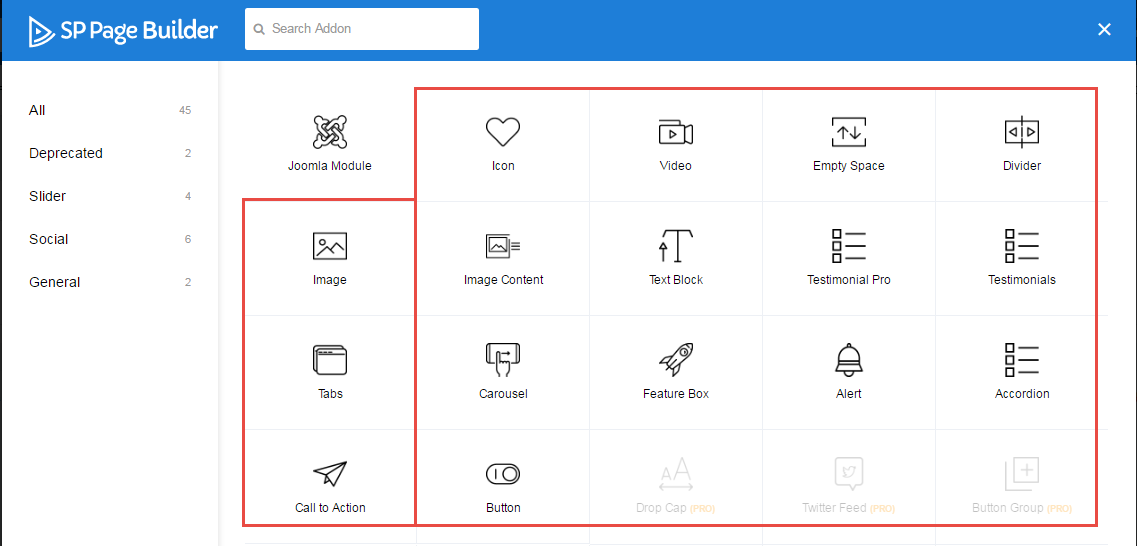
To create new rows, please click " Add new Addon" button

To configure Addon, We have 2 options
Options 1: Click "Joomla Module" then please fill General Tab
General Tab: backend settings
Note: To create new Joomla module, example SJ K2 Filter, please go to Extensions => Module Manager => Click New button to create a new module => Select SJ K2 Filter module.
- Backend Settings: Module/Options/ Search Result Settings/ Filter By Standard Fields/ Advanced Options
Options 2: Click "Shortcode" then please fill General Tab
2. Row1 Configuration
Frontend Appearance

To configure Row1, please go toSP Page Builder => Click Edit Addon button
Backend Settings

- Screenshot Backend Settings: General/ Style/ Responsive
Note: To create new Joomla module - Custom module, please go to Extensions => Module Manager => Click New button to create a new module => Select Custom module.
Copy & Paste the code into your editor:
<div class="slideshow">[yt_content_slider style="default" margin="0" items_column0="1" items_column1="1" items_column2="1" items_column3="1" items_column4="1" transitionin="" transitionout="" arrows="yes" arrow_position="arrow-default" pagination="no" autoplay="no" autoheight="yes" hoverpause="yes" lazyload="no" loop="no" speed="0.8" delay="4" items_column0="1" ] [yt_content_slider_item src="images/slideshow/1.jpg" caption="yes" ]
<div class="content">
<h3 class="title-small lora">Welcome to University</h3>
<h2 class="title-lage">Education for the Creatives</h2>
<p class="des">Inceptos at dis blanditiis quaerat mollitia aspernatur purus hic dignissimos excepturi blandit,feugiat repellat! Blandit, laboriosam montes, egestas ipsa tenetur</p>
<a class="button-find" href="#">find out more</a></div>
[/yt_content_slider_item] [yt_content_slider_item src="images/slideshow/2.jpg" caption="yes" ]
<div class="content">
<h3 class="title-small lora">Welcome to University</h3>
<h2 class="title-lage">Education for the Creatives</h2>
<p class="des">Inceptos at dis blanditiis quaerat mollitia aspernatur purus hic dignissimos excepturi blandit,feugiat repellat! Blandit, laboriosam montes, egestas ipsa tenetur</p>
<a class="button-find" href="#">find out more</a></div>
[/yt_content_slider_item] [yt_content_slider_item src="images/slideshow/3.jpg" caption="yes" ]
<div class="content">
<h3 class="title-small lora">Welcome to University</h3>
<h2 class="title-lage">Education for the Creatives</h2>
<p class="des">Inceptos at dis blanditiis quaerat mollitia aspernatur purus hic dignissimos excepturi blandit,feugiat repellat! Blandit, laboriosam montes, egestas ipsa tenetur</p>
<a class="button-find" href="#">find out more</a></div>
[/yt_content_slider_item] [/yt_content_slider]</div>
3. Row2 Configuration
Frontend Appearance

To configure Row2, please go toSP Page Builder => Click Edit Addon button
Backend Settings

Note: To create new Joomla module - SJ K2 Filter, please go to Extensions => Module Manager => Click New button to create a new module => Select SJ K2 Filter module.
- Backend Settings: Module/Options/ Search Result Settings/ Filter By Standard Fields/ Advanced Options
4. Row3 Configuration
Frontend Appearance
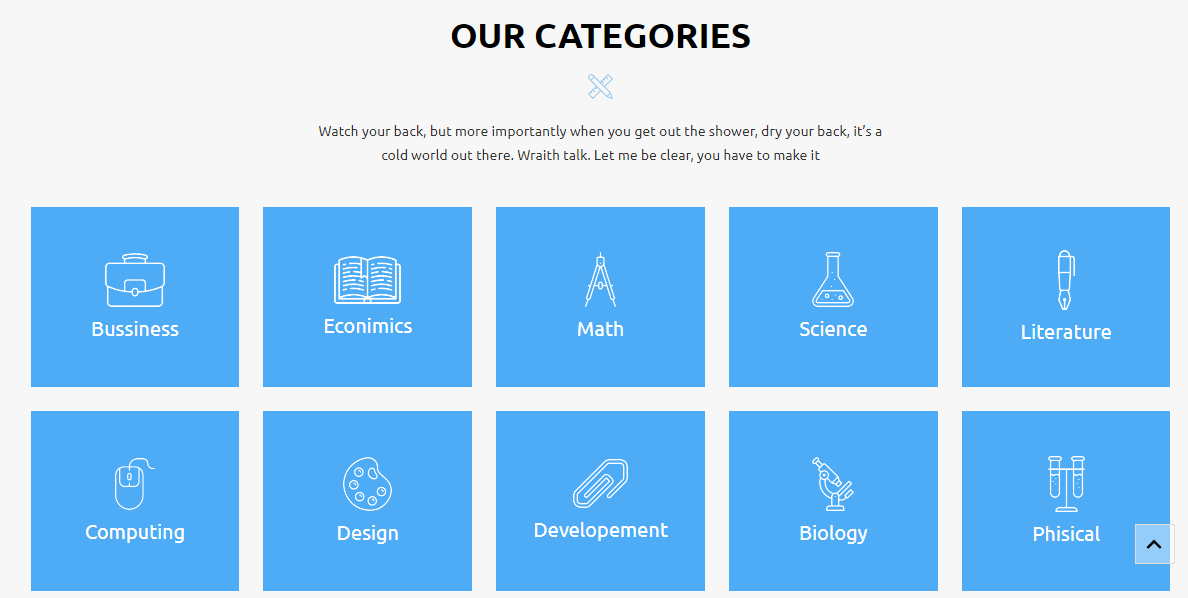
To configure Row3, please go toSP Page Builder => Click Edit Addon button
Backend Settings

Note: To create new Joomla module - Custom module, please go to Extensions => Module Manager => Click New button to create a new module => Select Custom module.
Copy & Paste the code into your editor:
<div class="box-cate">
<p>Watch your back, but more importantly when you get out the shower, dry your back, it’s a cold world out there. Wraith talk. Let me be clear, you have to make it</p>
<ul class="list-cate">
<li class="item"><a class="main" title="" href="#"> <img src="images/icon1.png" alt="" /> <span class="title">Bussiness</span> </a></li>
<li class="item"><a class="main" title="" href="#"> <img src="images/icon2.png" alt="" /> <span class="title">Econimics</span> </a></li>
<li class="item"><a class="main" title="" href="#"> <img src="images/icon3.png" alt="" /> <span class="title">Math</span> </a></li>
<li class="item"><a class="main" title="" href="#"> <img src="images/icon4.png" alt="" /> <span class="title">Science</span> </a></li>
<li class="item"><a class="main" title="" href="#"> <img src="images/icon5.png" alt="" /> <span class="title">Literature</span> </a></li>
<li class="item"><a class="main" title="" href="#"> <img src="images/icon6.png" alt="" /> <span class="title">Computing</span> </a></li>
<li class="item"><a class="main" title="" href="#"> <img src="images/icon7.png" alt="" /> <span class="title">Design</span> </a></li>
<li class="item"><a class="main" title="" href="#"> <img src="images/icon8.png" alt="" /> <span class="title">Developement</span> </a></li>
<li class="item"><a class="main" title="" href="#"> <img src="images/icon9.png" alt="" /> <span class="title">Biology</span> </a></li>
<li class="item"><a class="main" title="" href="#"> <img src="images/icon10.png" alt="" /> <span class="title">Phisical</span> </a></li>
</ul>
</div>
5. Row4 Configuration
Frontend Appearance
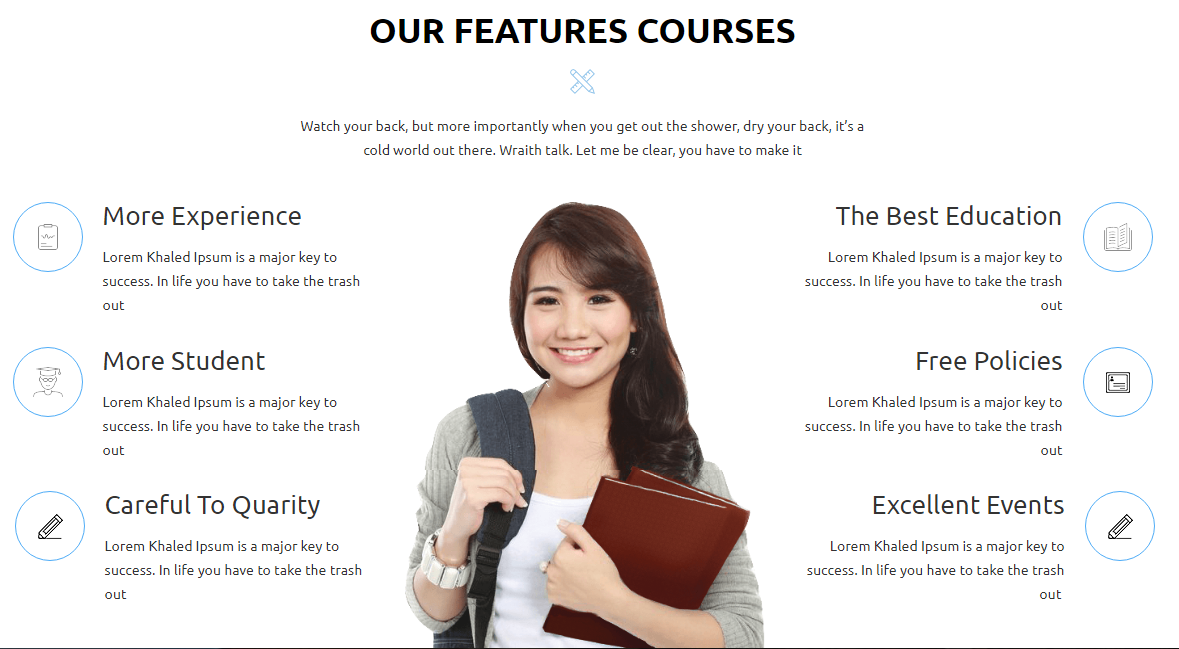
To configure Row4, please go toSP Page Builder => Click Edit Addon button
Backend Settings

Note: To create new Joomla module - Custom module, please go to Extensions => Module Manager => Click New button to create a new module => Select Custom module.
Copy & Paste the code into your editor:
<div class="features-courses">
<p class="des">Watch your back, but more importantly when you get out the shower, dry your back, it’s a cold world out there. Wraith talk. Let me be clear, you have to make it</p>
<div class="row">
<div class="col-md-4">
<ul class="list-item left">
<li class="item">
<div class="icon icon1">Icon</div>
<div class="content">
<h3>More Experience</h3>
<p>Lorem Khaled Ipsum is a major key to success. In life you have to take the trash out</p>
</div>
</li>
<li class="item">
<div class="icon icon2">Icon</div>
<div class="content">
<h3>More Student</h3>
<p>Lorem Khaled Ipsum is a major key to success. In life you have to take the trash out</p>
</div>
</li>
<li class="item">
<div class="icon icon3">Icon</div>
<div class="content">
<h3>Careful to Quarity</h3>
<p>Lorem Khaled Ipsum is a major key to success. In life you have to take the trash out</p>
</div>
</li>
</ul>
</div>
<div class="col-md-4">
<div class="image"><img src="images/our.png" alt="" /></div>
</div>
<div class="col-md-4">
<ul class="list-item right">
<li class="item">
<div class="icon icon4">Icon</div>
<div class="content">
<h3>The Best Education</h3>
<p>Lorem Khaled Ipsum is a major key to success. In life you have to take the trash out</p>
</div>
</li>
<li class="item">
<div class="icon icon5">Icon</div>
<div class="content">
<h3>Free Policies</h3>
<p>Lorem Khaled Ipsum is a major key to success. In life you have to take the trash out</p>
</div>
</li>
<li class="item">
<div class="icon icon6">Icon</div>
<div class="content">
<h3>Excellent Events</h3>
<p>Lorem Khaled Ipsum is a major key to success. In life you have to take the trash out </p>
</div>
</li>
</ul>
</div>
</div>
</div>
6. Row5 Configuration
Frontend Appearance

To configure Row5, please go toSP Page Builder => Click Edit Addon button
Backend Settings

Note: To create new Joomla module - Custom module, please go to Extensions => Module Manager => Click New button to create a new module => Select Custom module.
Copy & Paste the code into your editor:
<div class="row list-counter"> <div class="col-xs-12 col-sm-3">[yt_counter count_start="0" count_end="3000" counter_speed="5" prefix="" suffix="" separator="no" align="center" background="none" border_radius="0px" icon="images/count1.png" icon_color="#444" count_color="#fff" count_size="55px" text_color="#ffffff" text_size="16px" border="0px solid #DDD" ] Milions Dolars [/yt_counter]</div> <div class="col-xs-12 col-sm-3">[yt_counter count_start="0" count_end="1257" counter_speed="5" prefix="" suffix="" separator="no" align="center" background="none" border_radius="0px" icon="images/count2.png" icon_color="#444" count_color="#fff" count_size="55px" text_color="#ffffff" text_size="16px" border="0px solid #DDD" ] Successful Deals [/yt_counter]</div> <div class="col-xs-12 col-sm-3">[yt_counter count_start="0" count_end="700" counter_speed="5" prefix="" suffix="" separator="no" align="center" background="none" border_radius="0px" icon="images/count3.png" icon_color="#444" count_color="#fff" count_size="55px" text_color="#ffffff" text_size="16px" border="0px solid #DDD" ] Advisions & Experts [/yt_counter]</div> <div class="col-xs-12 col-sm-3">[yt_counter count_start="0" count_end="3456" counter_speed="5" prefix="" suffix="" separator="no" align="center" background="none" border_radius="0px" icon="images/count4.png" icon_color="#444" count_color="#fff" count_size="55px" text_color="#ffffff" text_size="16px" border="0px solid #DDD" ] Happy Students [/yt_counter]</div> </div>
7. Row6 Configuration
Frontend Appearance
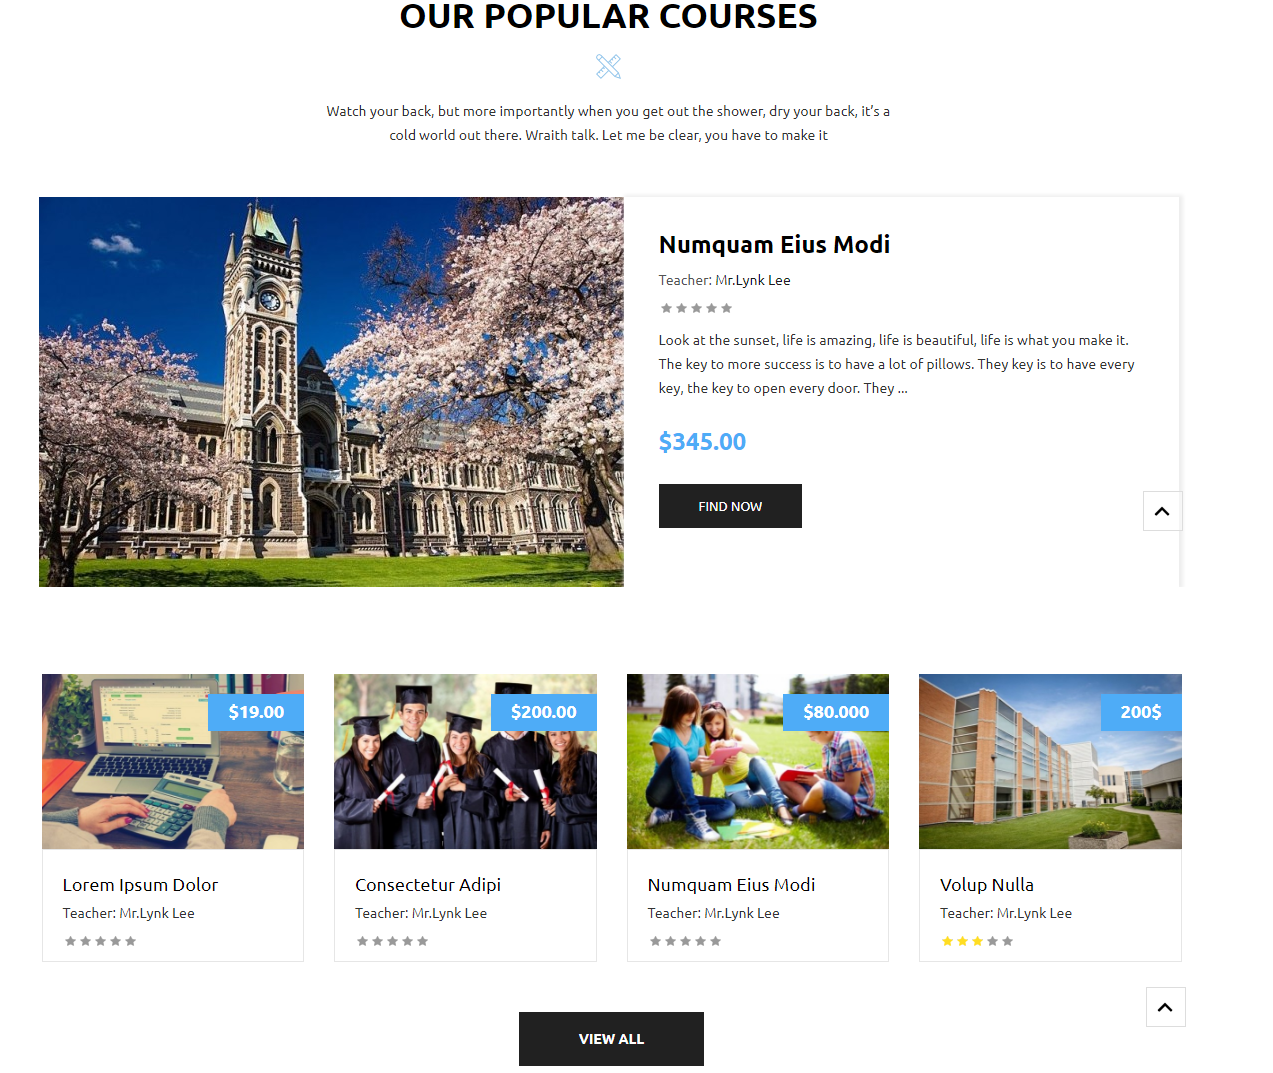
To configure Row6, please go toSP Page Builder => Click Edit Addon button
Backend Settings

Note: To create new Joomla module - Sj Mega News for K2, please go to Extensions => Module Manager => Click New button to create a new module => Select Sj Mega News for K2 module.
8. Row7 Configuration
Frontend Appearance

To configure Row7, please go toSP Page Builder => Click Edit Addon button
Backend Settings

Note: To create new Joomla module - HTML, please go to Extensions => Module Manager => Click New button to create a new module => Select HTML module.
Copy & Paste the code into your editor:
<p class="des white">Watch your back, but more importantly when you get out the shower, dry your back, it’s a cold world out there. Wraith talk. Let me be clear, you have to make it</p>
<div id="owl-carosel-event">
<div class="item">
<div class="image hidden-xs hidden-sm"><img src="images/event1.jpg" alt="img" /></div>
<div class="content">
<h3 class="title"><a title="" href="#">Summer Vacation</a></h3>
<ul class="list-info">
<li class="time">March 05, 2017</li>
<li class="address">12-14 Victoria Road, London W8 5RD</li>
</ul>
<p class="des">Many desktop publishing packages and web page editors now use Lorem Ipsum as their default model text, and a search for 'lorem ipsum'</p>
[yt_countdown count_date="2019/12/25" count_time="10:30:35" align="left" count_size="26" count_color="#242626" background="#FFFFFF" text_color="#242626" text_align="center" text_size="10" padding="0px" margin="0px" radius="0px" divider="none" divider_color="rgba(100,100,100,.1)" ]</div>
</div>
<div class="item">
<div class="image hidden-xs hidden-sm"><img src="images/event1.jpg" alt="img" /></div>
<div class="content">
<h3 class="title"><a title="" href="#">Summer Vacation</a></h3>
<ul class="list-info">
<li class="time">March 05, 2017</li>
<li class="address">12-14 Victoria Road, London W8 5RD</li>
</ul>
<p class="des">Many desktop publishing packages and web page editors now use Lorem Ipsum as their default model text, and a search for 'lorem ipsum'</p>
[yt_countdown count_date="2019/12/25" count_time="10:30:35" align="left" count_size="26" count_color="#242626" background="#FFFFFF" text_color="#242626" text_align="center" text_size="10" padding="0px" margin="0px" radius="0px" divider="none" divider_color="rgba(100,100,100,.1)" ]</div>
</div>
<div class="item">
<div class="image hidden-xs hidden-sm"><img src="images/event1.jpg" alt="img" /></div>
<div class="content">
<h3 class="title"><a title="" href="#">Summer Vacation</a></h3>
<ul class="list-info">
<li class="time">March 05, 2017</li>
<li class="address">12-14 Victoria Road, London W8 5RD</li>
</ul>
<p class="des">Many desktop publishing packages and web page editors now use Lorem Ipsum as their default model text, and a search for 'lorem ipsum'</p>
[yt_countdown count_date="2019/12/25" count_time="10:30:35" align="left" count_size="26" count_color="#242626" background="#FFFFFF" text_color="#242626" text_align="center" text_size="10" padding="0px" margin="0px" radius="0px" divider="none" divider_color="rgba(100,100,100,.1)" ]</div>
</div>
</div>
9. Row8 Configuration
Frontend Appearance

To configure Row8, please go toSP Page Builder => Click Edit Addon button
Backend Settings

Note: To create new Joomla module - HTML, please go to Extensions => Module Manager => Click New button to create a new module => Select HTML module.
Copy & Paste the code into your editor:
<div id="owl-carosel-teachers">
<p class="des">Watch your back, but more importantly when you get out the shower, dry your back, it’s a cold world out there. Wraith talk. Let me be clear, you have to make it</p>
<div class="owl-carosel-teachers">
<div class="item">
<div class="image"><img src="images/teacher1.jpg" alt="" />
<ul class="list-social">
<li class="facebook"><a title="" href="#"><i class="fa fa-facebook">facebook</i></a></li>
<li class="google"><a title="" href="#"><i class="fa fa-google-plus">google</i></a></li>
<li class="twitter"><a title="" href="#"><i class="fa fa-twitter">twitter</i></a></li>
</ul>
</div>
<div class="content">
<h3>Mr.Michale</h3>
<span class="job">Math Teacher</span></div>
</div>
<div class="item">
<div class="image"><img src="images/teacher2.jpg" alt="" />
<ul class="list-social">
<li class="facebook"><a title="" href="#"><i class="fa fa-facebook">facebook</i></a></li>
<li class="google"><a title="" href="#"><i class="fa fa-google-plus">google</i></a></li>
<li class="twitter"><a title="" href="#"><i class="fa fa-twitter">twitter</i></a></li>
</ul>
</div>
<div class="content">
<h3>Ms.Anna</h3>
<span class="job">Literacher Teacher</span></div>
</div>
<div class="item">
<div class="image"><img src="images/teacher3.jpg" alt="" />
<ul class="list-social">
<li class="facebook"><a title="" href="#"><i class="fa fa-facebook">facebook</i></a></li>
<li class="google"><a title="" href="#"><i class="fa fa-google-plus">google</i></a></li>
<li class="twitter"><a title="" href="#"><i class="fa fa-twitter">twitter</i></a></li>
</ul>
</div>
<div class="content">
<h3>Mrs.Kenga</h3>
<span class="job">Physic Teacher</span></div>
</div>
<div class="item">
<div class="image"><img src="images/teacher4.jpg" alt="" />
<ul class="list-social">
<li class="facebook"><a title="" href="#"><i class="fa fa-facebook">facebook</i></a></li>
<li class="google"><a title="" href="#"><i class="fa fa-google-plus">google</i></a></li>
<li class="twitter"><a title="" href="#"><i class="fa fa-twitter">twitter</i></a></li>
</ul>
</div>
<div class="content">
<h3>Mr.Brown</h3>
<span class="job">Math Teacher</span></div>
</div>
</div>
</div>
10. Row8 Configuration
Frontend Appearance
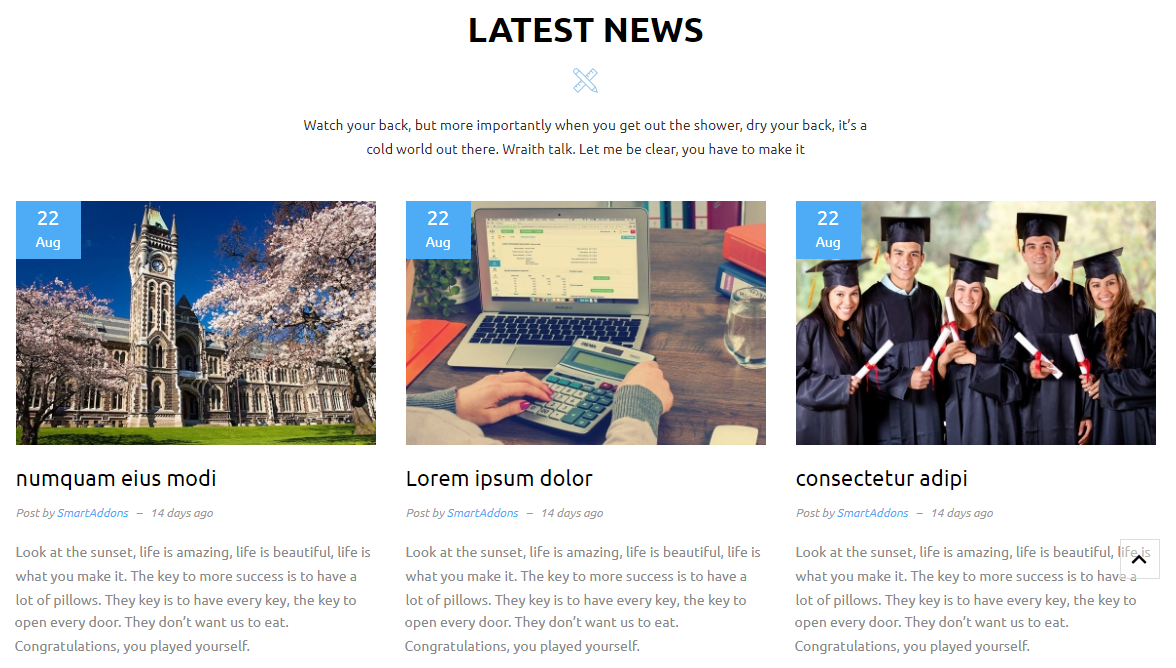
To configure Row8, please go toSP Page Builder => Click Edit Addon button
Backend Settings

Note: To create new Joomla module - K2 Content, please go to Extensions => Module Manager => Click New button to create a new module => Select K2 Content module.
11. Row9 Configuration
Frontend Appearance
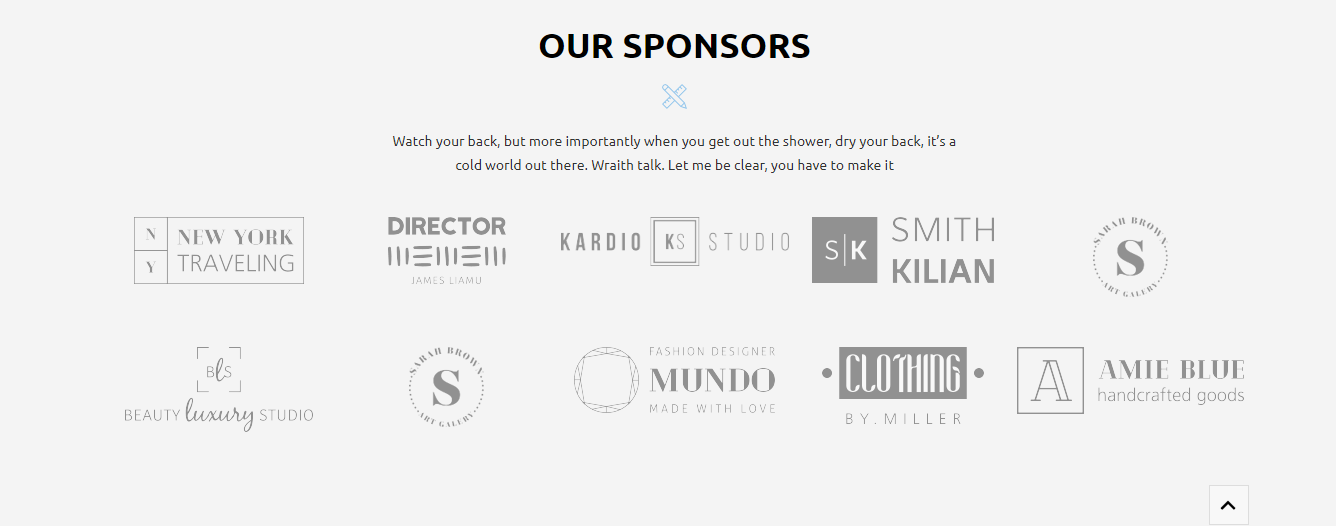
To configure Row9, please go toSP Page Builder => Click Edit Addon button
Backend Settings

Note: To create new Joomla module - HTML, please go to Extensions => Module Manager => Click New button to create a new module => Select HTML module.
Copy & Paste the code into your editor:
<div class="our-sponsors">
<p class="des">Watch your back, but more importantly when you get out the shower, dry your back, it’s a cold world out there. Wraith talk. Let me be clear, you have to make it</p>
<ul class="list-brand">
<li class="item"><a title="brand" href="#"><img src="images/brand1.png" alt="brand" /></a></li>
<li class="item"><a title="brand" href="#"><img src="images/brand2.png" alt="brand" /></a></li>
<li class="item"><a title="brand" href="#"><img src="images/brand3.png" alt="brand" /></a></li>
<li class="item"><a title="brand" href="#"><img src="images/brand4.png" alt="brand" /></a></li>
<li class="item"><a title="brand" href="#"><img src="images/brand5.png" alt="brand" /></a></li>
<li class="item"><a title="brand" href="#"><img src="images/brand6.png" alt="brand" /></a></li>
<li class="item"><a title="brand" href="#"><img src="images/brand7.png" alt="brand" /></a></li>
<li class="item"><a title="brand" href="#"><img src="images/brand8.png" alt="brand" /></a></li>
<li class="item"><a title="brand" href="#"><img src="images/brand9.png" alt="brand" /></a></li>
<li class="item"><a title="brand" href="#"><img src="images/brand10.png" alt="brand" /></a></li>
</ul>
</div>
Copyright
To remove Designed by SmartAddons.Com at the footer of template, please purchase our Copyright Removal here
Support
Thank you so much for purchasing this template. If you have any questions that are beyond the scope of this help file, please send us via: Submit a Ticket
Thanks so much!
