Sj PetShop


Sj PetShop - Responsive Pet Store Joomla Template

System Requirements: here

SP Page Builder Component

VirtueMart Component

Download Packages from our store: here

This template uses Helix3 - Framework . You can refer to the Helix3 function: here

By using this package, you will see your website exactly as our Demo with sample data. This is applied when you need a fresh Joomla with our template

The following steps will guide to install a quickstart package of SmartAddons Joomla Template: Click here
1. Install Template

To install Template for Joomla, please click: here

2. Install Extensions

The extensions package include of Modules, Components and Plugins.

Note: Extensions installation is the same with Template installation as above

Enable Modules and Plugins: here

3. Install Component

To Install SP Page Builder Component, VirtueMart Component, you can follow these steps:

Step 1: Please go to Extensions => Extension Manager

Step 2: Choose file SP Page Builder.zip that you have downloaded and then Click on the button Upload & Install to install the uploaded package.

4. Enable Plugin

To Install Plugin System - Helix Ultimate Framework, you can follow these steps:

Step 1: Please go to Extensions => Plugins

Step 2: Choose filter system and then Click on the button Enable & Plugin System - Helix Ultimate Framework.

5. Import Json

To Install Template, you can follow these steps:

Step 1: Please go to Extensions => Templates

Step 2: Choose Styles sj_petshop - Default and then Click on the button Template & Options to advanced and choose the Import Settings.

Step 3: Download: file json and open & copy

Step 4: Advanced tab Import & Export and then Save

To help you about language problem when you work with SJ Template, please read this post: how to set up a multilingual site in SJ Template.

Position Layout


Go to Extensions => Template Manager => SJ PetShop. All of parameters of this template are divided into the following groups, in which they are explained themselves:


Header Configuration

1. Top1

Frontend Appearance

Please go to Extensions >> Module Manager >>Click "New" button to create a new module >> Select "Language Switcher" module.

Backend Settings: Module

Please go to Extensions >> Module Manager >>Click "New" button to create a new module >> Select "VirtueMart Currency Selector" module.

Backend Settings: Module


2. Top2

Frontend Appearance

Please go to Extensions >> Module Manager >>Click "New" button to create a new module >> Select "Login" module.

Backend Settings: Module


3. Logo

Frontend Appearance

To configure Logo, please go to Extensions => Templates => sj-petShop => Basic Tab => Logo

Backend Settings: Logo


4. User1

Frontend Appearance

Please go to Extensions >> Module Manager >>Click "New" button to create a new module >> Select "SJ Search Pro for VirtueMart" module.

Backend Settings: Module


5. User2

Frontend Appearance

Please go to Extensions >> Module Manager >>Click "New" button to create a new module >> Select "Custom" module.

Backend Settings: Module

Copy & Paste the code into your editor:

					
<div class="telephone hidden-md hidden-sm hidden-xs">Call Us Free:<a href="tel:88894366000">888 9436 6000</a></div>
					

Please go to Extensions >> Module Manager >>Click "New" button to create a new module >> Select "SJ Minicart Pro for Virtuemart" module.

Backend Settings: Module

Copy & Paste the class suffix " block-cart" into the option "Module Class Suffix" of the Avandced tab


6. Menu

Frontend Appearance

Menu

To configure the menu,please go to Extensions >> Styles Manager >>Click "Edit" button to templates >> Select "Sj_PetShop"- Default to select your menu.

Backend Settings: Navigation tab


Positions Configuration

7. breadcrumb

Frontend Appearance

Please go to Extensions >> Module Manager >>Click "New" button to create a new module >> Select "Breadcrumb" module.

Backend Settings: Module


8. Position-0

Frontend Appearance

Please go to Extensions >> Module Manager >>Click "New" button to create a new module >> Select "Custom" module.

Backend Settings: Module

Copy & Paste the code into your editor:

					
<div class="home-ads">
<div class="dis-ads">Extra <b>40%</b> off</div>
some final sale styles * Your Purrchase ( CODE: CODE2020) <a href="#">Shop now</a></div>
					

Please go to Extensions >> Module Manager >>Click "New" button to create a new module >> Select "Sj Newsletter Popup" module.

Backend Settings: Module / Advanced


9. Position-1

Frontend Appearance

Please go to Extensions >> Module Manager >>Click "New" button to create a new module >> Select "Custom" module.

Backend Settings: Module

Copy & Paste the code into your editor:

					
<div class="block-policy">
<ul>
<li class="item-1">
<div class="item-inner">
<div class="content"><b>Free Shipping</b>
<div>From $99.00</div>
</div>
</div>
</li>
<li class="item-2">
<div class="item-inner">
<div class="content"><b>Money Guarantee</b>
<div>30 days back</div>
</div>
</div>
</li>
<li class="item-3">
<div class="item-inner">
<div class="content"><b>Payment Method</b>
<div>Secure System</div>
</div>
</div>
</li>
<li class="item-4">
<div class="item-inner">
<div class="content"><b>Online Support</b>
<div>24 hours on day</div>
</div>
</div>
</li>
<li class="item-5">
<div class="item-inner">
<div class="content"><b>100% Safe</b>
<div>Secure shopping</div>
</div>
</div>
</li>
</ul>
</div>	


10. Position-2

Frontend Appearance

Please go to Extensions >> Module Manager >>Click "New" button to create a new module >> Select "Custom" module.

Backend Settings: Module

Copy & Paste the code into your editor:

					
<div class="block-hot-cate">
<div class="row">

<div class="col-lg-2 col-md-4 col-sm-4 col-xs-6"> <div class="item"> <div class="image-cat"><a href="#"><img src="images/virtuemart/category/cate1.jpg" alt="" /></a></div> <div class="title-cat"><a href="#">Dogs</a></div> </div> </div> <div class="col-lg-2  col-md-4 col-sm-4 col-xs-6"> <div class="item"> <div class="image-cat"><a href="#"><img src="images/virtuemart/category/cate2.jpg" alt="" /></a></div> <div class="title-cat"><a href="#">Cats</a></div> </div> </div> <div class="col-lg-2  col-md-4 col-sm-4 col-xs-6"> <div class="item"> <div class="image-cat"><a href="#"><img src="images/virtuemart/category/cate3.jpg" alt="" /></a></div> <div class="title-cat"><a href="#">Fishs</a></div> </div> </div> <div class="col-lg-2  col-md-4 col-sm-4 col-xs-6"> <div class="item"> <div class="image-cat"><a href="#"><img src="images/virtuemart/category/cate4.jpg" alt="" /></a></div> <div class="title-cat"><a href="#">Small pets</a></div> </div> </div> <div class="col-lg-2  col-md-4 col-sm-4 col-xs-6"> <div class="item"> <div class="image-cat"><a href="#"><img src="images/virtuemart/category/cate5.jpg" alt="" /></a></div> <div class="title-cat"><a href="#">Reptiles</a></div> </div> </div> <div class="col-lg-2  col-md-4 col-sm-4 col-xs-6"> <div class="item"> <div class="image-cat"><a href="#"><img src="images/virtuemart/category/cate6.jpg" alt="" /></a></div> <div class="title-cat"><a href="#">Brids</a></div> </div> </div> </div> </div>


11. Position-3

Frontend Appearance

Backend Settings

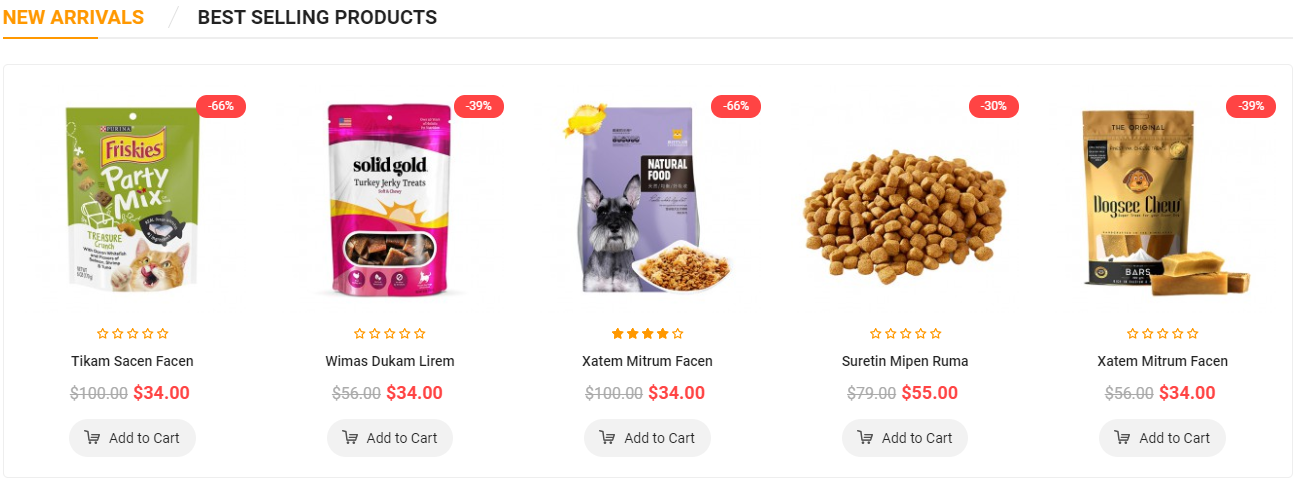
Note: Please go to Extensions => Module Manager => Click New button to create a new module => Select SJ Listing Tabs for VirtueMart module.

  • Backend Settings: Module/ Source Options/ Tabs options/ Products Options/ Image Options/ Effects Options/ Advanced
  • 12. Position-4

    Frontend Appearance

    Please go to Extensions >> Module Manager >>Click "New" button to create a new module >> Select "Custom" module.

    Backend Settings: Module

    Copy & Paste the code into your editor:

    					
    <div class="banners banners1">
    <div class="row">
    <div class="bn bn1 col-lg-3 col-sm-3 col-xs-12">
    <div class="banner1"><a href="#"><img src="#" alt="image" /></a></div>
    <div class="banner2"><a href="#"><img src="#" alt="image" /></a></div>
    </div>
    <div class="bn bn2 col-lg-6 col-sm-6 col-xs-12"><a href="#"><img src="#" alt="image" /></a></div>
    <div class="bn bn3 col-lg-3 col-sm-3 col-xs-12">
    <div class="banner1"><a href="#"><img src="#" alt="image" /></a></div>
    <div class="banner2"><a href="#"><img src="#" alt="image" /></a></div>
    </div>
    </div>
    </div>


    13. Position-5

    Frontend Appearance

    Backend Settings

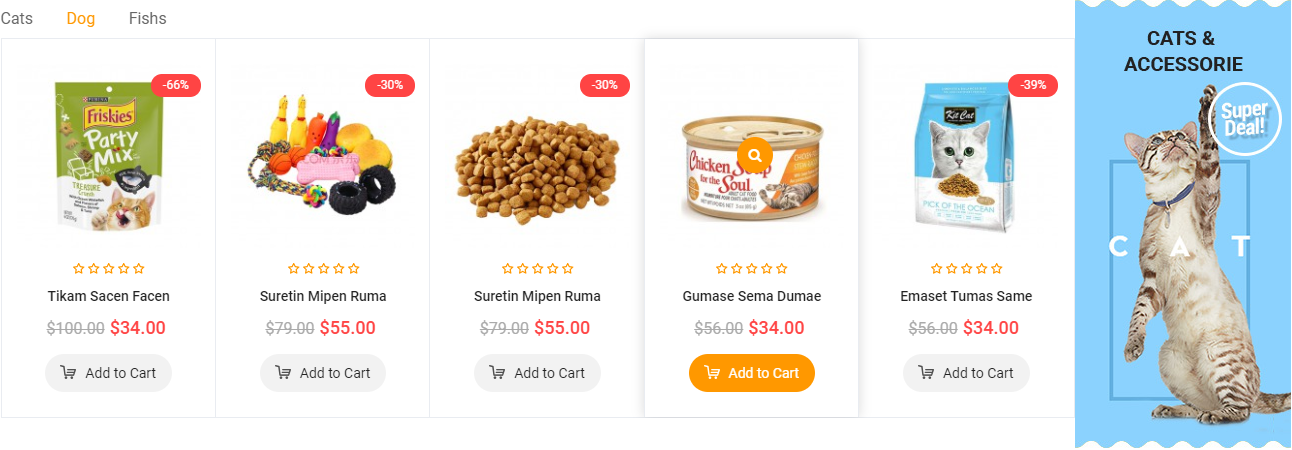
    Note: Please go to Extensions => Module Manager => Click New button to create a new module => Select SJ Listing Tabs for VirtueMart module.

  • Backend Settings: Module/ Source Options/ Tabs options/ Products Options/ Image Options/ Effects Options/ Advanced
  • 14. Position-6

    Frontend Appearance

    Backend Settings

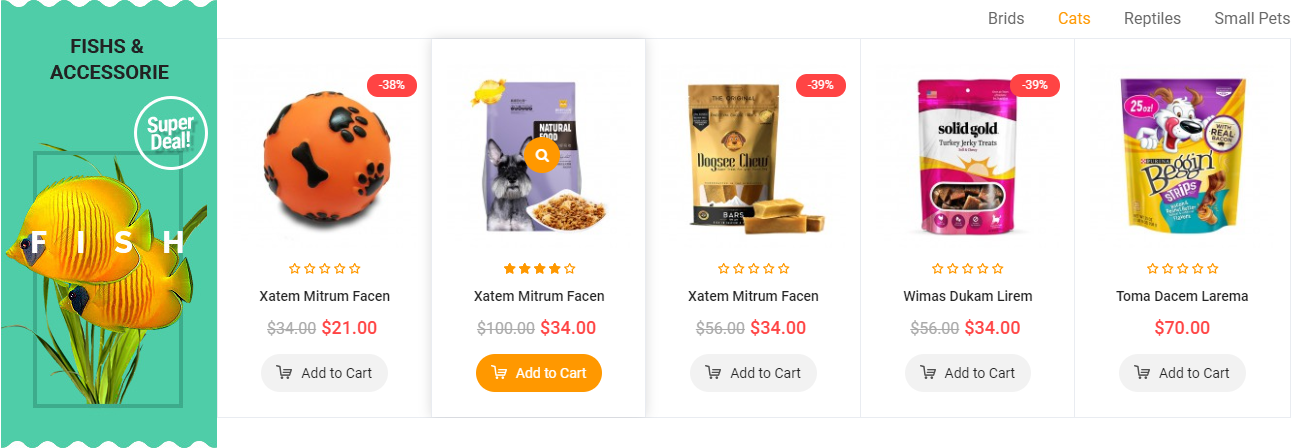
    Note: Please go to Extensions => Module Manager => Click New button to create a new module => Select SJ Listing Tabs for VirtueMart module.

  • Backend Settings: Module/ Source Options/ Tabs options/ Products Options/ Image Options/ Effects Options/ Advanced
  • 15. Position-7

    Frontend Appearance

    Backend Settings

    Note: Please go to Extensions => Module Manager => Click New button to create a new module => Select SJ Listing Tabs for VirtueMart module.

  • Backend Settings: Module/ Source Options/ Tabs options/ Products Options/ Image Options/ Effects Options/ Advanced
  • 16. Position-8

    Frontend Appearance

    Please go to Extensions >> Module Manager >>Click "New" button to create a new module >> Select "Custom" module.

    Backend Settings: Module

    Copy & Paste the code into your editor:

    					
    <div class="banners banners2">
    <div class="row">
    <div class="bn bn1 col-lg-6 col-sm-6 col-xs-12"><a href="#"><img src="images/banners/bn6.jpg" alt="image" /></a></div>
    <div class="bn bn2 col-lg-6 col-sm-6 col-xs-12"><a href="#"><img src="images/banners/bn7.jpg" alt="image" /></a></div>
    </div>
    </div>


    17. Position-9

    Frontend Appearance

    Backend Settings

    Note: To create new Joomla module - SJ Extra Slider for Content, please go to Extensions => Module Manager => Click New button to create a new module => Select SJ Extra Slider for Content module.

  • Backend Settings: Module/ Source Options/ Item Options/ Image Options/ Effects Options/ Advanced
  • 18. Position-10

    Frontend Appearance

    Backend Settings

    Note: To create new Joomla module - SJ Extra Slider for VirtueMart, please go to Extensions => Module Manager => Click New button to create a new module => Select SJ Extra Slider for VirtueMart module.

  • Backend Settings: Module/ Source Options/ Item Options/ Image Options/ Effects Options/ Advanced
  • 19. Position-11

    Frontend Appearance

    Backend Settings

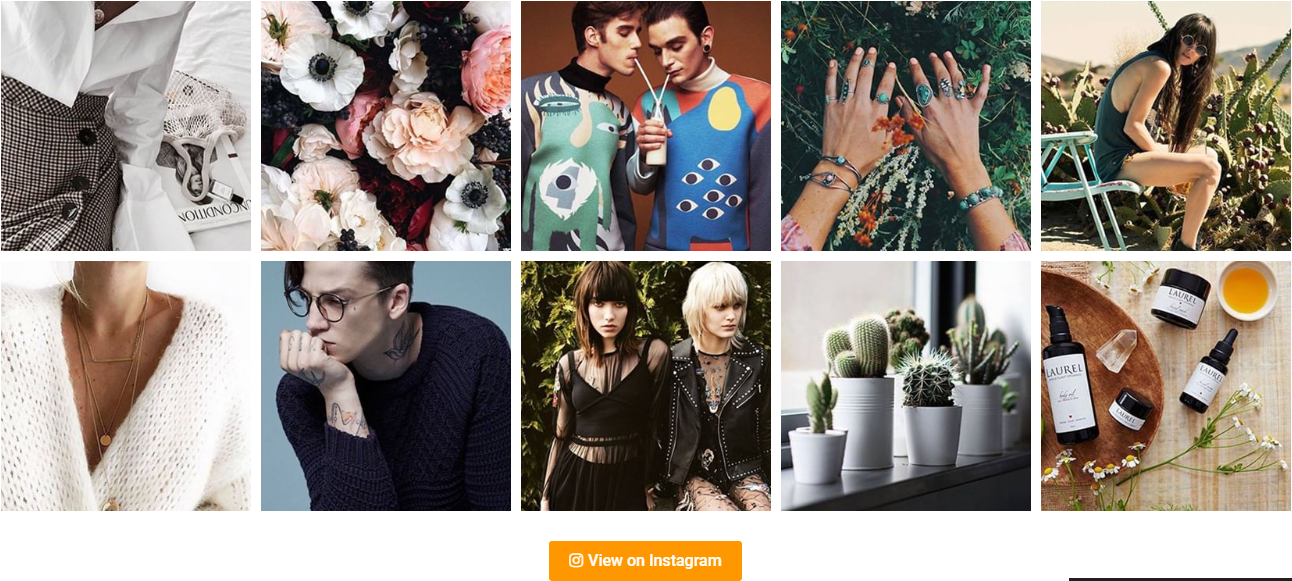
    Note: To create new Joomla module - SJ Instagram Gallery, please go to Extensions => Module Manager => Click New button to create a new module => Select SJ Instagram Gallery module.

  • Backend Settings: Module/ Source Options/ Effects Options/ Advanced
  • Footer Configuration

    20. bottom1

    Frontend Appearance

    Please go to Extensions >> Module Manager >>Click "New" button to create a new module >> Select "Custom" module.

    Backend Settings: Module

    Copy & Paste the code into your editor:

    					
    <div class="infos-footer">
    <ul>
    <li class="adres"><i class="fa fa-home">icon</i>No 40 Baria Sreet 133/2 NewYork City, NY, USA.</li>
    <li class="mail"><i class="fa fa-envelope-o">icon</i><a href="#">contact@opencartworks.com</a></li>
    <li class="phone"><i class="fa fa-phone">icon</i>(800) 1234 8888 - (800) 1234 9999</li>
    <li class="times"><i class="fa fa-clock-o">icon</i>Open Time: 8:00AM - 6:00PM</li>
    </ul>
    </div>


    21. bottom2

    Frontend Appearance

    To configure this module,please go to Extensions >> Module Manager >>Click "New" button to create a new module >> Select "Menu" module.

    Backend Settings: Module


    22. bottom3

    Frontend Appearance

    To configure this module,please go to Extensions >> Module Manager >>Click "New" button to create a new module >> Select "Menu" module.

    Backend Settings: Module


    23. bottom4

    Frontend Appearance

    To configure this module,please go to Extensions >> Module Manager >>Click "New" button to create a new module >> Select "AcyMailing Module" module.

    Backend Settings: Module

    Please go to Extensions >> Module Manager >>Click "New" button to create a new module >> Select "Custom" module.

    Backend Settings: Module

    Copy & Paste the code into your editor:

    					
    <ul class="socials modcontent">
    <li class="facebook"><a href="https://www.facebook.com/SmartAddons.page" target="_blank" rel="noopener noreferrer"><i class="fa fa-facebook">Facebook</i></a></li>
    <li class="twitter"><a href="https://twitter.com/smartaddons" target="_blank" rel="noopener noreferrer"><i class="fa fa-twitter">Twitter</i></a></li>
    <li class="google_plus"><a href="https://plus.google.com/+Smartaddons/posts" target="_blank" rel="noopener noreferrer"><i class="fa fa-google-plus">Google Plus</i></a></li>
    <li class="pinterest"><a href="#" target="_blank" rel="noopener noreferrer"><i class="fa fa-pinterest">Pinterest</i></a></li>
    <li class="youtube"><a href="#" target="_blank" rel="noopener noreferrer"><i class="fa fa-youtube-play">Youtube</i></a></li>
    <li class="linkedin"><a href="#" target="_blank" rel="noopener noreferrer"><i class="fa fa-linkedin">linkedin</i></a></li>
    <li class="skype"><a href="#" target="_blank" rel="noopener noreferrer"><i class="fa fa-skype">skype</i></a></li>
    </ul>


    24. bottom5

    Frontend Appearance

    Please go to Extensions >> Module Manager >>Click "New" button to create a new module >> Select "Custom" module.

    Backend Settings: Module

    Copy & Paste the code into your editor:

    					
    <div class="categories-footer">
    <h2>MOST SEARCHED KEYWORDS PETSHOP:</h2>
    <ul>
    <li>
    <h4>Brids:</h4>
    <a href="#">Hand Raised Baby Birds</a> | <a href="#">Parrots</a> | <a href="#">Budgies</a> | <a href="#">Finches</a> | <a href="#">Canaries</a> | <a href="#">View all</a></li>
    <li>
    <h4>Cats:</h4>
    <a href="#">Cat Food &amp; Treats</a> | <a href="#">Crates &amp; Carriers</a> | <a href="#">Medication &amp; Supplement</a> | <a href="#">Flea, Tick &amp; Worming</a> | <a href="#">Housing &amp; Bedding</a> | <a href="#">Cat Litter &amp; Trays</a> | <a href="#">Cat Accessories</a> | <a href="#">Cat Food</a> | <a href="#">View all</a></li>
    <li>
    <h4>Dog:</h4>
    <a href="#">Dog Food &amp; Treats</a> | <a href="#">Dog Kennels</a> | <a href="#">Crates</a> | <a href="#">Carriers &amp; Pens</a> | <a href="#">Dog Medication</a> | <a href="#">Flea, Tick And Worming</a> | <a href="#">Shampoo &amp; Grooming</a> | <a href="#">Puppy Care</a> | <a href="#">View all</a></li>
    <li>
    <h4>Fishs:</h4>
    <a href="#">Amano Shrimp</a> | <a href="#">Cherry Shrimp</a> | <a href="#">Red Female Veiltail Betta</a> | <a href="#">Female Koi Betta</a> | <a href="#">Blue Shrimp</a> | <a href="#">Male Paradise Betta</a> | <a href="#">Albino Cory</a> | <a href="#">Neon Tetra</a> | <a href="#">Baby Girl Betta</a> | <a href="#">View all</a></li>
    <li>
    <h4>Reptiles:</h4>
    <a href="#">Bearded Dragon</a> | <a href="#">Hermit Crab</a> | <a href="#">Leopard Gecko</a> | <a href="#">Ball Python</a> | <a href="#">Chameleon</a> | <a href="#">Crested Gecko</a> | <a href="#">Terrariums &amp; Tanks</a> | <a href="#">Live Reptiles</a> | <a href="#">Heating &amp; Lighting</a> | <a href="#">View all</a></li>
    <li>
    <h4>Small pets:</h4>
    <a href="#">Food</a> | <a href="#">Rabbit &amp; Guinea Pig Food</a> | <a href="#">Treats</a> | <a href="#">Toys</a> | <a href="#">Carrier</a> | <a href="#">Rabbit Hutches</a> | <a href="#">Nursing</a> | <a href="#">View all</a></li>
    </ul>
    </div>


    25. Footer1

    Frontend Appearance

    To configure Footer4, please go to Extensions => Templates => sj-petShop => Basic Tab => Footer

    Backend Settings: Footer4

    26. footer2

    Frontend Appearance

    Please go to Extensions >> Module Manager >>Click "New" button to create a new module >> Select "Custom" module.

    Backend Settings: Module

    Copy & Paste the code into your editor:

    					
    <p><a href="#"><img src="images/petshop/payment.png" alt="payment" /></a></p>


    Create new SP Page Builder

    Please go to Components => SP Page Builder => Click New button => Enter the Title: Home Page

    Please go to Menus => Main menu => Click New button => Enter the Title: Home Page. Select "SP Page Builder ยป Page: home page"

    Backend Settings

    Thank you so much for purchasing this template. If you have any questions that are beyond the scope of this help file, please send us via: Submit a Ticket

    Thanks so much!