SJ iConstruct
- created: 05/10/2017
- by: SmartAddons
- email: contact@ytcvn.com
SJ iConstruct - Resort and Hotel Joomla Template is specially designed for resort, accommodation, bed and breakfast and any type of Hotel Business who offer accommodation related services. SJ iConstruct comes with a beautiful and unique design that will dynamically fit for your online web presence.
System Requirements – Joomla version 3.x
System Requirements: here
Component Requirements
DOWNLOAD
Download Packages from our store: here
Helix3 - Framework
This template uses Helix3 - Framework . You can refer to the Helix3 function: here
Install with Quickstart Package
By using this package, you will see your website exactly as our Demo with sample data. This is applied when you need a fresh Joomla with our template
The following steps will guide to install a quickstart package of SmartAddons Joomla Template: Click hereInstall with Template and Extensions
To install Template for Joomla, please click: here
The extensions package include of Modules, Components and Plugins.
Note: Extensions installation is the same with Template installation as above
Enable Modules and Plugins: here
To Install SP Page Builder Component, you can follow these steps:
Step 1: Please go to Extensions => Extension Manager
Step 2: Choose file SP Page Builder.zip that you have downloaded and then Click on the button Upload & Install to install the uploaded package.
Install multilingual site in SJ Template
To help you about language problem when you work with SJ Template, please read this post: how to set up a multilingual site in SJ Template.
Layout Position
Position Layout

Template Configuration
Go to Extensions => Template Manager => SJ iConstruct. All of parameters of this template are divided into the following groups, in which they are explained themselves:
- Basic: backend settings
- Presets: backend settings
- Layout: backend settings
- Menu: backend settings
- Typography: backend settings
- Advanced: backend settings
- Blog: backend settings
Header, Footer Configuration
Header Configuration
1. Top1
Frontend Appearance
![]()
Login
To configure Login, please go to Extensions >> Module Manager >> Click "New" button to create a new module >> Select "Login" module
Language
To configure Language, please go to Extensions >> Module Manager >> Click "New" button to create a new module >> Select "Language Switcher" module
2. Top2
Frontend Appearance
![]()
Menu Social Header
To configure Menu Social Header, please go to Extensions >> Module Manager >> Click "New" button to create a new module >> Select "Menu" module
3. Top3
Frontend Appearance
![]()
Menu Social Header
To configure Menu Social Header, please go to Extensions >> Module Manager >> Click "New" button to create a new module >> Select "Menu" module
Copy & Paste the code into your editor:
<table class="header-info">
<tbody>
<tr>
<td><i class="fa fa-map-marker"> </i>
<h4>Our Address</h4>
<p>2381 Rosecrans Ave, CA USA</p>
</td>
<td><i class="fa fa-phone"> </i>
<h4>Phone</h4>
<p>+67 7839 749 472</p>
</td>
<td><i class="fa fa-envelope"> </i>
<h4>Email</h4>
<p>iconstruct@gmail.com</p>
</td>
<td><a class="btn btn-warning" title="Get A Quote" href="#">Get A Quote</a></td>
</tr>
</tbody>
</table>
Footer Configuration
1. iConstruct About
Frontend Appearance
![]()
Module: Custom
To configure this module, please go to Extensions >> Module Manager >>Click "New" button to create a new module >> Select "Custom" module.
Copy & Paste the code into your editor:
<p class="form-group"><img src="images/logo/logo.png" alt="" /></p>
<p class="form-group" style="width: 80%;">Ut wisi enim ad minim veniam, quis nostrud exerci tation ullamcorper suscipit lobortis nisl. Duis autem vel eum iriure dolor ... <a href="#">Read more</a></p>
<ul class="list-inline list-social--about">
<li>[yt_social_icon type="facebook" yt_title="SmartAddons" color="no" style="flat" size="large" link="https://www.facebook.com/SmartAddons.page" ]</li>
<li>[yt_social_icon type="twitter" yt_title="smartaddons" color="no" style="flat" size="large" link="https://twitter.com/smartaddons" ]</li>
<li>[yt_social_icon type="google-plus" yt_title="smartaddons" color="no" style="flat" size="large" link="https://plus.google.com/+Smartaddons" ]</li>
<li>[yt_social_icon type="rss" yt_title="smartaddons" color="no" style="flat" size="large" link="#" ]</li>
<li>[yt_social_icon type="pinterest" yt_title="smartaddons" color="no" style="flat" size="large" link="https://www.pinterest.com/smartaddons/" ]</li>
</ul>
<p><img class="hidden-md hidden-sm hidden-xs" src="images/demo/map.png" alt="" /></p>
2. Working Time
Frontend Appearance
![]()
Module: Custom
To configure this module,please go to Extensions >> Module Manager >>Click "New" button to create a new module >> Select "Custom" module.
Copy & Paste the code into your editor:
<table class="table-worktime">
<tbody>
<tr>
<td>Mon</td>
<td class="td-time">08:00 AM - 10:00 PM</td>
</tr>
<tr>
<td>Tue </td>
<td class="td-time">08:00 AM - 10:00 PM</td>
</tr>
<tr>
<td>Wed</td>
<td class="td-time">08:00 AM - 10:00 PM</td>
</tr>
<tr>
<td>Thur</td>
<td class="td-time">08:00 AM - 10:00 PM </td>
</tr>
<tr>
<td>Fri</td>
<td class="td-time">08:00 AM - 10:00 PM</td>
</tr>
<tr>
<td>Weekend</td>
<td class="td-time">CLOSED</td>
</tr>
</tbody>
</table>
3. Our Services
Frontend Appearance
![]()
Module: Menu
To configure this module,please go to Extensions >> Module Manager >>Click "New" button to create a new module >> Select "Menu" module.
4. Twitter Feeds
Frontend Appearance
![]()
Module: SJ Twitter Slider
To configure this module,please go to Extensions >> Module Manager >>Click "New" button to create a new module >> Select "SJ Twitter Slider" module.
5. Subscribe to Our Newsletter
Frontend Appearance
![]()
Module: AcyMailing Module
To configure this module,please go to Extensions >> Module Manager >>Click "New" button to create a new module >> Select "AcyMailing Module" module.
Slider Settings
1. Create new SP Page Builder
Please go to Components => SP Page Builder => Click New button => Enter the Title: Home Page
Backend Settings

To create new rows of Home Page, please click " Add new Row" button
Example: Create a new row
General Tab: backend settings
Style Tab: backend settings
Responsive Tab: backend settings
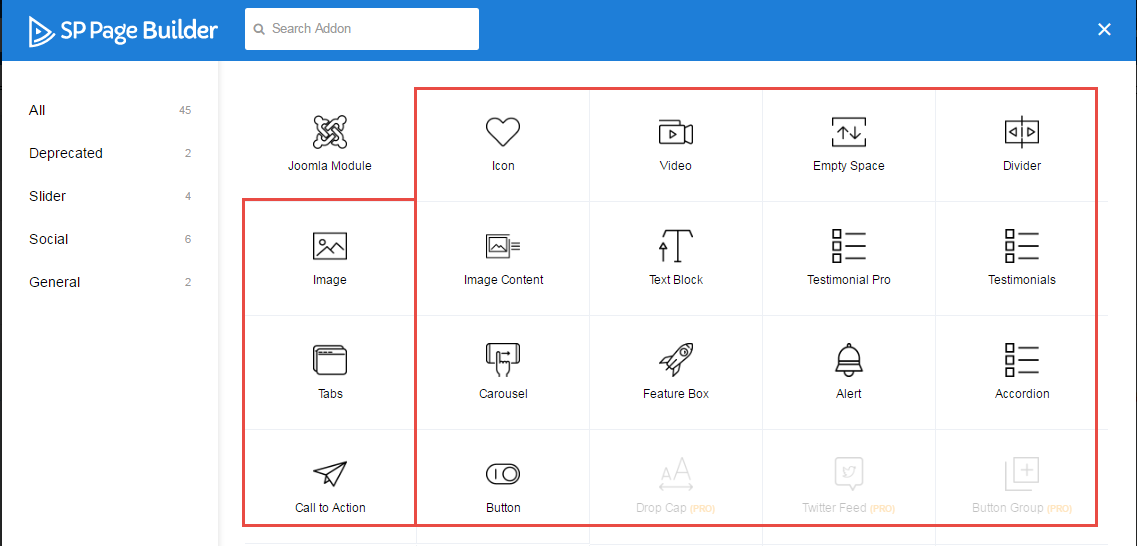
To create new rows, please click " Add new Addon" button

To configure Addon, We have 2 options
Options 1: Click "Joomla Module" then please fill General Tab
General Tab: backend settings
Note: To create new Joomla module, example Custom HTML, please go to Extensions => Module Manager => Click New button to create a new module => Select HTML module.
Options 2: Click "Shortcode" then please fill General Tab
2. Row1 Configuration - Home Slideshow
Frontend Appearance
![]()
To configure Row1, please go toSP Page Builder => Click Edit Addon button
Backend Settings
![]()
- Screenshot Backend Settings: General/ Style/ Responsive
Note: To create new Joomla module - Home - Slideshow module, please go to Extensions => Module Manager => Click New button to create a new module => Select Custom module.
Copy & Paste the code into your editor:
<div>[yt_content_slider style="default" margin="0" items_column0="1" items_column1="1" items_column2="1" items_column3="1" items_column4="1" type_change="fade" transitionin="fadeIn" transitionout="fadeOut" arrows="yes" arrow_position="arrow-default" pagination="yes" autoplay="no" autoheight="no" hoverpause="yes" lazyload="no" loop="yes" speed="0.6" delay="4" ] [yt_content_slider_item src="images/slideshow/slide1.jpg" caption="yes" link="#" ]
<h3 class="title-small lora">WELCOME TO iconstruct</h3>
<h2 class="title-lage">Make Everything You Want</h2>
<p class="des">“ It’s important to shape up your hedges, it’s like getting a haircut, stay fresh.”</p>
<a class="btn btn-default button-find" href="#">Read more</a> [/yt_content_slider_item] [yt_content_slider_item src="images/slideshow/slide2.jpg" caption="yes" link="#" ]
<h3 class="title-small lora">WELCOME TO iconstruct</h3>
<h2 class="title-lage">Make Everything You Want</h2>
<p class="des">“ It’s important to shape up your hedges, it’s like getting a haircut, stay fresh.”</p>
<a class="btn btn-default button-find" href="#">Read more</a> [/yt_content_slider_item] [yt_content_slider_item src="images/slideshow/slide3.jpg" caption="yes" link="#" ]
<h3 class="title-small lora">WELCOME TO iconstruct</h3>
<h2 class="title-lage">Make Everything You Want</h2>
<p class="des">“ It’s important to shape up your hedges, it’s like getting a haircut, stay fresh.”</p>
<a class="btn btn-default button-find" href="#">Read more</a> [/yt_content_slider_item] [/yt_content_slider]</div>
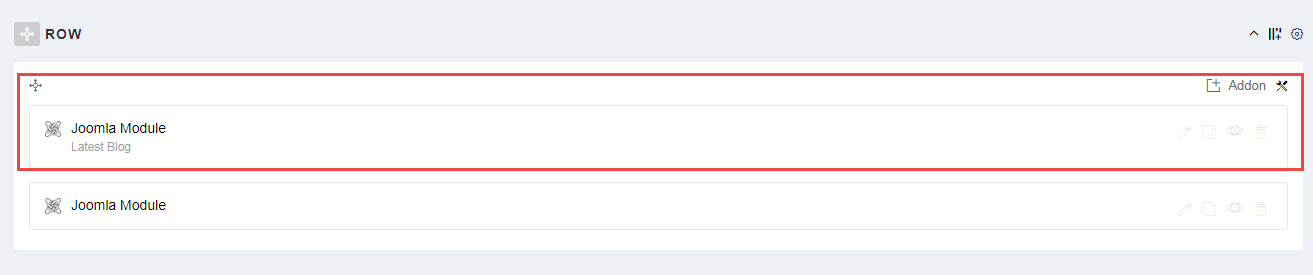
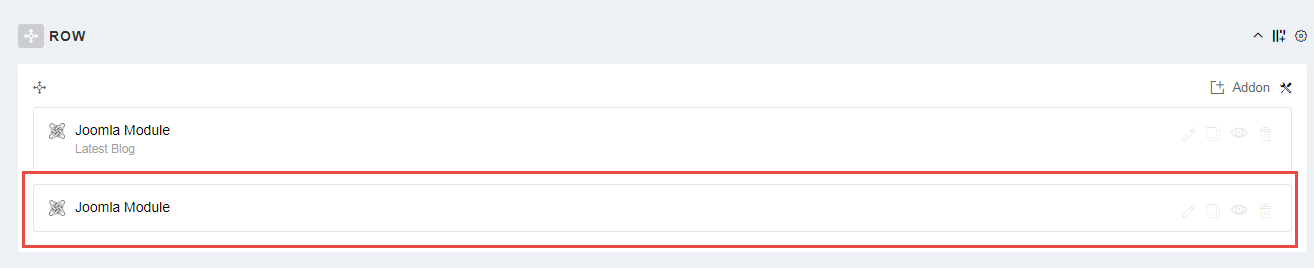
3. Row2 Configuration - We and our features
Frontend Appearance

To configure Row2, please go toSP Page Builder => Click Edit Addon button
Backend Settings

- Screenshot Backend Settings: General/ Style/ Responsive
Note: To create new Joomla module - SJ Extra Slider for Content module, please go to Extensions => Module Manager => Click New button to create a new module => Select SJ Extra Slider for Content module.
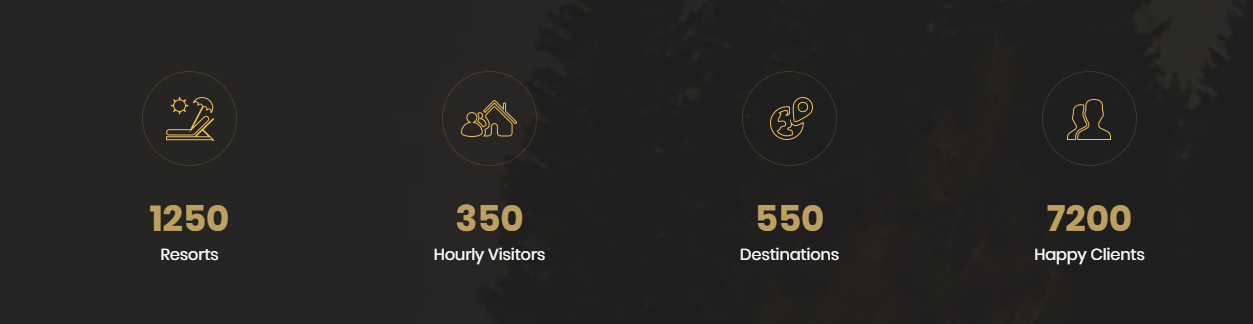
4. Row3 Configuration - Home - Project Counter
Frontend Appearance
To configure Row3, please go toSP Page Builder => Click Edit Addon button
Backend Settings

Note: To create new Joomla module - Custom, please go to Extensions => Module Manager => Click New button to create a new module => Select Custom module.
- Backend Settings: Module/ Advanced Options
Copy & Paste the code into your editor:
<div class="counter-wrap">
<div class="row">
<div class="maps box-maps col-lg-3 col-md-3 col-sm-3 col-xs-12">[yt_counter count_start="900" count_end="1250" counter_speed="5" prefix="" suffix="" separator="no" align="none" background="transparent" border_radius="0px" icon="images/homepage/icon1.png" icon_color="" count_color="" count_size="36px" text_color="#ffffff" text_size="18px" border="0px solid #DDD" ]Projects[/yt_counter]</div>
<div class="maps box-maps col-md-3 col-sm-3 col-xs-12">[yt_counter count_start="200" count_end="350" counter_speed="5" prefix="" suffix="" separator="no" align="none" background="transparent" border_radius="0px" icon="images/homepage/icon2.png" icon_color="" count_color="" count_size="36px" text_color="#ffffff" text_size="18px" border="0px solid #DDD" ]Clients [/yt_counter]</div>
<div class="maps box-maps col-md-3 col-sm-3 col-xs-12">[yt_counter count_start="200" count_end="550" counter_speed="5" prefix="" suffix="" separator="no" align="none" background="transparent" border_radius="0px" icon="images/homepage/icon3.png" icon_color="" count_color="" count_size="36px" text_color="#ffffff" text_size="18px" border="0px solid #DDD" ]Members [/yt_counter]</div>
<div class="maps box-maps col-md-3 col-sm-3 col-xs-12">[yt_counter count_start="6000" count_end="7000" counter_speed="5" prefix="" suffix="" separator="no" align="none" background="transparent" border_radius="0px" icon="images/homepage/icon4.png" icon_color="" count_color="" count_size="36px" text_color="#ffffff" text_size="18px" border="0px solid #DDD" ]Awards [/yt_counter]</div>
</div>
</div>
5. Row4 Configuration - Home - Our services
Frontend Appearance
To configure Row4, please go toSP Page Builder => Click Edit Addon button
Backend Settings

Note: To create new Joomla module - Custom module, please go to Extensions => Module Manager => Click New button to create a new module => Select Custom module.
Copy & Paste the code into your editor:
<div class="sppb-addon-heading text-center"> <p class="sppb-addon-title">our services</p> <h3 class="heading-title">Bring the best things</h3> <p class="heading-subtitle">It’s important to use cocoa butter. It’s the key to more success, why not live smooth?</p> </div> <div class="sppb-addon-services row"> <div class="col-sm-6 col-md-4"> <div class="sppb-box-services"> <div class="sppb-box-services-inner"> <div class="box-services--icons"><img src="images/homepage/do2.png" alt="" /></div> <h3 class="box-services--title">General Construction</h3> <p>We are a fully accredited hospital by The Joint Commission, with a certified Level II Trauma Center...</p> <a class="btn btn-default btn-services--readmore" href="#">Read more</a></div> </div> <div class="sppb-box-services"> <div class="sppb-box-services-inner"> <div class="box-services--icons"><img src="images/homepage/do5.png" alt="" /></div> <h3 class="box-services--title">Electrical System</h3> <p>We are a fully accredited hospital by The Joint Commission, with a certified Level II Trauma Center...</p> <a class="btn btn-default btn-services--readmore" href="#">Read more</a></div> </div> </div> <div class="col-sm-6 col-md-4"> <div class="sppb-box-services"> <div class="sppb-box-services-inner"> <div class="box-services--icons"><img src="images/homepage/do3.png" alt="" /></div> <h3 class="box-services--title">Renovation Project</h3> <p>We are a fully accredited hospital by The Joint Commission, with a certified Level II Trauma Center...</p> <a class="btn btn-default btn-services--readmore" href="#">Read more</a></div> </div> <div class="sppb-box-services"> <div class="sppb-box-services-inner"> <div class="box-services--icons"><img src="images/homepage/do6.png" alt="" /></div> <h3 class="box-services--title">Consultation Projects</h3> <p>We are a fully accredited hospital by The Joint Commission, with a certified Level II Trauma Center...</p> <a class="btn btn-default btn-services--readmore" href="#">Read more</a></div> </div> </div> <div class="col-sm-6 col-md-4"> <div class="sppb-box-services"> <div class="sppb-box-services-inner"> <div class="box-services--icons"><img src="images/homepage/do4.png" alt="" /></div> <h3 class="box-services--title">Interior & Decor Design</h3> <p>We are a fully accredited hospital by The Joint Commission, with a certified Level II Trauma Center...</p> <a class="btn btn-default btn-services--readmore" href="#">Read more</a></div> </div> <div class="sppb-box-services"> <div class="sppb-box-services-inner"> <div class="box-services--icons"><img src="images/homepage/do7.png" alt="" /></div> <h3 class="box-services--title">Project Partnering</h3> <p>We are a fully accredited hospital by The Joint Commission, with a certified Level II Trauma Center...</p> <a class="btn btn-default btn-services--readmore" href="#">Read more</a></div> </div> </div> </div>
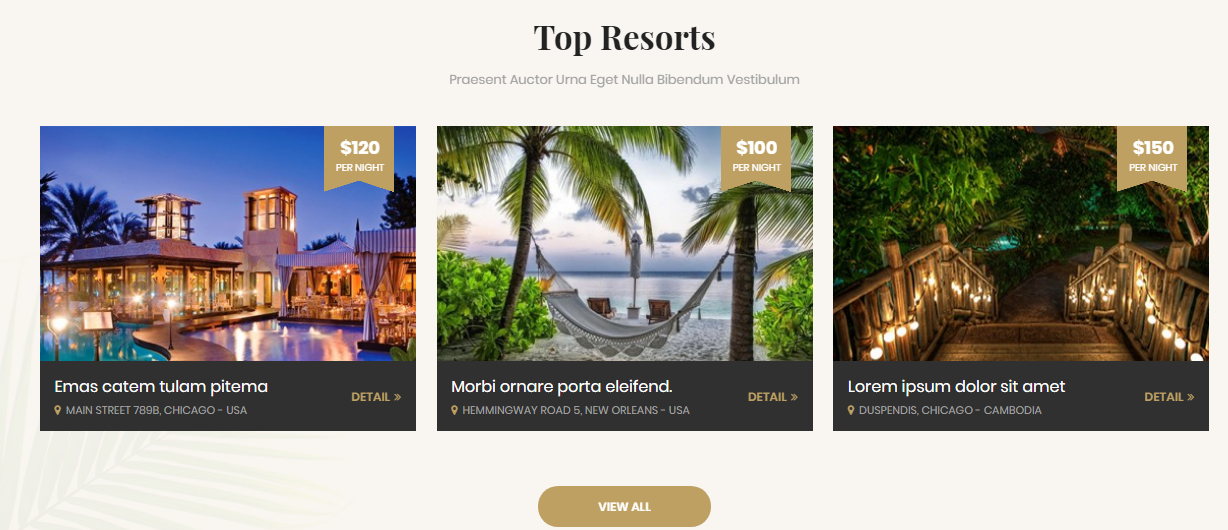
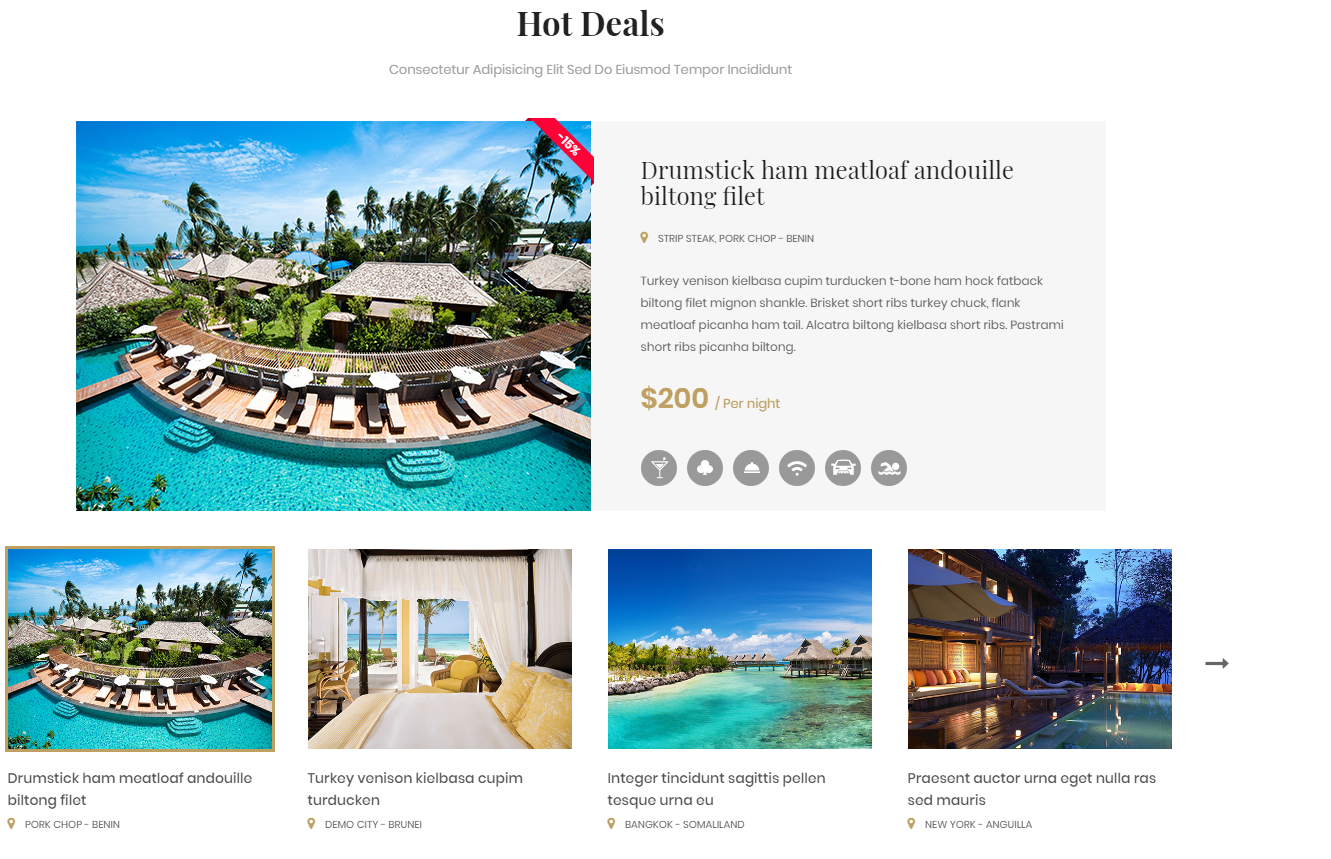
6. Row5 Configuration - Our products
Frontend Appearance
To configure Row5, please go toSP Page Builder => Click Edit Addon button
Backend Settings

Copy & Paste the code into your editor:
<div class="sppb-addon-heading text-center "> <p class="sppb-addon-title">our products</p> <h3 class="heading-title">The Latest Projects</h3> <p class="heading-subtitle">It’s important to use cocoa butter. It’s the key to more success, why not live smooth?</p> </div>
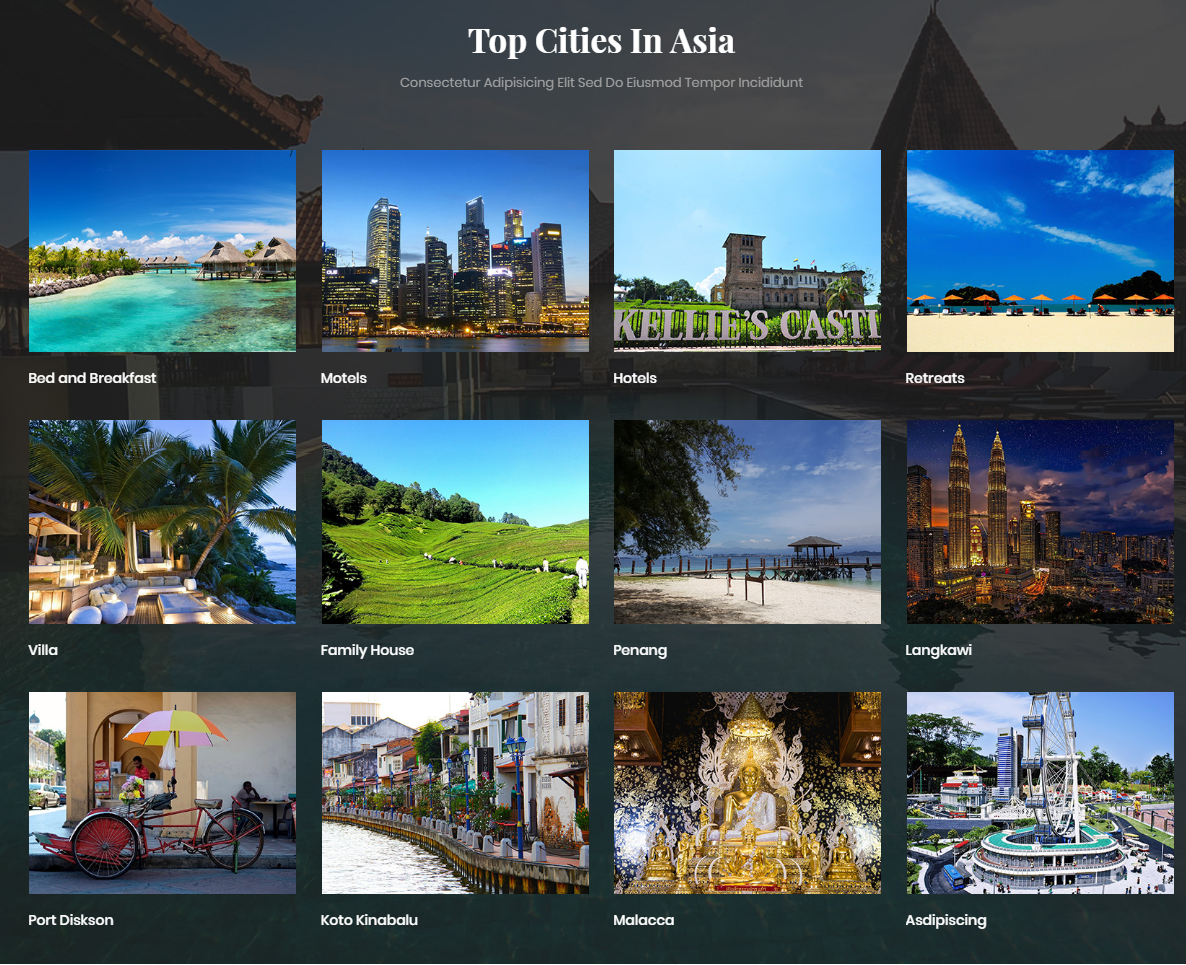
7. Row5 Configuration - Portfolio
Frontend Appearance
To configure Row6, please go toSP Page Builder => Click Edit Addon button
Backend Settings

8. Row6 Configuration - Home - Why choose us
Frontend Appearance

To configure Row6, please go toSP Page Builder => Click Edit Addon button
Backend Settings

Note: To create new Joomla module - Custom, please go to Extensions => Module Manager => Click New button to create a new module => Select Custom module.
Copy & Paste the code into your editor:
<div class="sppb-addon-whychoose row">
<div class="col-md-7 col-sm-12">
<div class="sppb-addon-heading ">
<p class="sppb-addon-title">Why choose us ?</p>
<h3 class="heading-title">Bring the best things</h3>
<p class="heading-subtitle">It’s important to use cocoa butter. It’s the key to more success, why not live smooth? You should never complain, complaining is a weak emotion</p>
</div>
<div class="row">
<div class="col-sm-6">
<div class="sppb-box-whychoose">
<div class="sppb-box-whychoose-inner">
<div class="box-whychoose--icons"><img src="images/homepage/why-1.png" alt="" /></div>
<h3 class="box-whychoose--title">We are Responsible</h3>
<p>In life there will be road blocks but we will over come it. Let me be clear, you have to make it</p>
</div>
</div>
<div class="sppb-box-whychoose">
<div class="sppb-box-whychoose-inner">
<div class="box-whychoose--icons"><img src="images/homepage/why-2.png" alt="" /></div>
<h3 class="box-whychoose--title">Best Finance Aid</h3>
<p>In life there will be road blocks but we will over come it. Let me be clear, you have to make it</p>
</div>
</div>
<div class="sppb-box-whychoose">
<div class="sppb-box-whychoose-inner">
<div class="box-whychoose--icons"><img src="images/homepage/why-3.png" alt="" /></div>
<h3 class="box-whychoose--title">First Class Support</h3>
<p>In life there will be road blocks but we will over come it. Let me be clear, you have to make it</p>
</div>
</div>
</div>
<div class="col-sm-6">
<div class="sppb-box-whychoose">
<div class="sppb-box-whychoose-inner">
<div class="box-whychoose--icons"><img src="images/homepage/why-4.png" alt="" /></div>
<h3 class="box-whychoose--title">World Class Specialists</h3>
<p>In life there will be road blocks but we will over come it. Let me be clear, you have to make it</p>
</div>
</div>
<div class="sppb-box-whychoose">
<div class="sppb-box-whychoose-inner">
<div class="box-whychoose--icons"><img src="images/homepage/why-5.png" alt="" /></div>
<h3 class="box-whychoose--title">Clear Design</h3>
<p>In life there will be road blocks but we will over come it. Let me be clear, you have to make it</p>
</div>
</div>
<div class="sppb-box-whychoose">
<div class="sppb-box-whychoose-inner">
<div class="box-whychoose--icons"><img src="images/homepage/why-6.png" alt="" /></div>
<h3 class="box-whychoose--title">Install and Play</h3>
<p>In life there will be road blocks but we will over come it. Let me be clear, you have to make it</p>
</div>
</div>
</div>
</div>
</div>
</div>
9. Row7 Configuration - Home - Faq
Frontend Appearance

To configure Row7, please go toSP Page Builder => Click Edit Addon button
Backend Settings
Note: To create new Joomla module - Custom, please go to Extensions => Module Manager => Click New button to create a new module => Select Custom module.
Copy & Paste the code into your editor:
<div class="sppb-addon-faq row">
<div class="col-sm-5"> </div>
<div class="col-md-7 col-sm-12">
<div class="sppb-addon-heading ">
<p class="sppb-addon-title">FAQ</p>
<h3 class="heading-title">Additional Help</h3>
<p class="heading-subtitle">It’s important to use cocoa butter. It’s the key to more success, why not live smooth? You should never complain, complaining is a weak emotion</p>
</div>
[yt_accordion align="left" width="100" style="basic" color_background_active="yes" item_active="1" background_active="#ffb600" color_active="#ffffff" ] [yt_accordion_item yt_title="Nullam a lacus vel malesuada mollis nibh adipiscing sit litora ?" icon="" icon_color="#ccc" icon_size="14" color_title="#000" color_desc="#fff" background="#e3e3e3" border_color="#ccc" ] Placerat ipsum ut proin a dis nascetur suscipit a ullamcorper a magnis a scelerisque felis pretium himenaeos malesuada enim nostra non dapibu mattis nisl iaculis vivamus non ipsum ullamcorper. Convallis parturient curae rhoncus tempor in eget ullamcorper purus sociis ut ad viverra ipsum suspendisse. [/yt_accordion_item] [yt_accordion_item yt_title="Nullam a lacus vel malesuada mollis nibh adipiscing sit litora ?" icon="" icon_color="#ccc" icon_size="14" color_title="#000" color_desc="#fff" background="#e3e3e3" border_color="#ccc" ] Placerat ipsum ut proin a dis nascetur suscipit a ullamcorper a magnis a scelerisque felis pretium himenaeos malesuada enim nostra non dapibu mattis nisl iaculis vivamus non ipsum ullamcorper. Convallis parturient curae rhoncus tempor in eget ullamcorper purus sociis ut ad viverra ipsum suspendisse. [/yt_accordion_item] [yt_accordion_item yt_title="Nullam a lacus vel malesuada mollis nibh adipiscing sit litora ?" icon="" icon_color="#ccc" icon_size="14" color_title="#000" color_desc="#fff" background="#e3e3e3" border_color="#ccc" ] Placerat ipsum ut proin a dis nascetur suscipit a ullamcorper a magnis a scelerisque felis pretium himenaeos malesuada enim nostra non dapibu mattis nisl iaculis vivamus non ipsum ullamcorper. Convallis parturient curae rhoncus tempor in eget ullamcorper purus sociis ut ad viverra ipsum suspendisse. [/yt_accordion_item] [yt_accordion_item yt_title="Nullam a lacus vel malesuada mollis nibh adipiscing sit litora ?" icon="" icon_color="#ccc" icon_size="14" color_title="#000" color_desc="#fff" background="#e3e3e3" border_color="#ccc" ] Placerat ipsum ut proin a dis nascetur suscipit a ullamcorper a magnis a scelerisque felis pretium himenaeos malesuada enim nostra non dapibu mattis nisl iaculis vivamus non ipsum ullamcorper. Convallis parturient curae rhoncus tempor in eget ullamcorper purus sociis ut ad viverra ipsum suspendisse. [/yt_accordion_item] [/yt_accordion]</div>
</div>
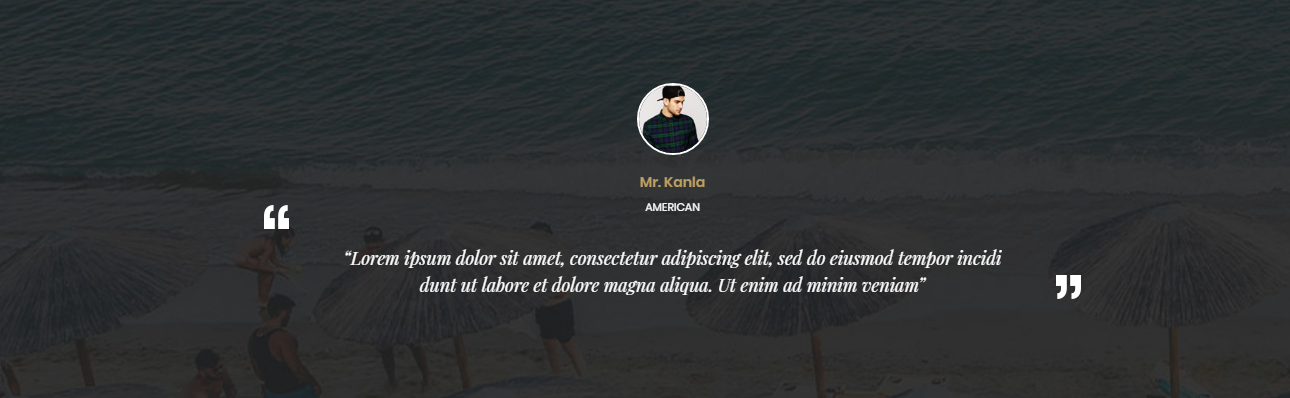
10. Row8 Configuration - Our Team
Frontend Appearance

To configure Row8, please go toSP Page Builder => Click Edit Addon button
Backend Settings
Copy & Paste the code into your editor:
<div class="sppb-addon-heading text-center "> <p class="sppb-addon-title">Our team</p> <h3 class="heading-title">always be the best team</h3> <p class="heading-subtitle">It’s important to use cocoa butter. It’s the key to more success, why not live smooth?</p> </div> <div class="yt-content-slider arrow-default content-slider--team" data-transitionin="fadeIn" data-transitionout="fadeOut" data-autoplay="no" data-autoheight="no" data-delay="4" data-speed="0.6" data-margin="30" data-items_column0="3" data-items_column1="3" data-items_column2="2" data-items_column3="1" data-items_column4="1" data-arrows="yes" data-pagination="no" data-lazyload="no" data-loop="yes" data-hoverpause="yes"> <div class="yt-content-slide"> <div class="image"><img src="images/homepage/member-1.jpg" alt="" /> <ul class="list-social list-inline"> <li class="facebook"><a class="fa fa-facebook" title="facebook" href="#">facebook</a></li> <li class="google"><a class="fa fa-google-plus" title="google" href="#">google</a></li> <li class="twitter"><a class="fa fa-twitter" title="twitter" href="#">twitter</a></li> </ul> </div> <div class="content"> <h3>Mr.Michale</h3> <span class="job">Ceo</span></div> </div> <div class="yt-content-slide"> <div class="image"><img src="images/homepage/member-2.jpg" alt="" /> <ul class="list-social list-inline"> <li class="facebook"><a class="fa fa-facebook" title="facebook" href="#">facebook</a></li> <li class="google"><a class="fa fa-google-plus" title="google" href="#">google</a></li> <li class="twitter"><a class="fa fa-twitter" title="twitter" href="#">twitter</a></li> </ul> </div> <div class="content"> <h3>Roy Hamilton</h3> <span class="job">care workers</span></div> </div> <div class="yt-content-slide"> <div class="image"><img src="images/homepage/member-3.jpg" alt="" /> <ul class="list-social list-inline"> <li class="facebook"><a class="fa fa-facebook" title="facebook" href="#">facebook</a></li> <li class="google"><a class="fa fa-google-plus" title="google" href="#">google</a></li> <li class="twitter"><a class="fa fa-twitter" title="twitter" href="#">twitter</a></li> </ul> </div> <div class="content"> <h3>Roy Hamilton</h3> <span class="job">care workers</span></div> </div> <div class="item"> <div class="image"><img src="images/homepage/member-1.jpg" alt="" /> <ul class="list-social list-inline"> <li class="facebook"><a class="fa fa-facebook" title="facebook" href="#">facebook</a></li> <li class="google"><a class="fa fa-google-plus" title="google" href="#">google</a></li> <li class="twitter"><a class="fa fa-twitter" title="twitter" href="#">twitter</a></li> </ul> </div> <div class="content"> <h3>Mr.Michale</h3> <span class="job">Ceo</span></div> </div> </div>
11. Row9 Configuration - Our Awards
Frontend Appearance
To configure Row9, please go toSP Page Builder => Click Edit Addon button
Backend Settings

Note: To create new Joomla module - Custom, please go to Extensions => Module Manager => Click New button to create a new module => Select Custom module.
Copy & Paste the code into your editor:
<div class="sppb-addon-heading ">
<p class="sppb-addon-title">our Awards</p>
<h3 class="heading-title">be the best team</h3>
<p class="heading-subtitle">It’s important to use cocoa butter. It’s the key to more success, why not live smooth?</p>
</div>
<p>[yt_content_slider style="default" margin="15" items_column0="3" items_column1="2" items_column2="2" items_column3="1" items_column4="1" type_change="fade" transitionin="fadeIn" transitionout="fadeOut" arrows="yes" arrow_position="arrow-default" pagination="no" autoplay="no" autoheight="no" hoverpause="yes" lazyload="no" loop="yes" speed="0.6" delay="4" ] [yt_content_slider_item src="images/homepage/award-3.jpg" caption="yes" link="#" ] Archicture Award [/yt_content_slider_item] [yt_content_slider_item src="images/homepage/award-2.jpg" caption="yes" link="#" ] Archicture Award [/yt_content_slider_item] [yt_content_slider_item src="images/homepage/award-1.jpg" caption="yes" link="#" ] Archicture Award [/yt_content_slider_item] [/yt_content_slider]</p>
12. Row9 Configuration - Our project are Perfect
Frontend Appearance
To configure Row9, please go toSP Page Builder => Click Edit Addon button
Backend Settings

Note: To create new Joomla module - HTML, please go to Extensions => Module Manager => Click New button to create a new module => Select HTML module.
Copy & Paste the code into your editor:
<div>[yt_lightbox yt_title="" align="left" type="none" style="none" src="images/homepage/bg-video.jpg" video_addr="https://www.youtube.com/watch?v=yJZ-Pqj-glU" width="960px" height="746px" lightbox="yes" description="It’s important to use cocoa butter. It’s the key to more success, why not live smooth?" ]</div>
13. Row10 Configuration - Our project are Perfect
Frontend Appearance

To configure Row10, please go toSP Page Builder => Click Edit Addon button
Backend Settings

Text
Note: To create new Joomla module - HTML, please go to Extensions => Module Manager => Click New button to create a new module => Select HTML module.
Copy & Paste the code into your editor:
<div>[yt_lightbox yt_title="" align="left" type="none" style="none" src="images/homepage/bg-video.jpg" video_addr="https://www.youtube.com/watch?v=yJZ-Pqj-glU" width="960px" height="746px" lightbox="yes" description="It’s important to use cocoa butter. It’s the key to more success, why not live smooth?" ]</div>
Copyright
To remove Designed by SmartAddons.Com at the footer of template, please purchase our Copyright Removal here
Support
Thank you so much for purchasing this template. If you have any questions that are beyond the scope of this help file, please send us via: Submit a Ticket
Thanks so much!