SJ Directory
- created: 02/08/2017
- by: SmartAddons
- email: contact@ytcvn.com
SJ Directory is a powerful directory Joomla template, especially for school, university listing and directory websites.
System Requirements – Joomla version 3.x
System Requirements: here
Component Requirements
DOWNLOAD
Download Packages from our store: here
Install with Quickstart Package
By using this package, you will see your website exactly as our Demo with sample data. This is applied when you need a fresh Joomla with our template
The following steps will guide to install a quickstart package of SmartAddons Joomla Template: Click hereInstall with Template and Extensions
Step 1: Access the installation panel Navigate to Extensions >> Extension Manager.

- Install with option: Upload Package File
Firstly, you choose file template.zip then click on the button Upload & Install to install the uploaded package.

Step 3: Set New Installed Template As Default Template
- Go to Extensions >> Template Manager.

- In order to display your site with the new installed template, you have to set the template as default template

The extensions package include of (Modules/Components and Plugins).
Note: Extensions installation is the same with Template installation as above
Here is list of extensions that are used in the template.

Enable Modules and Plugins: here
To Install K2 Component, you can follow these steps:
Step 1: Please go to Extensions >> Extension Manager

Step 2: Choose file K2 component.zip that you have downloaded and then Click on the button Upload & Install to install the uploaded package.

To install Acymailing Component you do the same as the installation K2 Component.
Install multilingual site in SJ Template
To help you about language problem when you work with SJ Template, please read this post: how to set up a multilingual site in SJ Template.
Layout Position
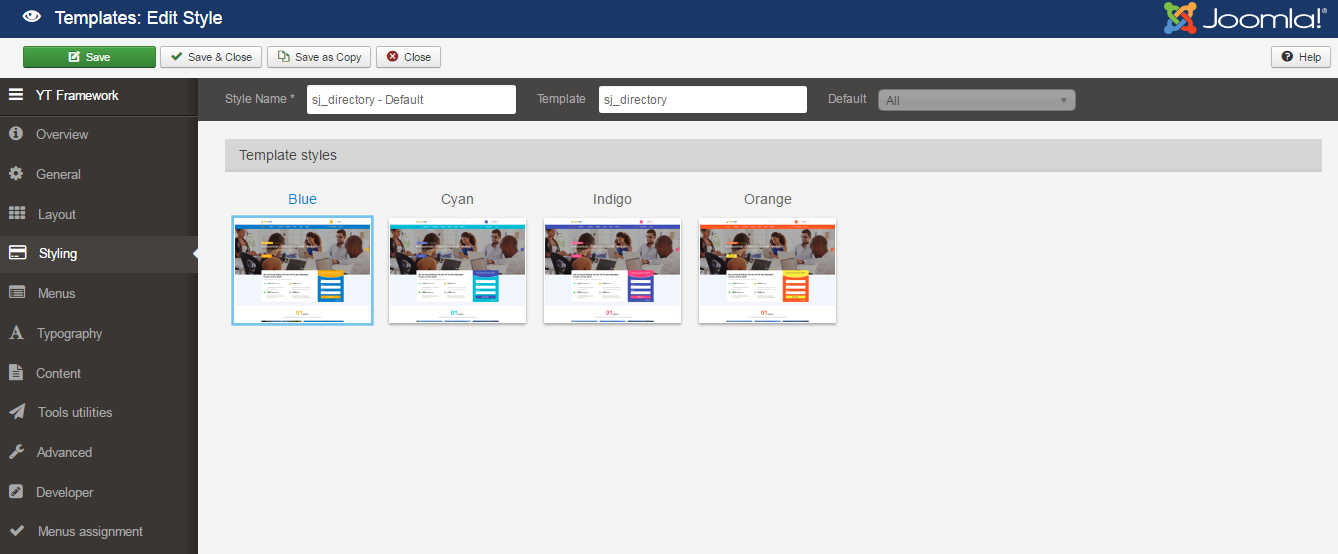
Template Configuration
Go to Extensions > Template Manager > Sj Directory. All of parameters of this template are divided into the following groups, in which they are explained themselves:
OVERVIEW

GENERAL

LAYOUT

STYLING

MENU

TYPOGRAPHY

CONTENT

TOOLS UTILITIES

ADVANCED

Extension Configuration
Position: content_top1
1. Module: Smart Search
Frontend Appearance

To configure this module, please go to Extensions >> Module Manager >> Click "New" button to create a new module >> Select "Smart Search" module.
- Backend Settings: Module/ Advanced Options
2. Module: Login
Frontend Appearance

To configure this module,please go to Extensions >> Module Manager >> Click "New" button to create a new module >> Select "Login" module.
- Backend Settings: Module/ Advanced Options
Position: content_top2
1. Module: Custom
Frontend Appearance

To configure this module, please go to Extensions >> Module Manager >> Click "New" button to create a new module >> Select "Custom" module.
- Backend Settings: Module/ Advanced Options
Copy & Paste the code into your editor:
                                                        <ul class="list_social">
                                                       <li>[yt_icon icon="icon: facebook" url="https://www.facebook.com/SmartAddons.page" size="14" background="transparent" color="" radius="" padding="" margin="" border="none" ]</li>
                                                       <li>[yt_icon icon="icon: twitter" url="https://twitter.com/smartaddons" size="14" background="transparent" color="" radius="" padding="" margin="" border="none" ]</li>
                                                       <li>[yt_icon icon="icon: google-plus" url="https://plus.google.com/+Smartaddons" size="14" background="transparent" color="" radius="" padding="" margin="" border="none" ]</li>
                                                         <li>[yt_icon icon="icon: youtube" url="https://www.youtube.com/user/smartaddons" size="14" background="transparent" color="" radius="" padding="" margin="" border="none" ]</li>
                                                          </ul>
2. Module: Language Switcher
Frontend Appearance

To configure this module, please go to Extensions >> Module Manager >> Click "New" button to create a new module >> Select "Language Switcher" module.
- Backend Settings: Module/ Advanced Options
Position: slideshow - Module: SJ Extra Slider for Content
Frontend Appearance

To configure this module, please go to Extensions >> Module Manager >> Click "New" button to create a new module >> Select "SJ Extra Slider for Content" module.
- Backend Settings: Module/ Source Options/ Item Options/ Image Options/ Effect Options/ Advanced Options
Position: content_main1
1. Module: Custom
Frontend Appearance

To configure this module, please go to Extensions >> Module Manager >> Click "New" button to create a new module >> Select "Custom" module.
- Backend Settings: Module/ Advanced Options
Copy & Paste the code into your editor:
                               <h3 class="title-box">We Are Proud Of Being The One Of The Best Education Centers On The World</h3>
                               <p class="pre-text">Over 5808 Courses For You. Start Your Learning Journey Today!</p>
                              <ul class="list">
                                <li class="item "><i class="fa fa-graduation-cap">graduation</i>
                              <div class="content"><span class="counter">1268</span>
                              <h3 class="title">Education Center</h3>
                                <p class="des">Lorem Khaled Ipsum is a major key to success. Eliptical talk.</p>
                               </div>
                               </li>
                              <li class="item"><i class="fa fa-users">users</i>
                               <div class="content"><span class="counter">2686</span>
                              <h3 class="title">Members</h3>
                             <p class="des">They don’t want us to eat. Life is what you make it, so let’s make it the key is to enjoy</p>
                                 </div>
                                 </li>
                               <li class="item"><i class="fa fa-leanpub">leanpub</i>
                                 <div class="content"><span class="counter">5808</span>
                                <h3 class="title">Online Course</h3>
                               <p class="des">Let’s see what Chef Dee got that they don’t want us to eat.</p>
                              </div>
                                 </li>
                                <li class="item"><i class="fa fa-globe">globe</i>
                                   <div class="content"><span class="counter">6246</span>
                              <h3 class="title">Cities</h3>
                                 <p class="des">Excepteur sint occaecat cupidatat non proident, sunt in culpa qui officia deserunt</p>
                              </div>
                              </li>
                              </ul>
2. Module: Sj K2 Filter
Frontend Appearance

To configure this module, please go to Extensions >> Module Manager >> Click "New" button to create a new module >> Select "Sj K2 Filter" module.
- Backend Settings: Module/ Source Options/ Extra Field Options/ Advanced Options
Position: content_main3 - Module: SJ Listing Tabs For K2
Frontend Appearance

To configure this module, please go to Extensions >> Module Manager >> Click "New" button to create a new module >> Select "SJ Listing Tabs For K2" module.
- Backend Settings: Module/ Source Options/ Tabs Options/ Items Options/ Image Options/ Effect Options/ Advanced
Position: content_main4
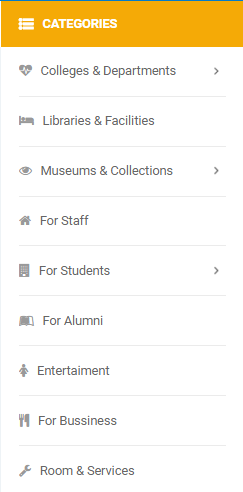
1. Module: SJ Categories for K2
Frontend Appearance

To configure this module, please go to Extensions >> Module Manager >> Click "New" button to create a new module >> Select "SJ Categories for K2" module.
- Backend Settings: Module/ Source Options/ Category Options/ Image Options/ Advanced Options
2. Module: SJ Listing Tabs For K2
Frontend Appearance

To configure this module, please go to Extensions >> Module Manager >> Click "New" button to create a new module >> Select "SJ Listing Tabs For K2" module.
- Backend Settings: Module/ Source Options/ Tabs Options/ Items Options/ Image Options/ Effect Options/ Advanced Options
Position: content_main5 - Module: SJ Extra Slider for K2
Frontend Appearance

To configure this module, please go to Extensions >> Module Manager >> Click "New" button to create a new module >> Select "SJ Extra Slider for K2" module.
- Backend Settings: Module/ Source Options/ Items Options/ Image Options/ Effect Options/ Advanced
Position: content_main6 - Module: Custom
Frontend Appearance

To configure this module, please go to Extensions >> Module Manager >> Click "New" button to create a new module >> Select "Custom" module.
Copy & Paste the code into your editor:
<div><img src="images/demo/s1.png" alt="" /></div>
Position: content_main7
1. Module: SJ Categories for K2
Frontend Appearance

To configure this module, please go to Extensions >> Module Manager >> Click "New" button to create a new module >> Select "SJ Categories for K2" module.
- Backend Settings: Module/ Source Options/ Items Options/ Image Options/ Effect Options/ Advanced Options
2. Module: Custom
Frontend Appearance

To configure this module, please go to Extensions >> Module Manager >> Click "New" button to create a new module >> Select "Custom" module.
Copy & Paste the code into your editor:
                                              <ul class="list">
                                             <li class="item"><a title="" href="#"><img src="images/demo/brand/b1.png" alt="" /></a></li>
                                             <li class="item"><a title="" href="#"><img src="images/demo/brand/b2.png" alt="" /></a></li>
                                             <li class="item"><a title="" href="#"><img src="images/demo/brand/b3.png" alt="" /></a></li>
                                            <li class="item"><a title="" href="#"><img src="images/demo/brand/b4.png" alt="" /></a></li>
                                            <li class="item"><a title="" href="#"><img src="images/demo/brand/b5.png" alt="" /></a></li>
                                            <li class="item"><a title="" href="#"><img src="images/demo/brand/b6.png" alt="" /></a></li>
                                            <li class="item"><a title="" href="#"><img src="images/demo/brand/b7.png" alt="" /></a></li>
                                            <li class="item"><a title="" href="#"><img src="images/demo/brand/b8.png" alt="" /></a></li>
                                            <li class="item"><a title="" href="#"><img src="images/demo/brand/b9.png" alt="" /></a></li>
                                            <li class="item"><a title="" href="#"><img src="images/demo/brand/b10.png" alt="" /></a></li>
                                             <li class="item"><a title="" href="#"><img src="images/demo/brand/b11.png" alt="" /></a></li>
                                         <li class="item"><a title="" href="#"><img src="images/demo/brand/b12.png" alt="" /></a></li>
                                          </ul>
3. Module: AcyMailing Module
Frontend Appearance

To configure this module, please go to Extensions >> Module Manager >> Click "New" button to create a new module >> Select "AcyMailing Module" module.
- Backend Settings: Module/ Advanced Options
Position: bottom1 - Module: Custom
Frontend Appearance

To configure this module, please go to Extensions >> Module Manager >> Click "New" button to create a new module >> Select "Custom" module.
Copy & Paste the code into your editor:
                                   <div class="footer-info">
                                   <div class="item-info col-sm-6 col-xs-12">
                                <div class="content-info">
                                 <div class="logo-footer"><img src="images/logo.png" alt="" /></div>
                                <p>Joomla Directory Template</p>
                                <ul class="list_social">
                                 <li><a href="https://www.facebook.com/SmartAddons.page" target="_blank"><i class="fa fa-facebook">facebook</i></a></li>
                                <li><a href="https://twitter.com/smartaddons" target="_blank"><i class="fa fa-twitter">twitter</i></a></li>
                                 <li><a href="https://plus.google.com/+Smartaddons" target="_blank"><i class="fa fa-google-plus">google</i></a></li>
                                     <li><a href="https://www.youtube.com/user/smartaddons" target="_blank"><i class="fa fa-youtube">youtube</i></a></li>
                                     </ul>
                                    </div>
                                   </div>
                                  <div class="item-info col-sm-6 col-xs-12">
                                  <div class="content-info">
                                  <ul class="list-info">
                                  <li class="item"><span class="key">A: </span>100 N Atlantic Ave, Daytona Beach, FL 32118, US</li>
                                  <li class="item"><span class="key">P: </span> (+123)4 567 8901 - (+122)4 567 8901</li>
                                  <li class="item"><span class="key">E: </span>Support@SmartAddons.Com</li>
                                  </ul>
                                  </div>
                                  </div>
                                  </div>
Position: bottom2 - Module: Custom
Frontend Appearance

To configure this module, please go to Extensions >> Module Manager >> Click "New" button to create a new module >> Select "Custom" module.
Copy & Paste the code into your editor:
                               <ul class="list-business">
                               <li class="item"><a title="" href="#">Courses</a></li>
                               <li class="item"><a title="" href="#">Events</a></li>
                               <li class="item"><a title="" href="#">Teachers</a></li>
                               <li class="item"><a title="" href="#">Blog</a></li>
                               <li class="item"><a title="" href="#">Graduation</a></li>
                               </ul>
Position: bottom3 - Module: Custom
Frontend Appearance

To configure this module, please go to Extensions >> Module Manager >> Click "New" button to create a new module >> Select "Custom" module.
Copy & Paste the code into your editor:
                               <ul class="list-our-team">
                               <li class="item"><a title="" href="#">Africa</a></li>
                               <li class="item"><a title="" href="#">Asia</a></li>
                               <li class="item"><a title="" href="#">Europe</a></li>
                               <li class="item"><a title="" href="#">Nouth America</a></li>
                               <li class="item"><a title="" href="#">South America </a></li>
                               </ul>
Position: bottom4 - Module: Custom
Frontend Appearance

To configure this module, please go to Extensions >> Module Manager >> Click "New" button to create a new module >> Select "Custom" module.
Copy & Paste the code into your editor:
                          <ul class="list-our-team">
                          <li class="item"><a title="" href="#">Who We Are</a></li>
                          <li class="item"><a title="" href="#">How It Works</a></li>
                          <li class="item"><a title="" href="#">Executive Team</a></li>
                          <li class="item"><a title="" href="#">Online Support</a></li>
                          <li class="item"><a title="" href="#">Our Story</a></li>
                          </ul>
Position: bottom5 - Module: Custom
Frontend Appearance

To configure this module, please go to Extensions >> Module Manager >> Click "New" button to create a new module >> Select "Custom" module.
Copy & Paste the code into your editor:
                         <ul class="list-our-team">
                         <li class="item"><a title="" href="#">About Us</a></li>
                         <li class="item"><a title="" href="#">Contact Us</a></li>
                         <li class="item"><a title="" href="#">Top Sellers</a></li>
                         <li class="item"><a title="" href="#">Privacy Policy</a></li>
                         <li class="item"><a title="" href="#">Term of Services </a></li>
                         </ul>
Position: bottom6 - Module: Custom
Frontend Appearance

To configure this module, please go to Extensions >> Module Manager >> Click "New" button to create a new module >> Select "Custom" module.
Copy & Paste the code into your editor:
<ul class="list-our-team">
<li class="item"><a title="" href="#">Web & Print Industry</a></li>
<li class="item"><a title="" href="#">Development</a></li>
<li class="item"><a title="" href="#">Photoshop Learning</a></li>
<li class="item"><a title="" href="#">Marketing & SEO</a></li>
<li class="item"><a title="" href="#">Illustrator Tutorial</a></li>
</ul>
Position: bottom7 - Module: K2 Tools
Extension Configuration Layout2
Position: content_top1
1. Module: Login
Frontend Appearance

To configure this module,please go to Extensions >> Module Manager >> Click "New" button to create a new module >> Select "Login" module.
- Backend Settings: Module/ Advanced Options
2. Module: Language Switcher
Frontend Appearance

To configure this module, please go to Extensions >> Module Manager >> Click "New" button to create a new module >> Select "Language Switcher" module.
- Backend Settings: Module/ Advanced Options
Position: content_top3
Module: Sj Flat Menu
Frontend Appearance

To configure this module, please go to Extensions >> Module Manager >> Click "New" button to create a new module >> Select "Sj Flat Menu" module.
- Backend Settings: Module/ Advanced Options
Position: slideshow - Module: SJ Extra Slider for Content
Frontend Appearance

To configure this module, please go to Extensions >> Module Manager >> Click "New" button to create a new module >> Select "SJ Extra Slider for Content" module.
- Backend Settings: Module/ Source Options/ Item Options/ Image Options/ Effect Options/ Advanced Options
Position: content_main1
1. Module: Custom
Frontend Appearance

To configure this module, please go to Extensions >> Module Manager >> Click "New" button to create a new module >> Select "Custom" module.
- Backend Settings: Module/ Advanced Options
Copy & Paste the code into your editor:
<div class="sj-popular">
<div class="title-global2">
<h3>Popular Locations</h3>
<div class="note">Sed ut perspiciatis unde omnis iste natus error sit voluptatem accusantium</div>
<div class="sub-hr"><i class="fa fa-globe">sub</i></div>
</div>
<div class="content-popular">
<div class="content-top">
<div class="col col7">
<div class="item-image"><img src="images/popular_location/uni1-index2.jpg" alt="San Francisco" /></div>
<h3 class="title-loca"><a href="#">San Francisco</a></h3>
</div>
<div class="col col3">
<div class="item-image"><img src="images/popular_location/uni2-index2.jpg" alt="Los Angeles" /></div>
<h3 class="title-loca"><a href="#">Los Angeles</a></h3>
</div>
</div>
<div class="content-bottom">
<div class="col col3">
<div class="item-image"><img src="images/popular_location/uni3-index2.jpg" alt="California" /></div>
<h3 class="title-loca"><a href="#">California</a></h3>
</div>
<div class="col col3">
<div class="item-image"><img src="images/popular_location/uni4-index2.jpg" alt="Texas" /></div>
<h3 class="title-loca"><a href="#">Texas</a></h3>
</div>
<div class="col col3">
<div class="item-image"><img src="images/popular_location/uni5-index2.jpg" alt="Colorado" /></div>
<h3 class="title-loca"><a href="#">Colorado</a></h3>
</div>
</div>
</div>
</div>
Position: content_main2 - Module: Sj K2 Accordion
Frontend Appearance

To configure this module, please go to Extensions >> Module Manager >> Click "New" button to create a new module >> Select "SSj K2 Accordion" module.
- Backend Settings: Module/ Source Options/ Items Options/ Image Options/ Advanced
Position: content_main3 - Module: Sj K2 Accordion
Frontend Appearance

To configure this module, please go to Extensions >> Module Manager >> Click "New" button to create a new module >> Select "Sj K2 Accordion" module.
- Backend Settings: Module/ Source Options/ Items Options/ Image Options/ Effect Advanced
Position: right
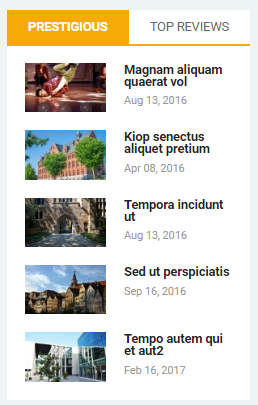
1. Module: Sj Module Tabs
Frontend Appearance

To configure this module, please go to Extensions >> Module Manager >> Click "New" button to create a new module >> Select "Sj Module Tabs" module.
- Backend Settings: Module/ Advanced Options
2. Module: Custom HTML
Frontend Appearance

To configure this module, please go to Extensions >> Module Manager >> Click "New" button to create a new module >> Select "Custom HTML " module.
- Backend Settings: Module/ Advanced Options
Copy & Paste the code into your editor:
<div class="box-image"><a href="#"><img src="images/demo/bn-sb-index2.jpg" alt="banner" /> </a></div>
3. Module: SJ Extra Slider for K2
Frontend Appearance

To configure this module, please go to Extensions >> Module Manager >> Click "New" button to create a new module >> Select "SJ Extra Slider for K2 " module.
- Backend Settings: Module/ Source Options/ Items Options/ Image Options/ Effect Advanced
Position: content_main4
Module: Custom HTML
Frontend Appearance

To configure this module, please go to Extensions >> Module Manager >> Click "New" button to create a new module >> Select "Custom HTML" module.
- Backend Settings: Module/ Advanced Options
<div class="sj-works">
<div class="title-global2">
<h3>Popular Locations</h3>
<div class="note">Sed ut perspiciatis unde omnis iste natus error sit voluptatem accusantium</div>
<div class="sub-hr"><i class="fa fa-globe">sub</i></div>
</div>
<div class="content-works">
<ul class="list-step">
<li>
<div class="item-image active"><i class="fa fa-code-fork">choose a category</i></div>
<div class="item-content">
<h3><span class="number">1. </span><span class="title"> Choose a Category</span></h3>
<div class="desc">Sed ut perspiciatis unde omnis iste natus error voluptatem accusantium doloremque</div>
</div>
</li>
<li>
<div class="item-image"><i class="fa fa-map-marker"> Find Locations</i></div>
<div class="item-content">
<h3><span class="number">2. </span><span class="title">Find Locations</span></h3>
<div class="desc">Lorem ipsum dolor sit amet, consectetur adipisicing elit, sed do eiusmod tempor incididunt</div>
</div>
</li>
<li>
<div class="item-image"><i class="fa fa-smile-o">Go Have Fun</i></div>
<div class="item-content">
<h3><span class="number">3. </span><span class="title"> Go Have Fun</span></h3>
<div class="desc">Lorem ipsum dolor sit amet, consectetur adipisicing elit, sed do eiusmod tempor incididunt</div>
</div>
</li>
</ul>
</div>
</div>
Position: content_main5 - Module: K2 Content
Frontend Appearance

To configure this module, please go to Extensions >> Module Manager >> Click "New" button to create a new module >> Select "K2 Content" module.
Position: content_main6 - Module: Custom
Frontend Appearance

To configure this module, please go to Extensions >> Module Manager >> Click "New" button to create a new module >> Select "Custom" module.
Copy & Paste the code into your editor:
                                          <ul class="list">
<li class="item"><a title="" href="#"><img src="images/demo/brand2/brand1.jpg" alt="" /></a></li>
<li class="item"><a title="" href="#"><img src="images/demo/brand2/brand2.jpg" alt="" /></a></li>
<li class="item"><a title="" href="#"><img src="images/demo/brand2/brand3.jpg" alt="" /></a></li>
<li class="item"><a title="" href="#"><img src="images/demo/brand2/brand4.jpg" alt="" /></a></li>
<li class="item"><a title="" href="#"><img src="images/demo/brand2/brand5.jpg" alt="" /></a></li>
<li class="item"><a title="" href="#"><img src="images/demo/brand2/brand6.jpg" alt="" /></a></li>
<li class="item"><a title="" href="#"><img src="images/demo/brand2/brand7.jpg" alt="" /></a></li>
<li class="item"><a title="" href="#"><img src="images/demo/brand2/brand8.jpg" alt="" /></a></li>
<li class="item"><a title="" href="#"><img src="images/demo/brand2/brand9.jpg" alt="" /></a></li>
<li class="item"><a title="" href="#"><img src="images/demo/brand2/brand10.jpg" alt="" /></a></li>
<li class="item"><a title="" href="#"><img src="images/demo/brand2/brand11.jpg" alt="" /></a></li>
<li class="item"><a title="" href="#"><img src="images/demo/brand2/brand12.jpg" alt="" /></a></li>
<li class="item"><a title="" href="#"><img src="images/demo/brand2/brand13.jpg" alt="" /></a></li>
<li class="item"><a title="" href="#"><img src="images/demo/brand2/brand14.jpg" alt="" /></a></li>
</ul>
Position: bottom7 - Module: Custom
Frontend Appearance

To configure this module, please go to Extensions >> Module Manager >> Click "New" button to create a new module >> Select "Custom" module.
Copy & Paste the code into your editor:
										<div class="about-footer2">
<div class="col-md-3 col-logo"><img src="images/logo2.png" alt="Directory" /></div>
<div class="col-md-6 col-about">
<h3>about us</h3>
<div class="desc">Lorem ipsum dolor sit amet, consectetur adipisicing elit, sed do eiusmod tempor incididunt ut labore et dolore magna aliqua. Ut enim ad minim veniam, quis nostrud exercitation ullamco laboris nisi ut aliquip ex ea commodo consequat.</div>
</div>
<div class="col-md-3 col-social">
<h3>Follow Us</h3>
<ul class="list_social">
<li><a href="https://www.facebook.com/SmartAddons.page" target="_blank"><i class="fa fa-facebook">facebook</i></a></li>
<li><a href="https://twitter.com/smartaddons" target="_blank"><i class="fa fa-twitter">twitter</i></a></li>
<li><a href="https://plus.google.com/+Smartaddons" target="_blank"><i class="fa fa-google-plus">google</i></a></li>
<li><a href="https://www.youtube.com/user/smartaddons" target="_blank"><i class="fa fa-youtube">youtube</i></a></li>
</ul>
</div>
</div>
Copyright
To remove Designed by SmartAddons.Com at the footer of template, please purchase our Copyright Removal here
Support
Thank you so much for purchasing this template. If you have any questions that are beyond the scope of this help file, please send us via: Submit a Ticket
Thanks so much!


