User Guide - BigCommerce SB TopDeal
- Created: 9/8/2018
- By: Revotheme
TopDeal multipurposeBigCommerce theme base on stencil framework, It is suitable for HiTech Shop, electronic, Fashion store,or any eCommerce site. It is also multipurpose theme which can be used for any kind of online store. TopDeal BigCommerce theme is looking good with it’s clean and fresh design.
New to BigCommerce?
If you're setting up a BigCommerce store for the first time, we highly recommend heading over to their site and taking a look at their support resources. From their community forums to their documentation to their BigCommerce University video series, they have everything you need to start your ecommerce journey on the right foot.
Here are a few articles that cover the basics of setting up a store:
The BigCommerce dashboard
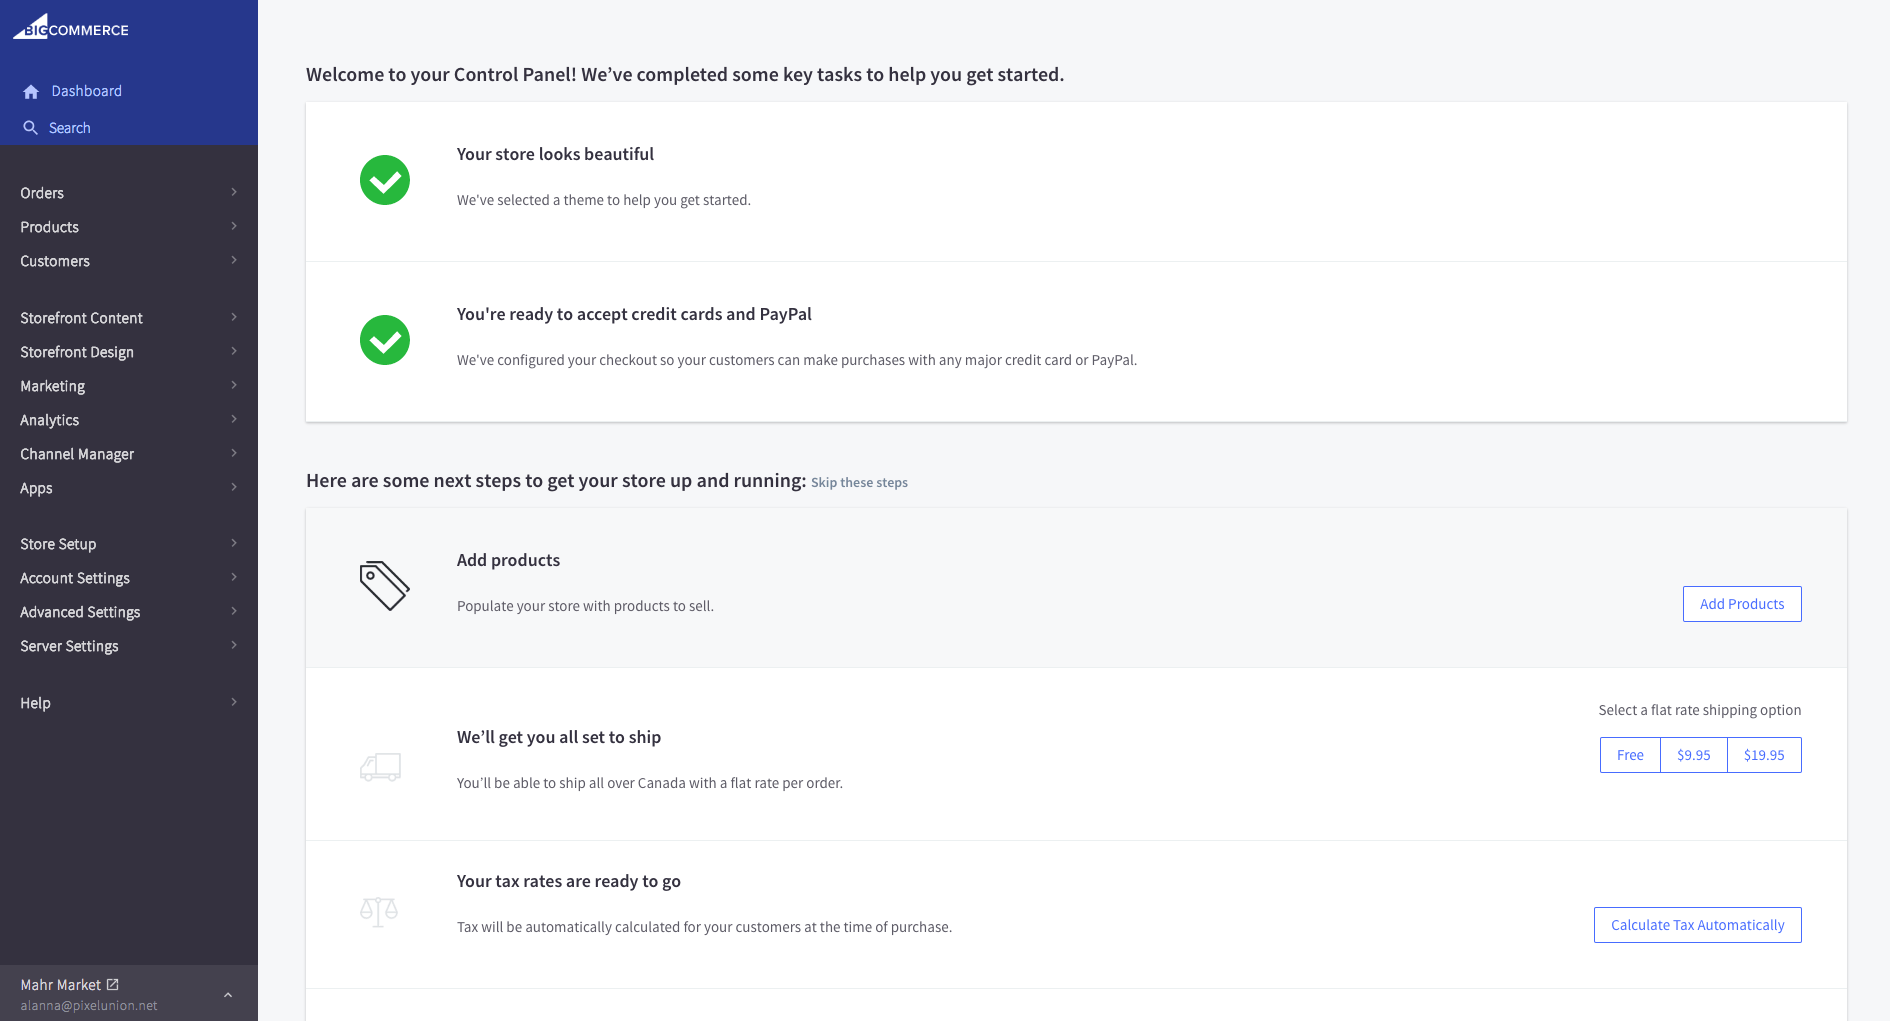
This is what your dashboard will look like when you first sign up for BigCommerce. You can go just about anywhere and do just about anything from here. It can be a little overwhelming at first, which is why we recommend taking a quick guided tour to get your bearings.
Our documentation deals primarily with customizing the content and design of your store. If you're looking at the dashboard, we'll be covering the items listed under Storefront Content, Storefront Design, and a little bit of TopDealing in these docs. If you're looking for basic information on how to add products, configure categories, set shipping rates, or anything else that isn't directly related to your theme, please consult BigCommerce's documentation or contact their support center.
Installing Theme
- Login to your BigCommerce store's admin page.
- Go to Storefront Design › My Themes.
- Click button Upload Theme. On the popup, click button Select theme from your computer.
- Choose the zip file
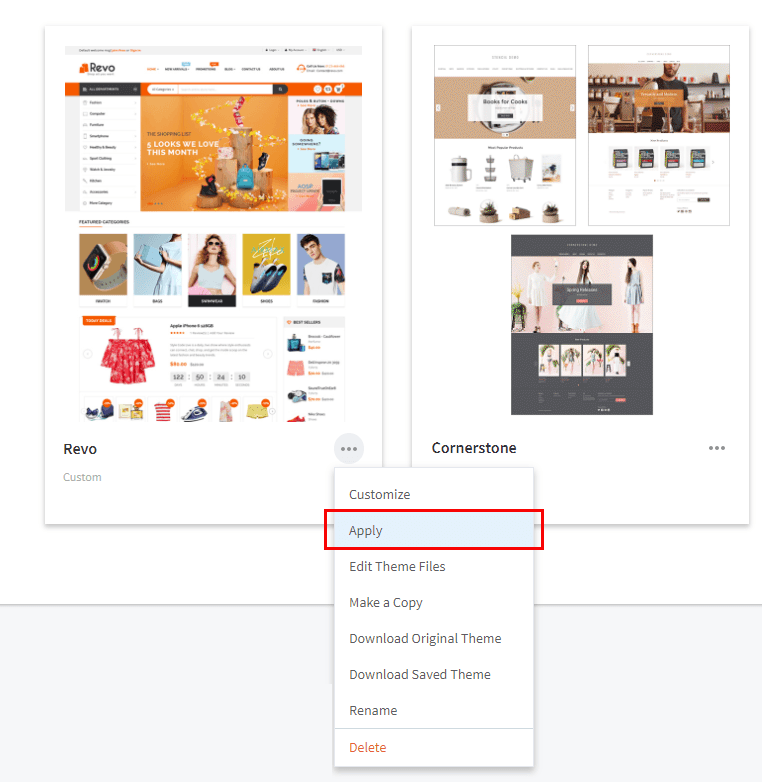
sb_topdeal_theme_x.zipto start installing the theme. Waiting for the uploading completed. - When a new theme appears, click on the button Apply Theme as showing below:

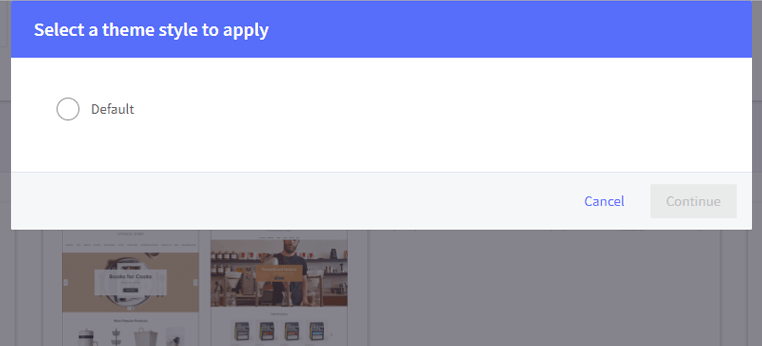
Then choose a style you want to use:
Refresh your store's front page you should see the theme installed successfully.
- Go to, Perform web demo configuration:
-
Read Connecting to WebDAV with CyberDuck
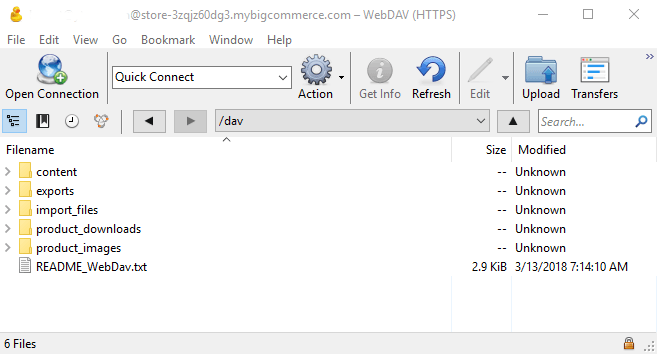
- When the login is successful, you will see your store's folders.
-
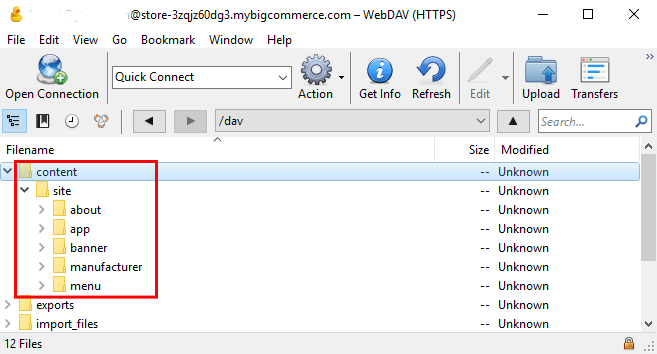
Extract the image - archive file which you downloaded into your PC:
sample_data_market.zipUploadsample_data_market/http://images.smartaddons.com/bigecommerce-images/sb-market/sitefolders you to into your CyberDuck folder content
-
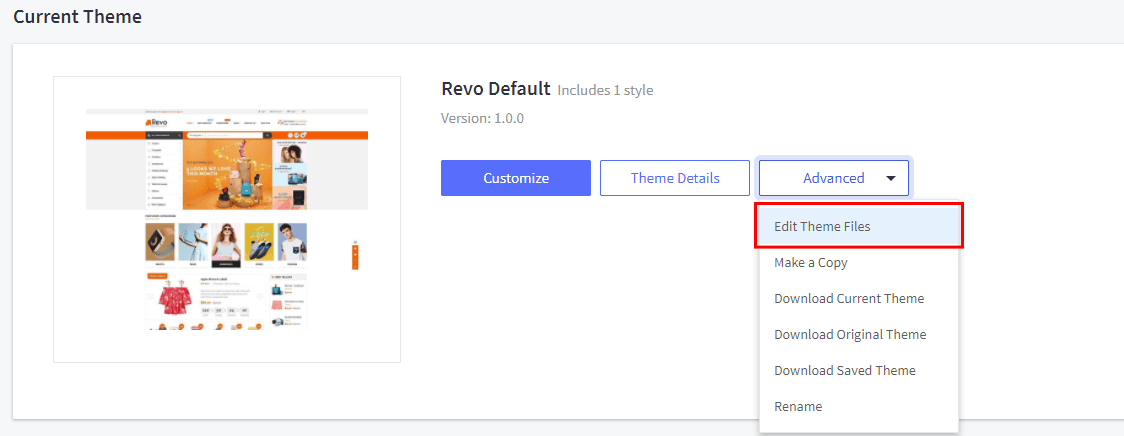
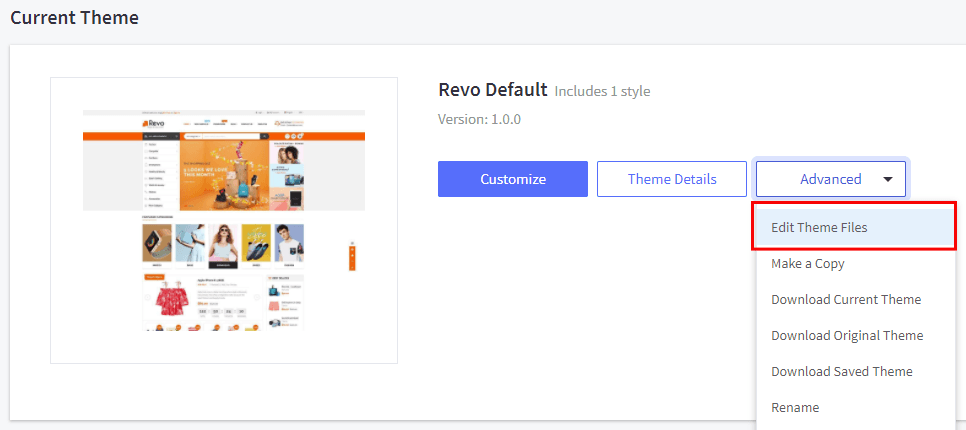
To edit the language file - Go to admin page › Storefront Design › My Themes, click button Advanced › Edit Theme Files of the current theme:
-
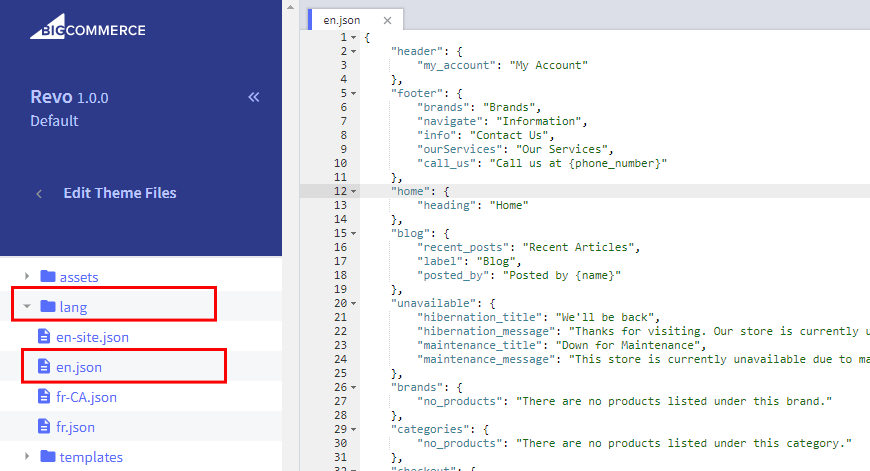
From the left navigation- click to edit the language file
en-full.json, en.jsoncopy all content fromen-full.json to en.json. Click on button save
en.json- the language file contains image placeholderen-full.json- the language file contains image as demo site
- Refresh your store's front page you should see the theme installed successfully.

Guide create new web pages as demo site
Note
You want to see more add web page : Click here
- Adding Web Pages- Go to Storefront › Web Pages, then click Create a Web Page.
-
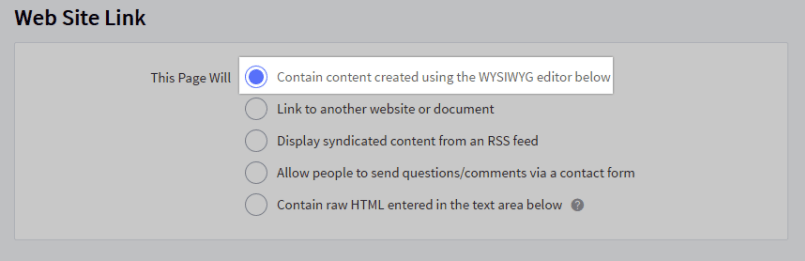
For This Page Will - select Contain content created using the WYSIWYG editor below.
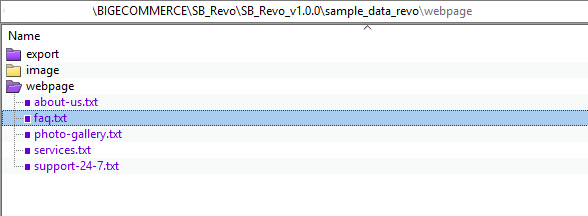
- Extract the web pages - archive file which you downloaded into your PC:
sample_data_market.zip.
-
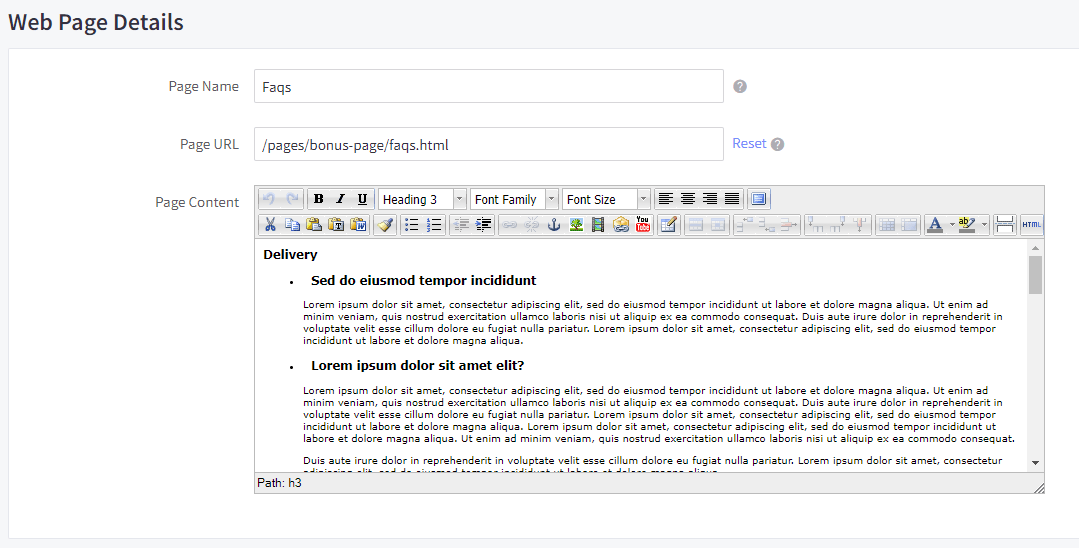
Example (open file webpage/faq.text ) - copy content to include in the Page Content section. The Page Content section has the same functionality as the WYSIWYG Editor in your product pages.
- Save your changes.Refresh your store's front page

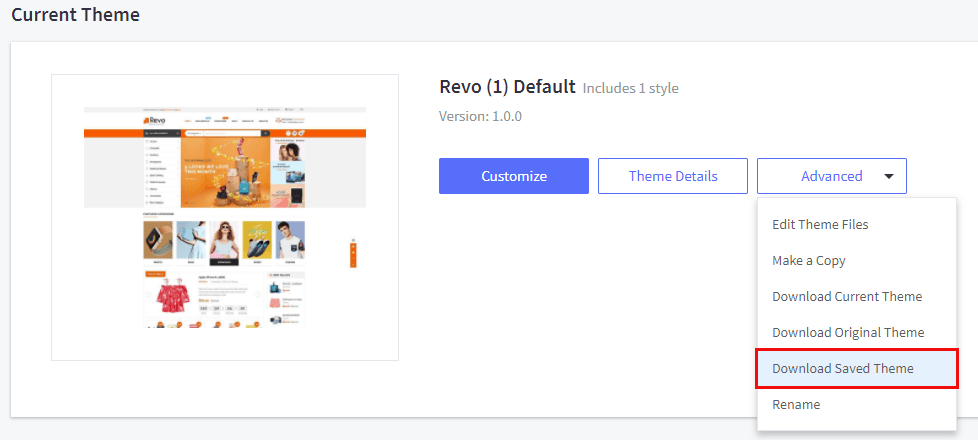
1. Go to admin › Storefront › My Themes, then click Advanced › Download Saved Theme of the current theme.
2. Go to Themeforest › Download the updated package.
3. Open archive file (For example: revo_update_version.zip) which you downloaded in step 2.
It has 2 file (changelog.html, README.txt)
4. If you do not overrider core of theme. You copy all code for package theme.
Or use the compare tool (Beyond Compare ) to compare files code
When the Complete, you zip back the theme package file
5.You reinstall your theme . Refresh your store's front page you should see the successfully.
Quick Start Guide
This theme provides a powerful Theme Editor with many options let you change styles, colors, fonts and more.
Note
You want to see more Using the Stencil Theme Editor: Click here
To get started- go to Storefront › My Themes, then click Customize.
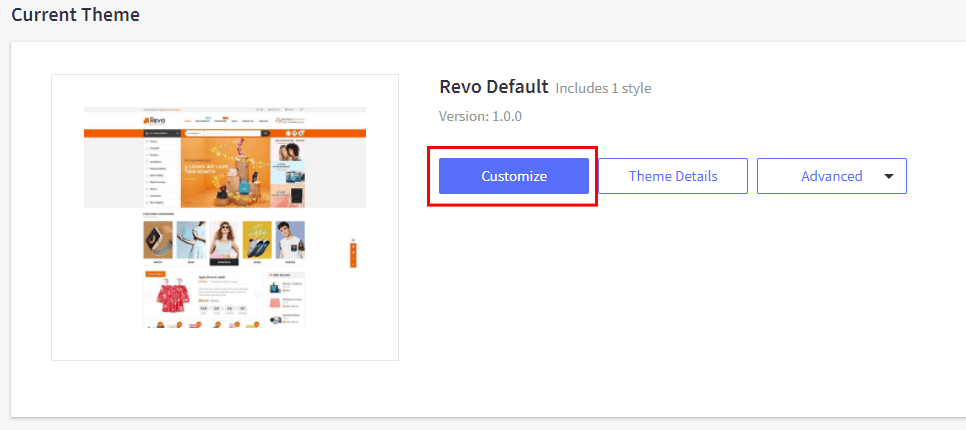
See the complete guide of Theme Editor in chapter Theme Settings.
Language files contains hard-coded static text, images and other links, which can be edited and translated to any languages.
1.To get started - Go to admin › Storefront › My Themes, then click Advanced › Edit Theme Files of the current theme.
2.From the left navigation - click to edit the language file (e.i en.json)
Edit template files is not recommended, unless you have HTML, CSS and Sass programming skills.
You can edit the HTML files, SCSS files, images. However remember to backup your changed files as they are overwritten when you upgrade the theme.
Go to admin › Storefront › My Themes, then click Advanced › Edit Theme Files of the current theme.
- All HTML files are in directory
templates. - All Sass files are in directory
assets/scss. - Images are placed in directory
assets/img.
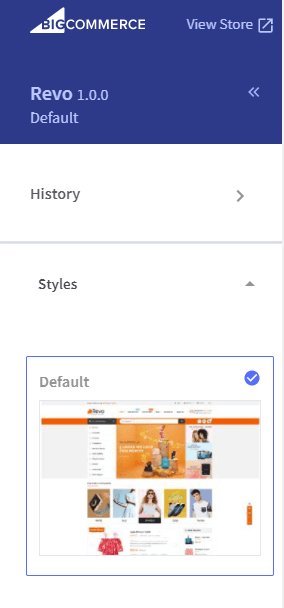
To activate a theme style, open Theme Editor, find Styles section, click on the theme variation's thumbnail to activate corresponding style. Theme only one styles
Note
- Copy / backup this file for future theme upgrade.
- Add custom CSS code required CSS (or Sass) programming skill. It's not recommended for new users.
Go to admin › Storefront › My Themes, then click Advanced › Edit Theme Files of the current theme.
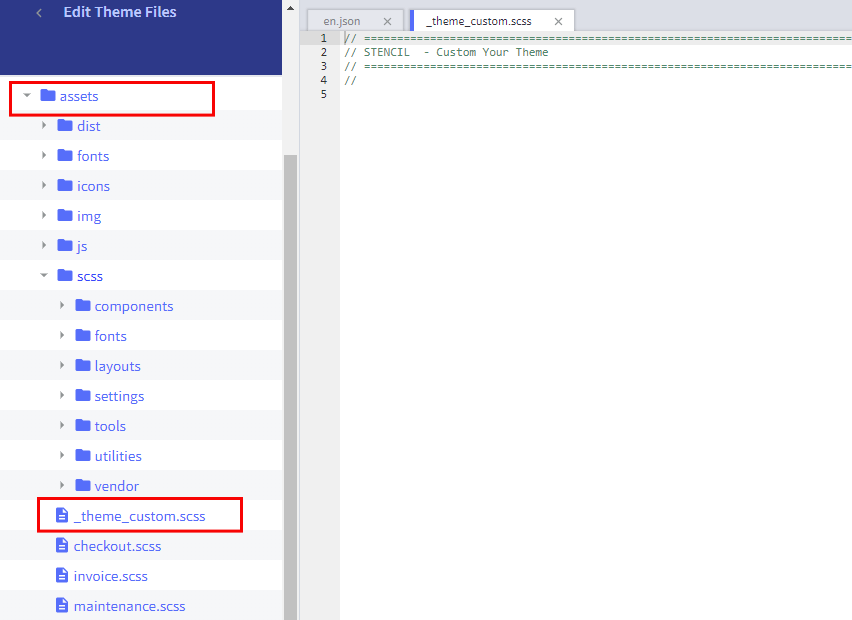
From the left navigation - To add your own custom CSS code you can edit the file assets/scss/_theme-custom.scss_ in Edit Theme Files editor:
The template language file is located in the lang folder. You have one called en.json which has the full English translation. You will need to copy and paste the data from en.json to the fr.json file and then translate the key-value pairs. Basically it will automatically change the language based on the user's browser settings.
Here's more information on how the localization works:
https://stencil.bigcommerce.com/docs/localization-file-structure
And here you can find the additional translation needed for the multi-language checkout:
https://stencil.bigcommerce.com/docs/multi-language-checkout
-
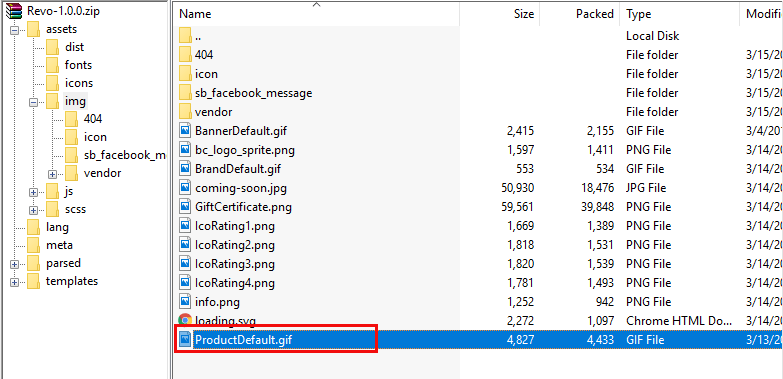
Go to admin › Storefront › My Themes, then click Advanced › Download Saved Theme of the current theme.
-
Open archive file which you downloaded into your PC, overwrite image file
ProductDefault.gifarchive file
- You reinstall your theme . Refresh your store's front page you should see the successfully.
Theme settings
Theme Settings or Theme Editor is a graphical user interface, lets you configure all features which the theme supports.
Go to admin › Storefront › My Themes, on the Current Theme section, click Customize button
This section shows all the theme's variations. You can change other style here.
1.Global color - This section lets you change colors of common elements, load indicator and overlays.
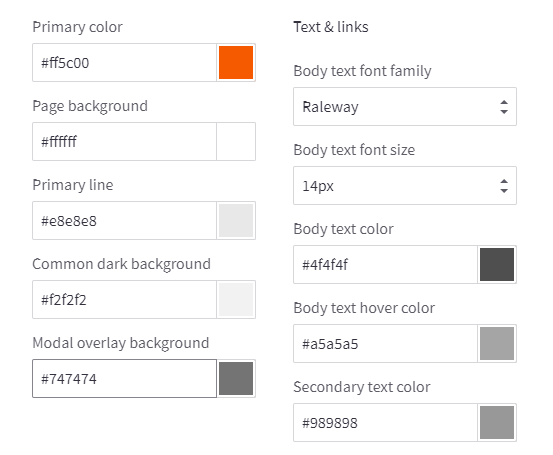
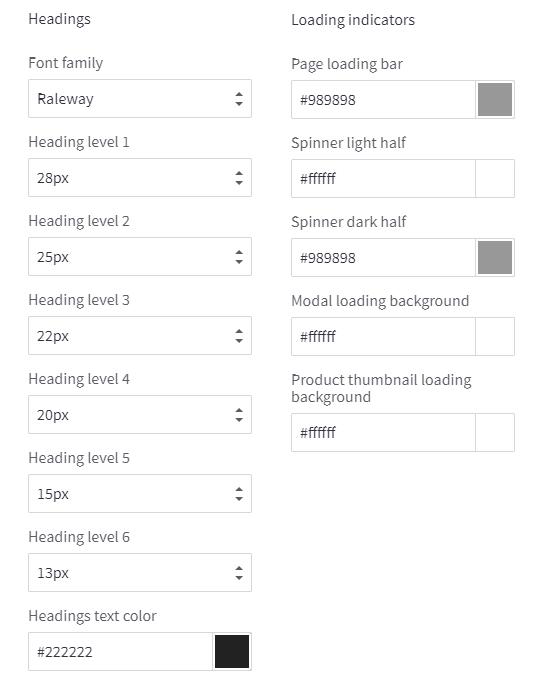
2.Typography - This section lets you change fonts, font sizes, colors of the logo, body text, headings, links, icons, ratings and other common elements.
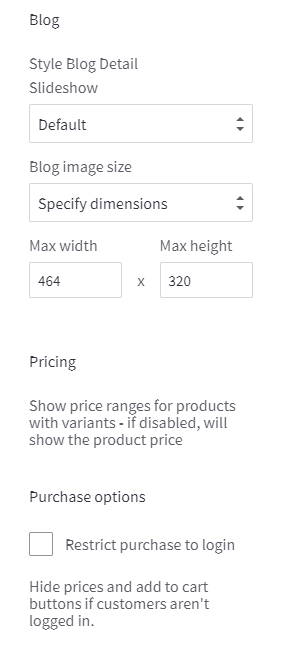
3.Blogs - This section lets you configure blog post image sizes.
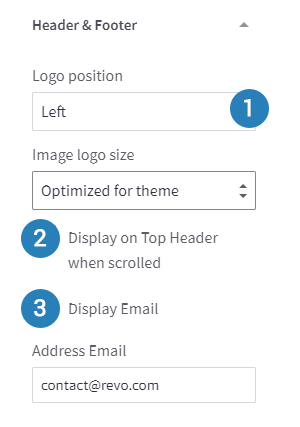
1.Logo position - This section lets you configure logo position and size.
2.Display on Top Header - This section lets you configure header on top when scroll
3.Display Email - This section lets you configure Email (Show/Hide)

4.Footer Menus & Payment icons - This section lets you configure footer menus & playment icon (Show/Hide )
5.GeoTrust SSL - Show/Hide GeoTrust SSL seal and configure seal size.
This section let you configure the SB Theme Setting:
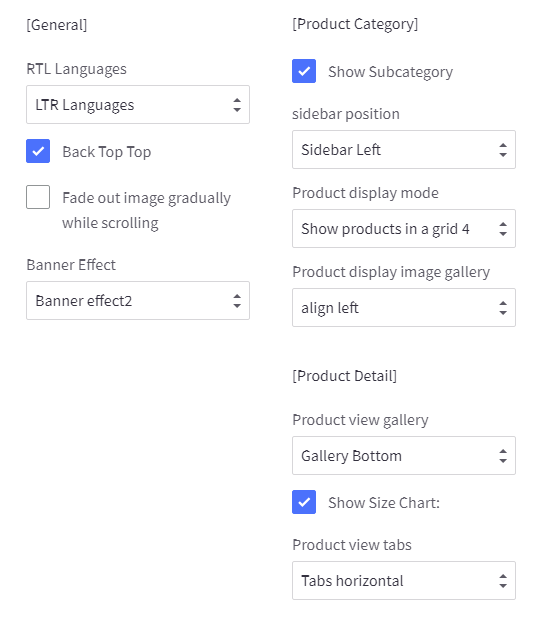
1.Configure General:
RTL Languages: Theme support RTL Languages
Back Top Top: allows users to smoothly scroll back to the top of the page.
Fade out image gradually while scrolling: scrolling create effect image fade
Banner Effect: Have all 12 effect banner you choose
2.Configure Product Category
Show Subcategory: Show/Hide Subcategory

Sidebar position: Select one in option ( Sidebar Left | Sidebar Right | Widthout Sidebar )
Product display mode: Column number display page category
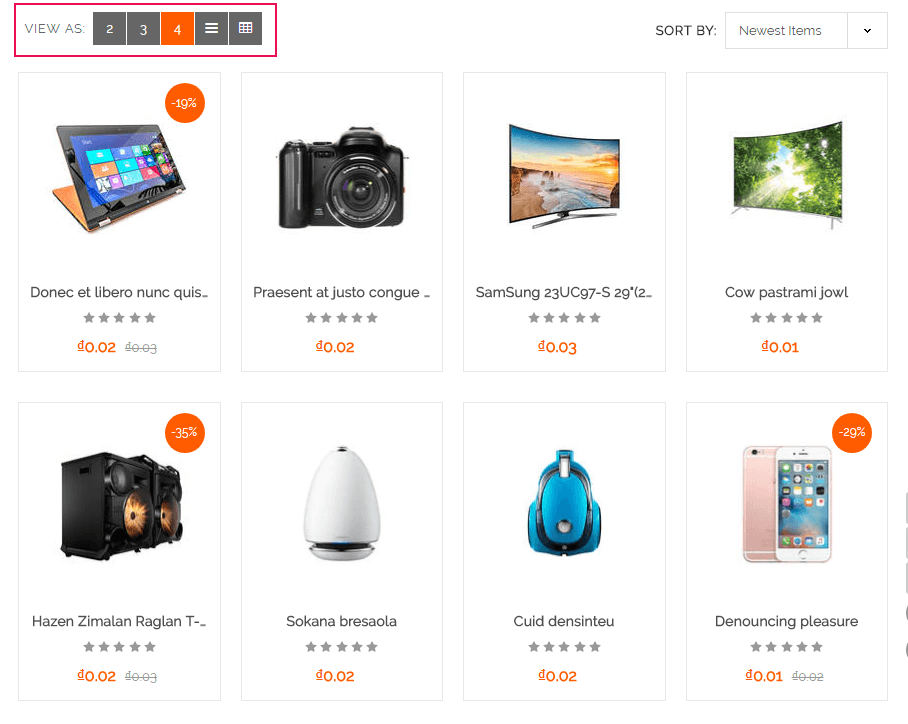
Product display image gallery: max item = 3
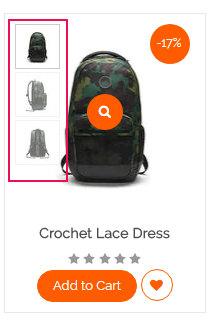
3.Product Detail
Product view gallery: Select one in option ( Gallery Bottom| Gallery Left| Gallery Grid | Gallery list )
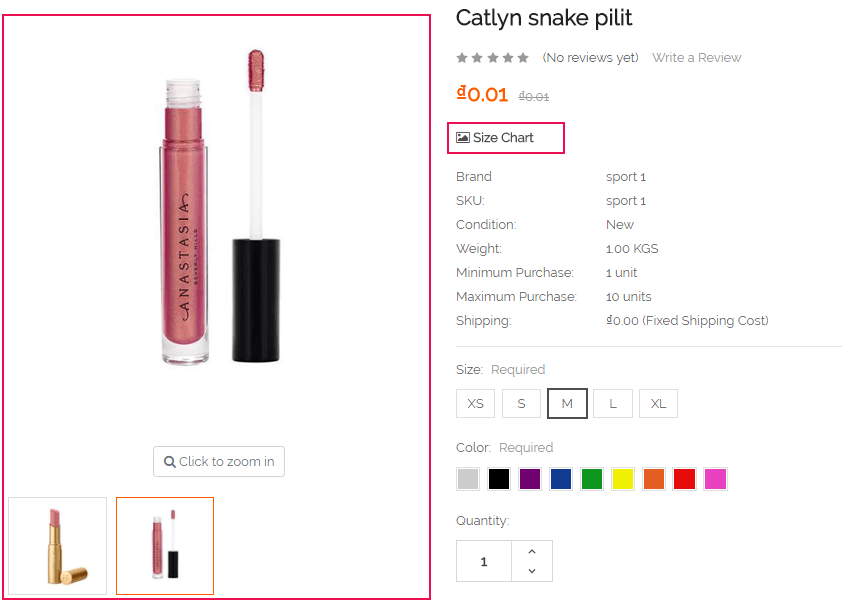
Show Size Chart: add product image size chart.
You can edit url images in the language file en.json in the File Editor, find section sb_themes › products › image_sizechart
Product view tabs: Select one in option(vertical|horizontal)
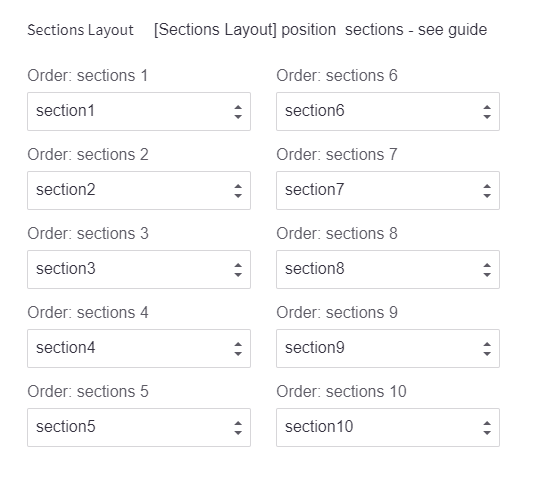
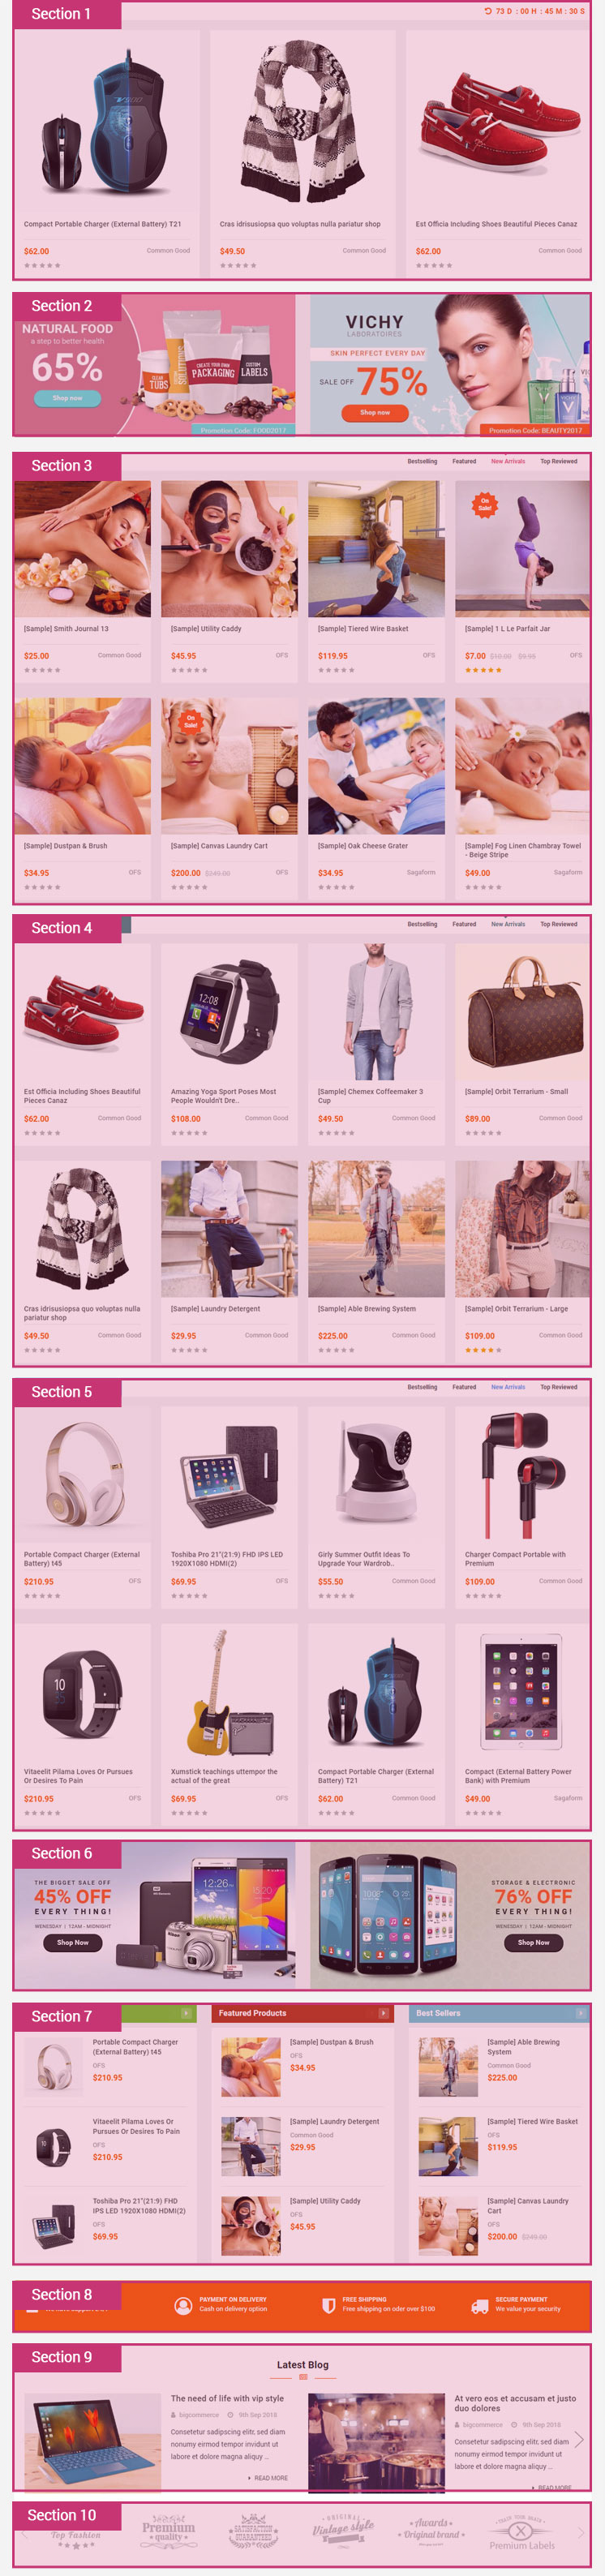
This section let you configure the homepage:
- Show/hide any content blocks and product blocks.
- Rearrange position of any blocks.
Home page 1: Position sections

Home page 2: Position sections
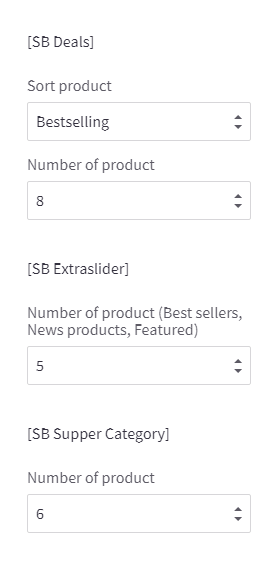
This section let you configure the Module:
- Configure display type of New, Featured, Popular Products blog.
- Number of products to show on each block.
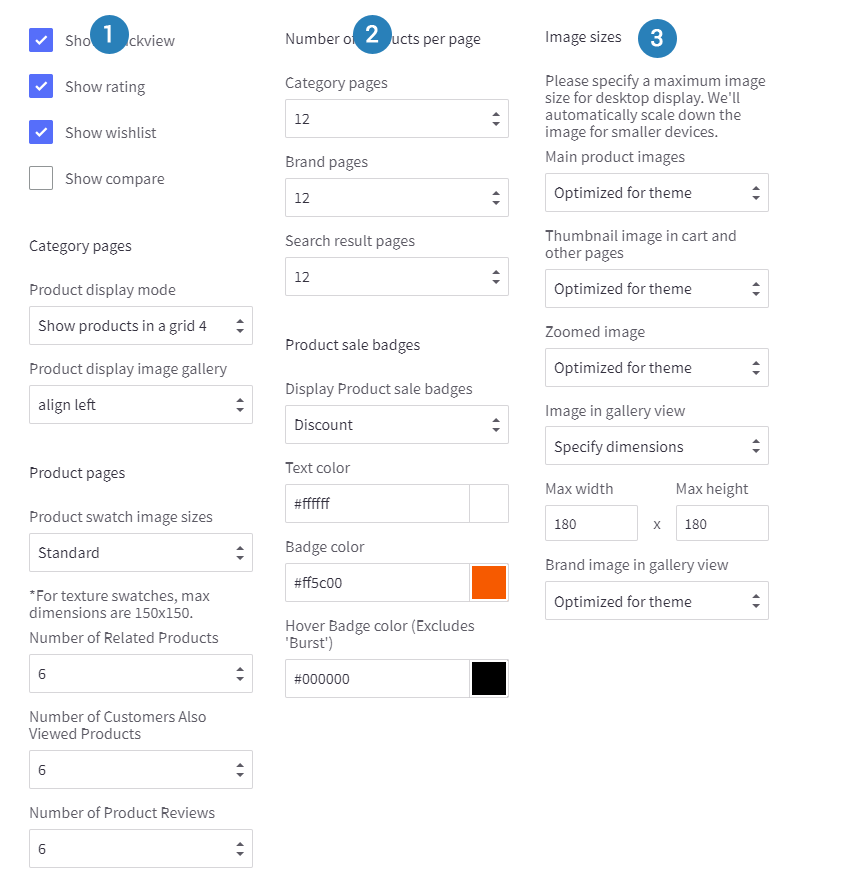
This configuration section lets you:
- Show/Hide Quickview button.
- Configure number of products, reviews, brands, search results showing.
- Configure product image sizes
- Configure Product swatch image sizes.
- Configure position and colors of Product Badges.
- Configure colors of elements of products grid items.
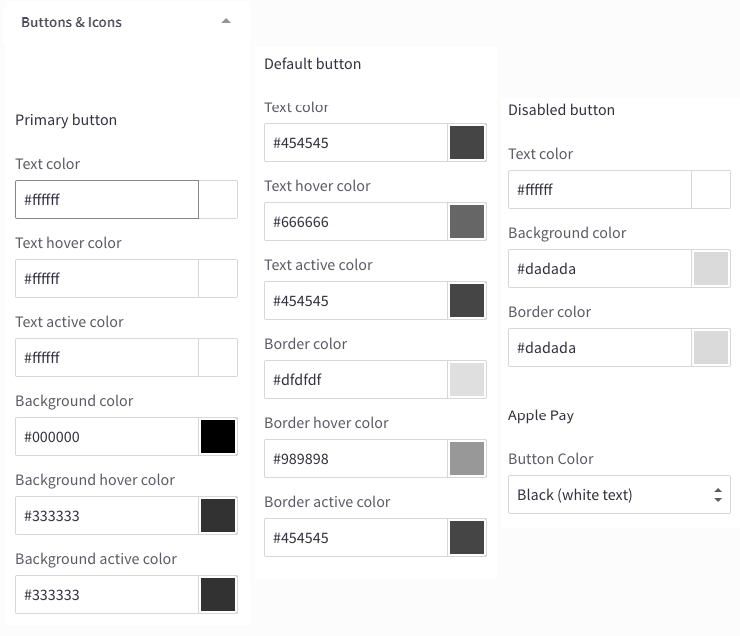
This section lets you change colors of buttons.
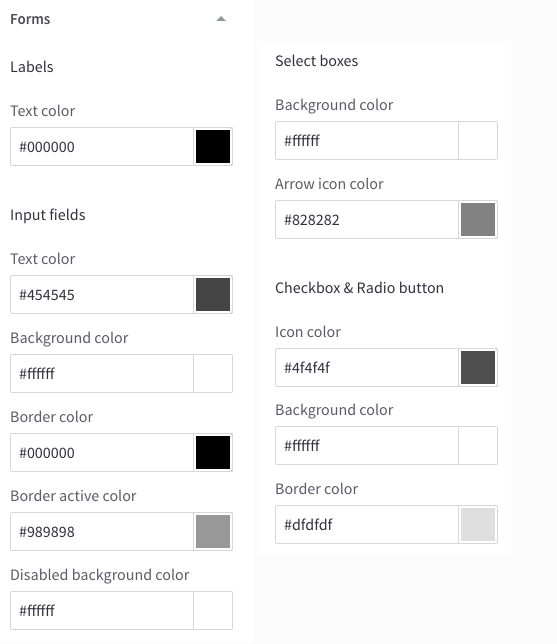
This section lets you change colors, borders, background of the form elements like labels, input boxes, select boxes, checkbox and radios.
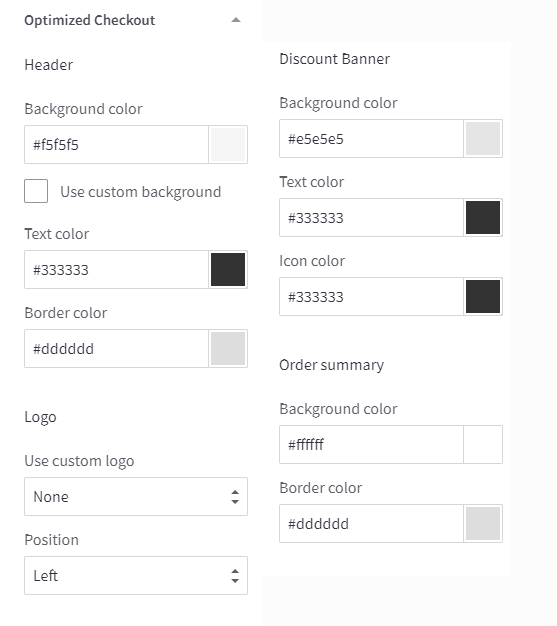
This section lets you change colors, borders, background of header, logo the page checkout
Custommization
- Go to admin › Products › View, then click view product.
- Copy the code below into the view product, then click save
[shortcode][badges]webdav:site/product_label/free_Shipping/2.png[/badges][countdown]12/25/2018[/countdown][/shortcode]
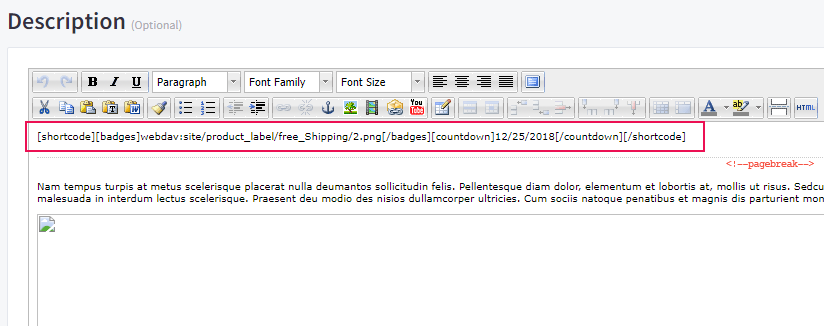
badges- is the image URL.countdown- is the Countdown Timer to Any Date.
-
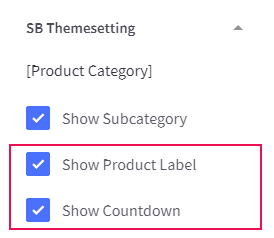
Go to configure the SB Theme Setting,Check if they are enabled or not
Home Page 1
Header Styles
This theme support 3 different header styles: - Logo at left - Logo at right - Logo at center
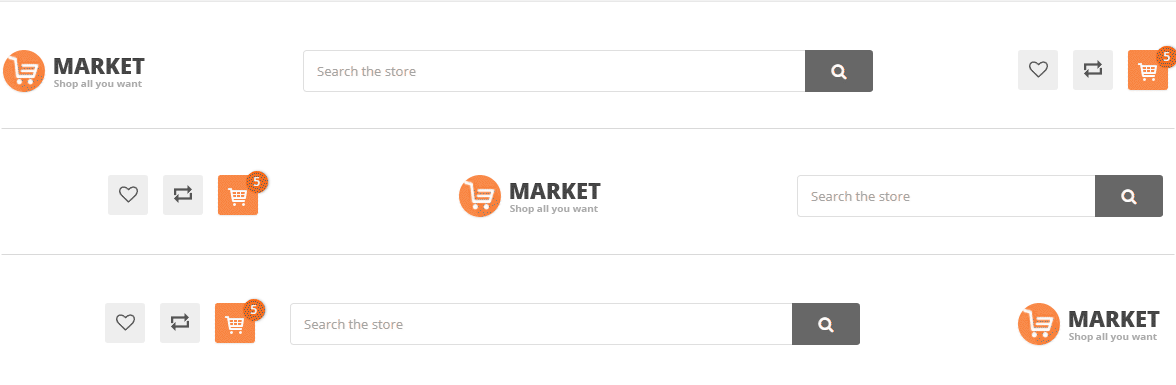
To configure, open the Theme Editor, scroll down to section Logo, click to expand the logo options. Choose a certain option of Logo position, then click Refresh button appear after.
Top Banner
The top banner can be showed / edited in admin page › Marketing › Banners. When you add / edit remember to choose Location is Top of Page.

Promotion Carousel

You can edit Promotion carousel in the language file lang/en.json. Find key sb_custom › promotion:
"promotion": {
                    "item1": {
                        "url": "#",
                    "title": "Free Shipping on all Orders. No Minimum Purchases Required*"
                    },
                    "item2": {
                        "url": "#",
                    "title": "Free 3 day delirery and free returns within the US"
                    },
                    "item3": {
                        "url": "#",
                    "title": "20% Discount on Selected Items"
                    }
},url- is the link url of imagetitle- is the content of promotion.
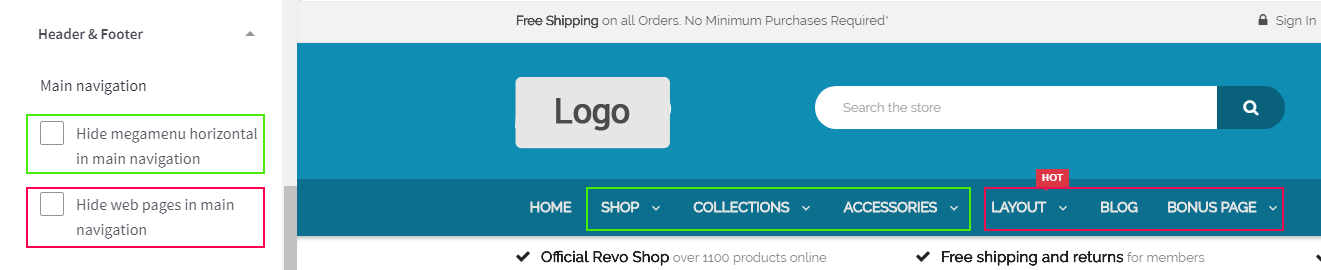
You can configure megamenu horizontal, web page on Main navigation. Header & Footer > Main navigation:
MegaMenu Horizontal
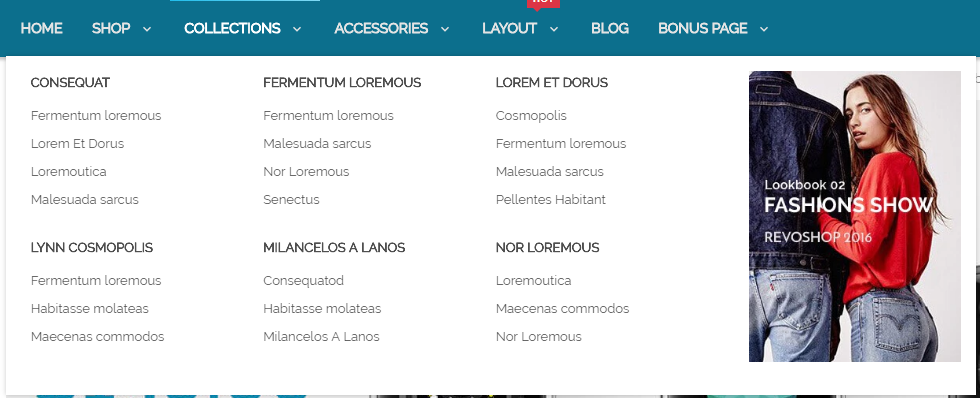
the mega menu Horizontal can be edited in the language file en.json:
"sb_megamenu": {
            "view_all": "View All Products",
            "horizontal": {
                    "menu_cat_0": {
                    "status": "true",
                    "icon-awesome": " ",
                    "icon-image": " ",
                    "menu-badge": " ",
                    "position": "left",
                    "type-menu": "mega",
                    "mega-category-col": "5",
                    "mega-banner-mode": " ",
                    "mega-banner-img": "webdav:site/banner/home1/image-left.jpg",
                    "mega-banner-placeholder": "http://via.placeholder.com/270x369",
                    "mega-banner-url": "#placeholder_link"

                },
                "menu_cat_1": {
                    "status": "true",
                    "icon-awesome": " ",
                    "icon-image": " ",
                    "menu-badge": " ",
                    "position": "left",
                    "type-menu": "mega",
                    "mega-category-col": "3",
                    "mega-banner-mode": "right",
                    "mega-banner-img": "webdav:site/banner/home1/image-left.jpg",
                    "mega-banner-placeholder": "http://via.placeholder.com/270x369",
                    "mega-banner-url": "#placeholder_link"
                },
                "menu_cat_2": {
                    "status": "true",
                    "icon-awesome": " ",
                    "icon-image": " ",
                    "menu-badge": " ",
                    "position": "left",
                    "type-menu": "default",
                    "mega-category-col": "3",
                    "mega-banner-mode": "left",
                    "mega-banner-img": "webdav:site/banner/home1/image-left.jpg",
                    "mega-banner-placeholder": "http://via.placeholder.com/270x369",
                    "mega-banner-url": "#placeholder_link"
                },
            },
},icon-awesome- icon name font awesome, user Fontawesome 4.7icon-image- is the image URL.menu-badge- is the badge (Hot, New, Top...) on menu items.type-menu- is the type menu (default menu, mega menu)position- align menu item (left/right ).
Type mega menu:
mega-category-colcolumn number category display on mega menu.mega-banner-modeis the align banner item (left/right ).mega-banner-imgis the image URL banner.mega-banner-placeholderis the image URL placeholder.mega-banner-urlis the link url of image.
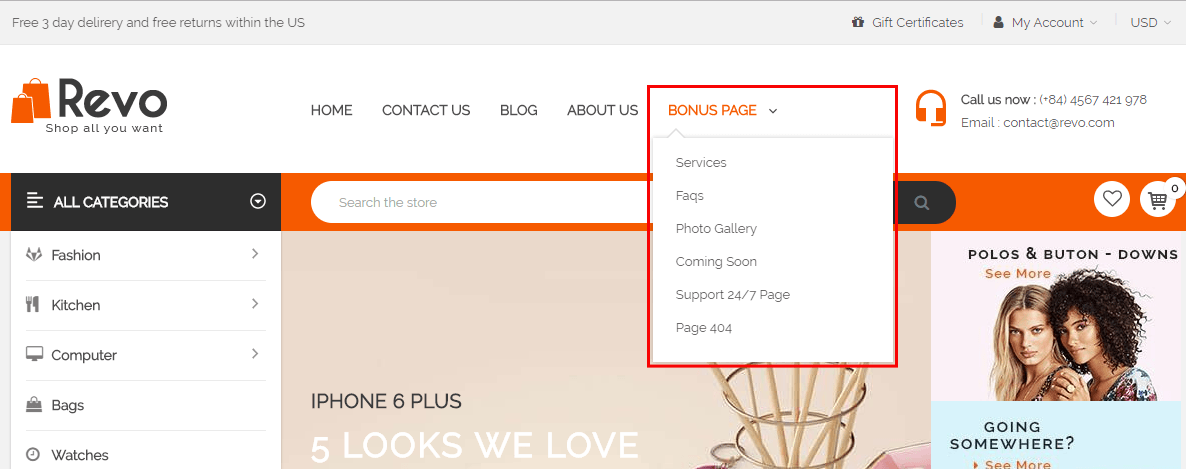
Adding Web Pages For MegaMenu Horizontal
Note
You want to see more add web page : Click here
the menu item web pages can be edited in the language file en.json:
 "webpage": {
            "menu_cat_0": {
                "load-webpage": "yes",
                "icon-awesome": " ",
                "icon-image": " ",
                "menu-badge": "hot",
                "position": "left"
            },
            "menu_cat_1": {
                "load-webpage": "no",
                "icon-awesome": " ",
                "icon-image": " ",
                "menu-badge": " ",
                "position": "left"
},load-webpage- is the loading content of web pageicon-awesome- icon name font awesome, user Fontawesome 4.7icon-image- is the image URL.menu-badge- is the badge (Hot, New, Top...) on menu items.position- align menu item (left/right ).
MegaMenu Vertical
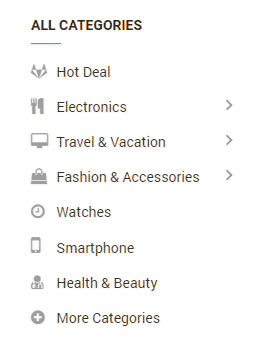
the mega menu Vertical can be edited in the language file en.json:
"vertical": {
            "more_categories": "More Categories",
            "close_categories": "Close Categories",
            "menu_cat_0": {
                "type-menu": "mega",
                "icon-awesome": "gitlab",
                "icon-image": "webdav:site/menu/icon/icon-1.png",
                "content_column": "3",
                "show_banner": "yes",
                "banner_mode": "vertical",
                "image": "webdav:site/banner/home1/6.jpg",
                "placeholderImage": "http://via.placeholder.com/170x470",
                "url": "#"
            },
            "menu_cat_1": {
                "type-menu": "mega",
                "icon-awesome": "cutlery",
                "icon-image": "webdav:site/menu/icon/icon-2.png",
                "content_column": "3",
                "show_banner": "yes",
                "banner_mode": "horizontal",
                "image": "webdav:site/banner/home1/9.jpg",
                "placeholderImage": "http://via.placeholder.com/170x470",
                "url": "#"
            },
            "menu_cat_2": {
                "type-menu": "default",
                "icon-awesome": "desktop",
                "icon-image": "webdav:site/menu/icon/icon-3.png",
                "content_column": "4",
                "show_banner": "yes",
                "banner_mode": "horizontal",
                "image": "webdav:site/banner/home1/9.jpg",
                "placeholderImage": "http://via.placeholder.com/770x140",
                "url": "#"
            },
}type-menu- is the type menu (default menu, mega menu)icon-awesome- icon name font awesome, user Fontawesome 4.7icon-image- is the image URL.content_column- column item show on sub content.show_banner- Show/Hide bannerbanner_mode- Show banner with value (horizontal/vertical)image- is the image URLplaceholderImage- is the image URL bannerurl- is the link url of image banner

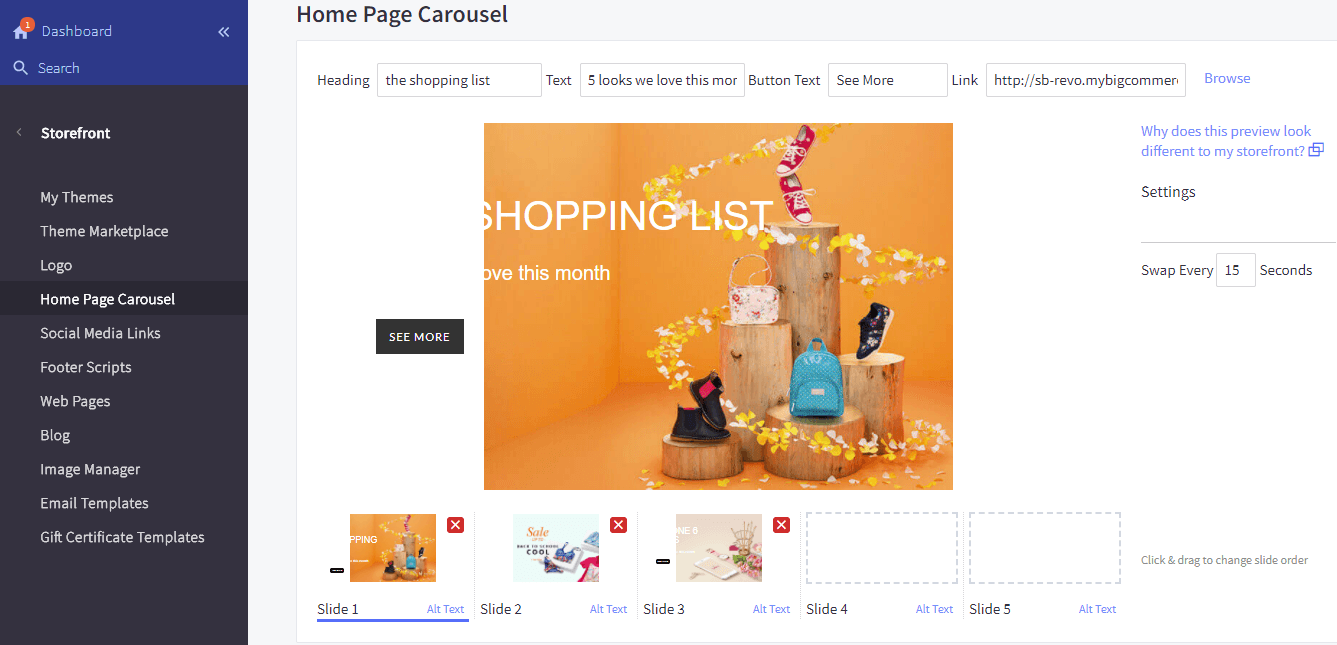
image placeholder Slideshow
Home 1 : size images (1058x370)
Home 2 : size images (885x356)
Home 3 : size images (1045x480)
Edit the slideshow in Admin page › Storefront › Home Page Carousel:
Note
Note: You want to change number items of SB Banner
- Go to admin › Storefront › My Themes, then click Advanced › Edit Theme Files of the current theme.
Edit Theme Files › templates\components\sbthemes\sections\slideshow-home1.html
Set limitation = 2 then the banner shows 2 items
{{> components/sbthemes/module/sb_banner/banner status=true prefix="slideshow" showContent=false limitation=2 class_sfx=""}}
Banner Sidebar
You can edit url images, links, text on images in the language file en.json in the File Editor, find section sb_custom › blockBanner-aside
"blockBanner-aside": {
"heading": " ",
"banner1": {
"image": "webdav:site/banner/home1/01.jpg",
"placeholderImage": "http://via.placeholder.com/242x320",
"icon": " ",
"url": "#",
"title": " ",
"text": " ",
"button": " "
}
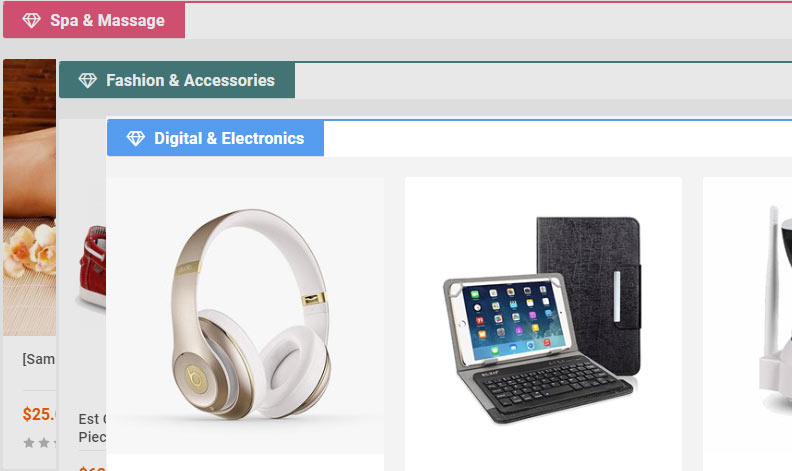
}Feature Category

You can edit url images, links, text on images in the language file en.json in the File Editor, find section sb_custom › feature_category
"feature_category": {
	"heading": " ",
	"banner1": {
		"image": " ",
		"placeholderImage": "http://via.placeholder.com/240x240",
		"icon": " ",
		"url": "/smartphone/",
		"title": "SPA & Massage",
		"text": " ",
		"button": " "
	},
	"banner2": {
		"image": " ",
		"placeholderImage": "http://via.placeholder.com/240x240",
		"icon": " ",
		"url": "/health-beauty/",
		"title": "Health Care",
		"text": " ",
		"button": " "
	},
	 "banner3": {
		"image": " ",
		"placeholderImage": "http://via.placeholder.com/240x240",
		"icon": " ",
		"url": "/bath/",
		"title": "Fashion",
		"text": " ",
		"button": " "
	},
	 "banner4": {
		"image": " ",
		"placeholderImage": "http://via.placeholder.com/240x240",
		"icon": " ",
		"url": "/watches/",
		"title": "Watches",
		"text": " ",
		"button": " "
	},
	 "banner5": {
		"image": " ",
		"placeholderImage": "http://via.placeholder.com/240x240",
		"icon": " ",
		"url": "/sport-clothing/",
		"title": "Travel",
		"text": " ",
		"button": " "
	}
}
Block Banner 1 & 2
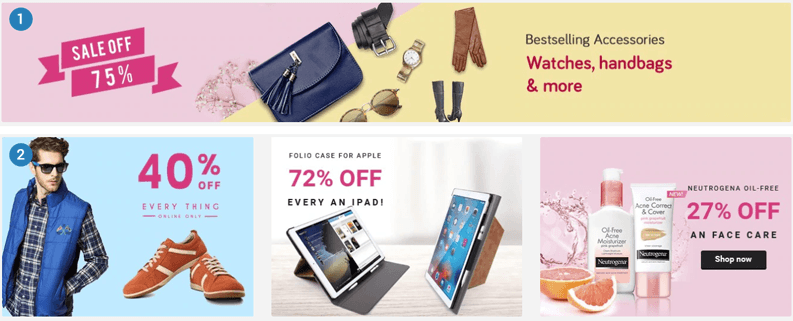
You can edit url images, links, text on images in the language file en.json in the File Editor, find section sb_custom › blockBanner1,blockBanner2
"blockBanner1": {
	"heading": " ",
	"banner1": {
		"image": " ",
		"placeholderImage": "http://via.placeholder.com/1328x200",
		"icon": " ",
		"url": "#",
		"title": "SPA & Massage",
		"text": " ",
		"button": " "
	}
}

"blockBanner2": {
	"heading": " ",
	"banner1": {
		"image": "webdav:site/banner/home1/banner22.jpg",
		"placeholderImage": "http://via.placeholder.com/420x300",
		"icon": " ",
		"url": "#",
		"title": " ",
		"text": " ",
		"button": " "
	},
	"banner2": {
		"image": "webdav:site/banner/home1/banner23.jpg",
		"placeholderImage": "http://via.placeholder.com/420x300",
		"icon": " ",
		"url": "#",
		"title": " ",
		"text": " ",
		"button": " "
	},
	"banner3": {
		"image": "webdav:site/banner/home1/banner24.jpg",
		"placeholderImage": "http://via.placeholder.com/420x300",
		"icon": " ",
		"url": "#",
		"title": " ",
		"text": " ",
		"button": " "
	}
}
Banner 3

You can edit url images, links, text on images in the language file en.json in the File Editor, find section sb_custom › blockBanner3
"blockBanner3": {
	"heading": " ",
	"banner1": {
		"image": "webdav:site/banner/home1/banner25.jpg",
		"placeholderImage": "http://via.placeholder.com/785x330",
		"icon": " ",
		"url": "#",
		"title": " ",
		"text": " ",
		"button": " "
	},
	"banner2": {
		"image": "webdav:site/banner/home1/banner26.jpg",
		"placeholderImage": "http://via.placeholder.com/785x330",
		"icon": " ",
		"url": "#",
		"title": " ",
		"text": " ",
		"button": " "
	}
}
Page Category - Banner
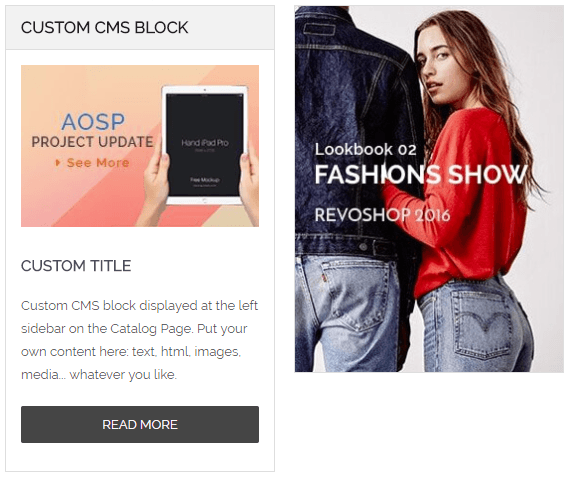
You can edit url images, links, text on images in the language file en.json in the File Editor, find section sb_custom › cmsblock, sidebarBanner
    "sidebarBanner": {
        "heading": " ",
        "banner1": {
            "image": "webdav:site/banner/home1/image-left.jpg",
            "placeholderImage": "http://via.placeholder.com/270x369",
            "icon": " ",
            "url": "#",
            "title": " ",
            "text": " ",
            "button": " "
        }

    },
    "cmsblock": {
        "heading": "Custom CMS Block",
        "banner1": {
            "image": "webdav:site/banner/home1/3.jpg",
            "placeholderImage": "http://via.placeholder.com/270x369",
            "icon": " ",
            "url": "#",
            "title": "Custom Title",
            "text": "Custom CMS block displayed at the left sidebar on the Catalog Page. Put your own content here: text, html, images, media... whatever you like.",
            "button": " Read More"
        }

    },
Page Product - Banner
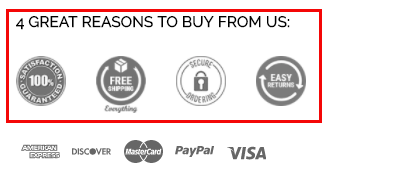
You can edit url images, links, text on images in the language file en.json in the File Editor, find section sb_custom › buyFromus
    "buyFromus": {
        "heading": "4 Great reasons to buy from us:",
        "banner1": {
            "image": "webdav:site/banner/home1/reasons/reasons-1.png",
            "placeholderImage": "http://via.placeholder.com/270x369",
            "icon": " ",
            "url": "#",
            "title": "reasons 1",
            "text": " ",
            "button": " "
        },
        "banner2": {
            "image": "webdav:site/banner/home1/reasons/reasons-2.png",
            "placeholderImage": "http://via.placeholder.com/270x369",
            "icon": " ",
            "url": "#",
            "title": "reasons 2",
            "text": " ",
            "button": " "
        },
        "banner3": {
            "image": "webdav:site/banner/home1/reasons/reasons-3.png",
            "placeholderImage": "http://via.placeholder.com/270x369",
            "icon": " ",
            "url": "#",
            "title": "reasons 3",
            "text": " ",
            "button": " "
        },
        "banner4": {
            "image": "webdav:site/banner/home1/reasons/reasons-4.png",
            "placeholderImage": "http://via.placeholder.com/270x369",
            "icon": " ",
            "url": "#",
            "title": " ",
            "text": " ",
            "button": " "
        }
    }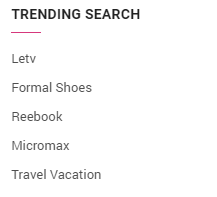
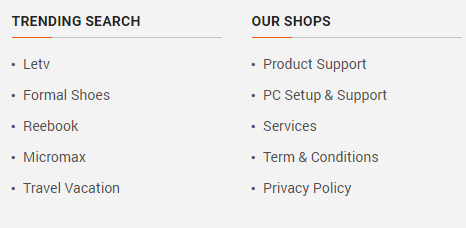
You can edit url images, links, text on images in the language file en.json in the File Editor, find section sb_themes › menu_info_1
"menu_info_1": {
	"heading": "Trending Search",
	"row_1": {
		"title": "Letv",
		"url": "#"
	},
	"row_2": {
		"title": "Formal Shoes",
		"url": "#"
	},
	"row_3": {
		"title": "Reebook",
		"url": "#"
	},
	"row_4": {
		"title": "Micromax",
		"url": "#"
	},
	"row_5": {
		"title": "Travel Vacation",
		"url": "#"
	},
	"row_6": {
		"title": "Hotel",
		"url": "#"
	}
}
Selecting Featured Products
1. Go to Products › View. At the top of the list of products, there is a Featured column left of the Action column with white stars under it.
2. To feature a product, click the star to its right. When the star is filled in, it has been marked as Featured.
Click it again to take off the Featured status.
You can also make a product Featured from the Other Details tab when adding or editing a product.
Number of Featured Products to Display
1. Go to Storefront Design › My Themes, then click Customize.
2. On the left, scroll down and click the Products section to expand it. Under Number of Featured Products, set the number of featured products you want to show on the home page.
3. Click Save Changes when you're done.

Some themes have a section on the home page that features the store's top-selling products. This is an easy way to dynamically market your best-performing products right on your homepage.
The products that appear in this section are chosen dynamically from store sales data. They cannot be added manually.
Products are ranked by the total number of units sold and not by the number of orders. For example, a product that has a single order for a quantity of 100 will rank higher than another product that has 99 orders for a quantity of one.
Stock sold in other channels (like eBay, Amazon, Facebook, Pinterest, Square) are included in these calculations but not orders that have been canceled, refunded or used for testing purposes. If you want more control over which products appear on the home page, consider using the Featured Products panel.

The New Products panel on your homepage displays the most recently added products in your store. It's a great way to promote new product lines and it lets your shoppers know about new additions quickly and easily.
Can I control which products in the New Products panel? Only the most recently added products appear in the New Products panel. Use the Featured Products panel for greater control over which products appear on the homepage.

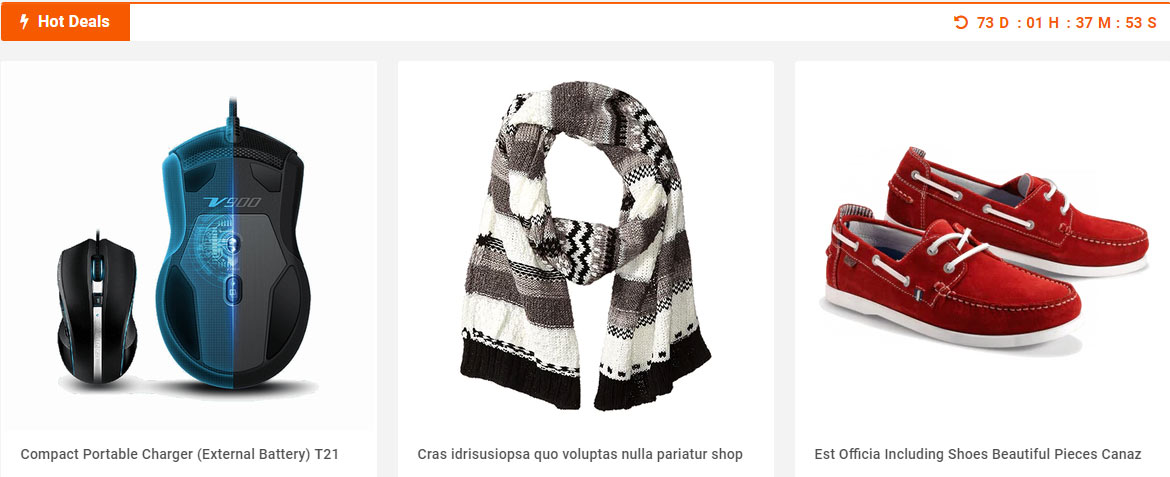
you should reset the specify category ID for properly in the language filelang/en.json. Find key sb_themes › sb_hotdeal:
	"sb_hotdeal":{
		"heading": "Hot Deal",
		"noItem": "Has no item discount to show",
		"noCategory": "specify category ID to display module in the language file lang/en.json.
 Find key sb_themes › sb_topdeals_home4 > category_auto > id",
		"countdown": "11/23/2018",
		"category_1": {
			"id": "23",
			"image": " ",
			"placeholderImage": "http://via.placeholder.com/285x375",
			"url": "#"
		}
}id- is the number is category ID.image- is the image URLplaceholderImage- is the image URLurl- is the link url of image
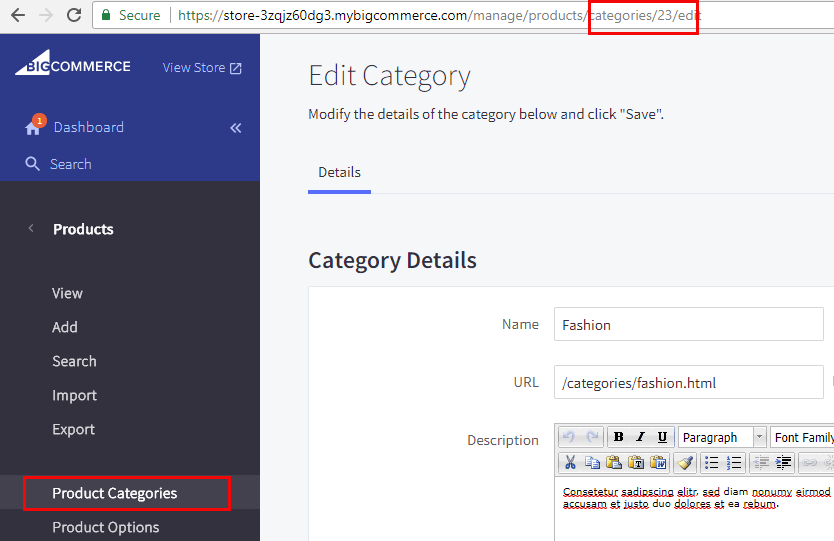
You can find the category ID by editing the category, look at the URL on your web browser, the number is category ID:
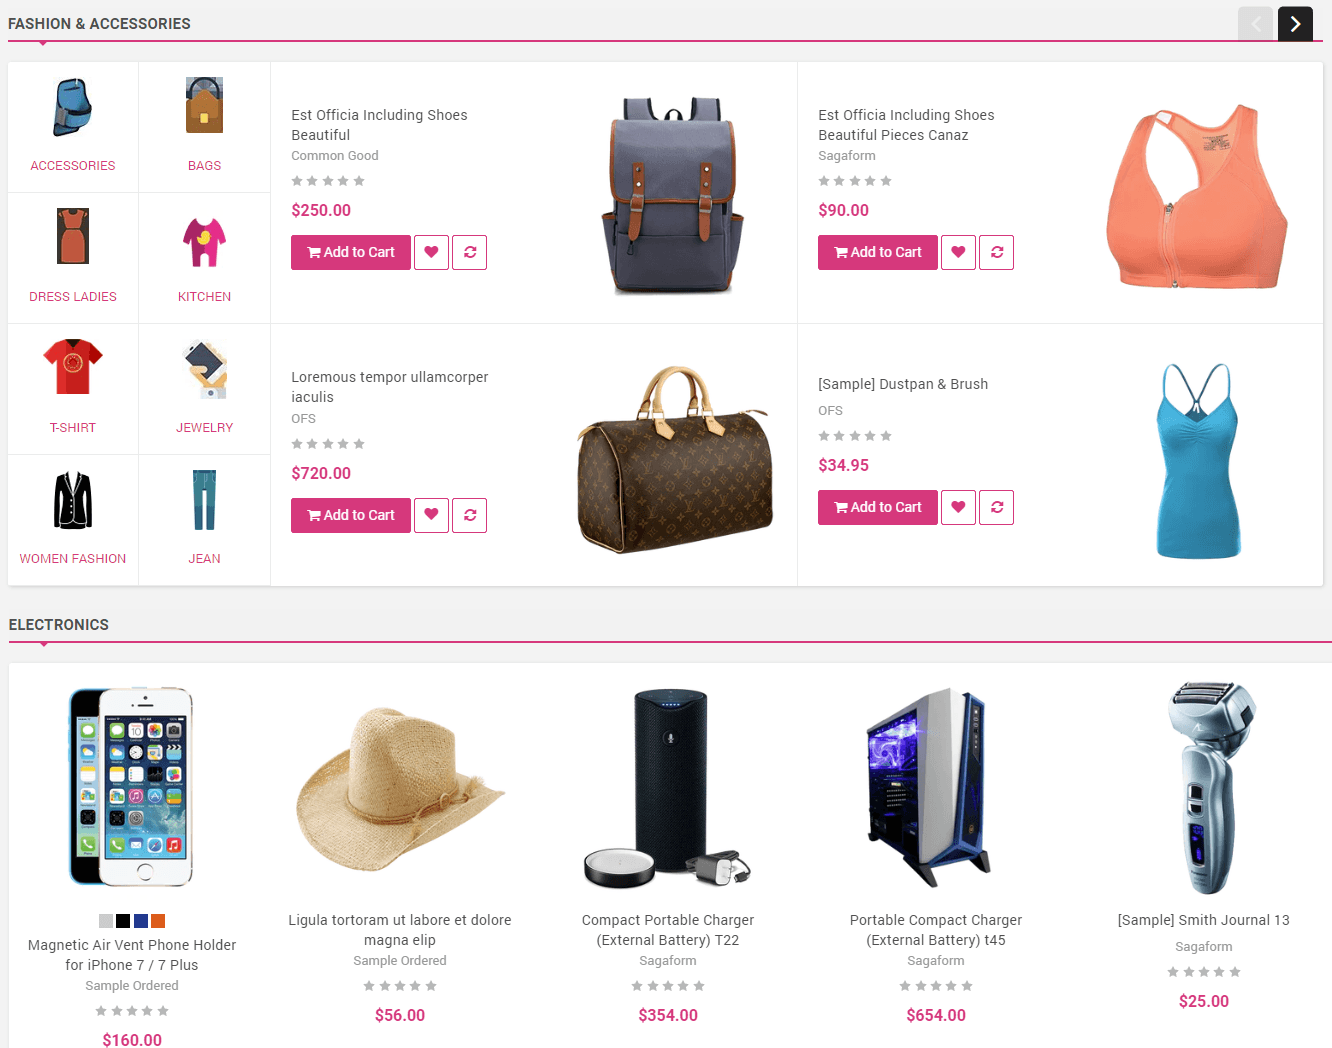
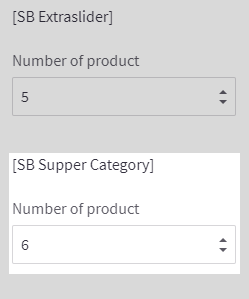
you should reset the specify category ID for properly in the language filelang/en.json. Find key sb_themes › sb_supper_category:
	"sb_supper_category": {
		"view_all": "View All",
		"noItem": "Has no item to show",
		"noCategory": "specify category ID to display module in the language file lang/en.json.
 Find key sb_themes › sb_supper_category > category_auto > id",
		"noSubCategory": "Has no item sub category to show",
		"category_1": {
			"id": "18",
			"image": " ",
			"placeholderImage": "http://via.placeholder.com/975x180"
		},
		"category_2": {
			"id": "37",
			"image": " ",
			"placeholderImage": "http://via.placeholder.com/975x180"

		},
		"category_3": {
			"id": "26",
			"image": " ",
			"placeholderImage": "http://via.placeholder.com/975x180"
		}
}id- is the number is category ID.image- is the image URLplaceholderImage- is the image URLurl- is the link url of image
You can find the category ID by editing the category, look at the URL on your web browser, the number is category ID:
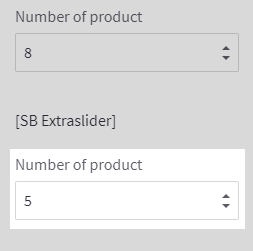
You can configure number of products and product display type in Theme Editor > Module:
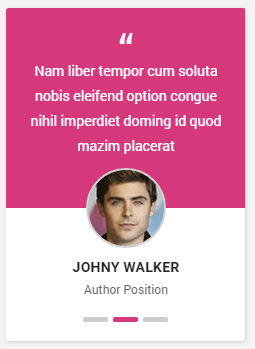
You can edit url images, links, text on images in the language file en.json in the File Editor, find section sb_themes › sb_testimonial
"sb_testimonial": {
	"item1": {
		"image": "webdav:site/banner/home1/user-1.jpg",
		"placeholderImage": "http://via.placeholder.com/80x80",
		"content": "Nam liber tempor cum soluta nobis eleifend option congue nihil imperdiet doming id quod mazim placerat ",
		"author_name": "Sharon Stone",
		"author_position": "Acc - Hollywood"
	},
	"item2": {
		"image": "webdav:site/banner/home1/user-2.jpg",
		"placeholderImage": "http://via.placeholder.com/80x80",
		"content": "Nam liber tempor cum soluta nobis eleifend option congue nihil imperdiet doming id quod mazim placerat ",
		"author_name": "Johny Walker",
		"author_position": "Author Position"
	},
	 "item3": {
		"image": "webdav:site/banner/home1/user-3.jpg",
		"placeholderImage": "http://via.placeholder.com/80x80",
		"content": "Nam liber tempor cum soluta nobis eleifend option congue nihil imperdiet doming id quod mazim placerat ",
		"author_name": "David Beckham",
		"author_position": "Author Position"
	}
}Banner Services
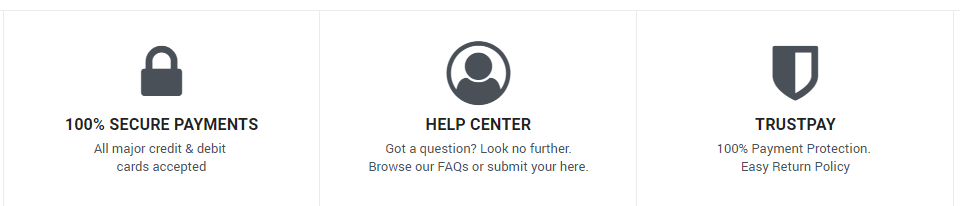
You can edit url images, links, text on images in the language file en.json in the File Editor, find section sb_custom › services
	"services": {
		"heading": " ",
		"banner1": {
			"image": " ",
			"url": "#",
			"icon": "lock",
			"title": "100% Secure Payments",
			"text": "All major credit & debit  cards accepted",
			"button": " "
		},
		"banner2": {
			"image": " ",
			"url": "#",
			"icon": "user-circle-o",
			"title": "Help Center",
			"text": "Got a question? Look no further.  Browse our FAQs or submit your here.",
			"button": " "
		},
		"banner3": {
			"image": " ",
			"url": "#",
			"icon": "shield",
			"title": "TrustPay",
			"text": "100% Payment Protection. Easy  Return Policy ",
			"button": " "
		},
		"banner4": {
			"image": " ",
			"url": "#",
			"icon": "truck",
			"title": "Worldwide Delivery",
			"text": "With sites in 5 languages, we ship to over 200 countries & regions.",
			"button": " "
		},
		"banner5": {
			"image": " ",
			"url": "#",
			"icon": "money",
			"title": "Great Value",
			"text": "We offer competitive prices on our 100 million plus product range.",
			"button": " "
		}
	}
Instagram Gallery

You can edit url images, links, text on images in the language file en.json in the File Editor, find section sb_themes › instagram
"instagram": {
	"title": "Instagram Gallery",
	"user_id": "7441584291",
	"client_id":"123",
	"access_token": "7441584291.1677ed0.643c27f05b38436cad8032a1fcf3a623"
}
Contact Us

In your admin page › Store Setup › Store Profile, edit Store Address and Phone:
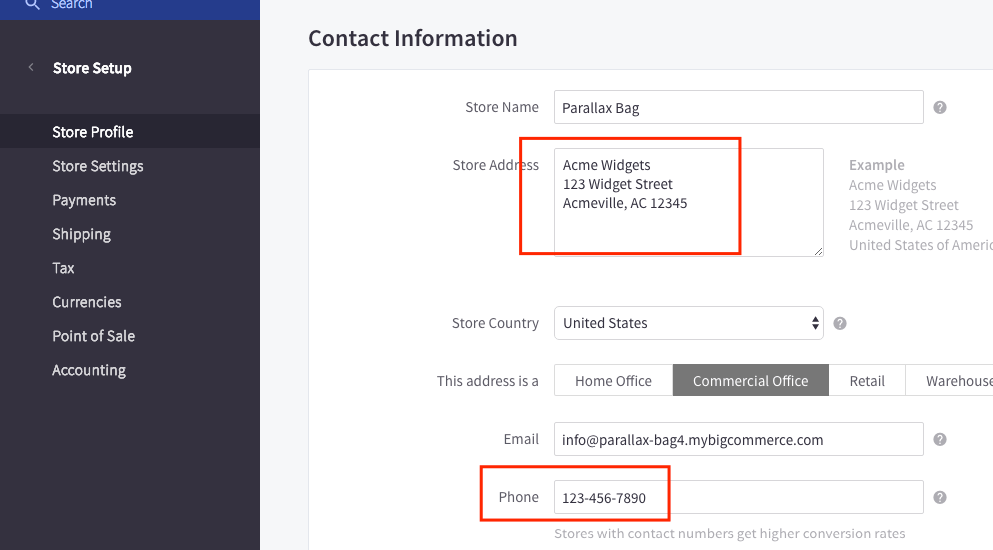
For email, Theme Editor › Header & Footer › Address Email : write email info
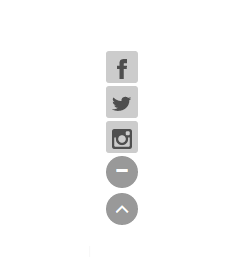
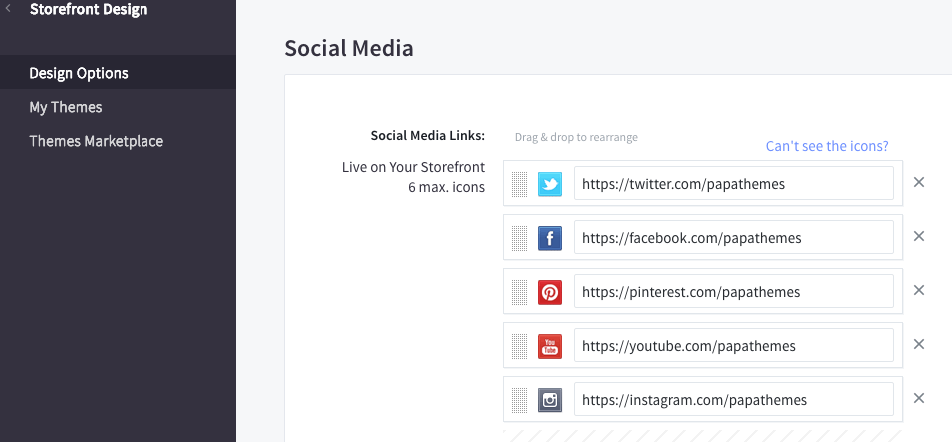
Social Follow us

In your admin page › Storefront Design › Design Options › Social Media, enter your social links:
Our Shop

You can edit url images, links, text on images in the language file en.json in the File Editor, find section sb_themes › menu_info_2
"menu_info_2": {
	"heading": "Our Shops",
	"row_1": {
		"title": "Product Support",
		"url": "#"
	},
	"row_2": {
		"title": "PC Setup & Support",
		"url": "#"
	},
	"row_3": {
		"title": "Services",
		"url": "#"
	},
	"row_4": {
		"title": "Term & Conditions",
		"url": "#"
	},
	"row_5": {
		"title": "Privacy Policy",
		"url": "#"
	},
	"row_6": {
		"title": " ",
		"url": " "
	},
	"row_7": {
		"title": " ",
		"url": " "
	}
}
Credit Link

To show/hide the credit links, go to Theme Editor › Footer section, tick or untick the checkboxes as showing above.
Payment Icon
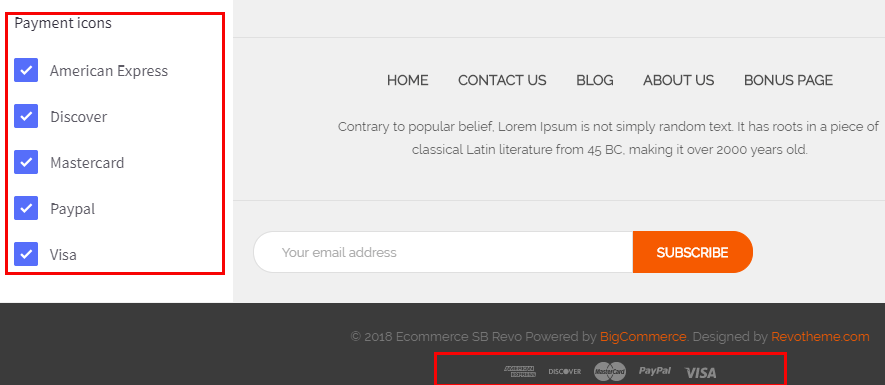
To show/hide payment icons, go to Theme Editor › Payment Icons secitons, check or uncheck any icons you want to show or hide.
Home Page 2

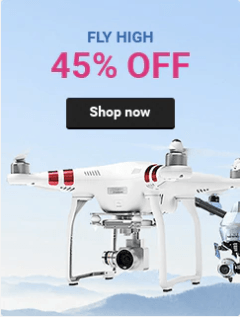
You can edit url images, links, text on images in the language file en.json in the File Editor, find section sb_custom › slideshow
"slideshow": {
	"heading": " ",
	"banner1": {
		"image": "webdav:site/banner/home2/bn-1.jpg",
		"placeholderImage": "http://via.placeholder.com/437x175",
		"icon": " ",
		"url": "#",
		"title": "slideshow banner1",
		"text": " ",
		"button": " "
	},
	"banner2": {
		"image": "webdav:site/banner/home2/bn-2.jpg",
		"placeholderImage": "http://via.placeholder.com/437x175",
		"icon": " ",
		"url": "#",
		"title": "slideshow banner2",
		"text": " ",
		"button": " "
	}
}Block Banner 1 & 2

You can edit url images, links, text on images in the language file en.json in the File Editor, find section sb_custom › home2Banner1,home2Banner2
"home2Banner1": {
	"heading": " ",
	"banner1": {
		"image": "webdav:site/banner/home2/bn-3.jpg",
		"placeholderImage": "http://via.placeholder.com/585x300",
		"icon": " ",
		"url": "#",
		"title": " ",
		"text": " ",
		"button": " "
	},
	"banner2": {
		"image": "webdav:site/banner/home2/bn-4.jpg",
		"placeholderImage": "http://via.placeholder.com/585x300",
		"icon": " ",
		"url": "#",
		"title": " ",
		"text": " ",
		"button": " "
	}
}

"home2Banner2": {
	"heading": " ",
	"banner1": {
		"image": "webdav:site/banner/home2/bn-5.jpg",
		"placeholderImage": "http://via.placeholder.com/585x300",
		"icon": " ",
		"url": "#",
		"title": " ",
		"text": " ",
		"button": " "
	},
	"banner2": {
		"image": "webdav:site/banner/home2/bn-6.jpg",
		"placeholderImage": "http://via.placeholder.com/585x300",
		"icon": " ",
		"url": "#",
		"title": " ",
		"text": " ",
		"button": " "
	}
}
Banner Services

You can edit url images, links, text on images in the language file en.json in the File Editor, find section sb_custom › home2Services
"home2Services": {
	"heading": " ",
	"banner1": {
		"image": " ",
		"url": "#",
		"icon": "lock",
		"title": "Online support",
		"text": "We have support 24/7",
		"button": " "
	},
	"banner2": {
		"image": " ",
		"url": "#",
		"icon": "user-circle-o",
		"title": "Payment on Delivery",
		"text": "Cash on delivery option",
		"button": " "
	},
	"banner3": {
		"image": " ",
		"url": "#",
		"icon": "shield",
		"title": "Free shipping",
		"text": "Free shipping on oder over $100 ",
		"button": " "
	},
	"banner4": {
		"image": " ",
		"url": "#",
		"icon": "truck",
		"title": "Secure Payment",
		"text": "We value your security",
		"button": " "
	}
}
you should reset the specify category ID for properly in the language filelang/en.json. Find key sb_themes › sb_hotdeal_home2:
			"sb_hotdeal_home2":{
			"heading": "Hot Deals",
			"viewAll": "View All",
			"endIn": "End in",
			"noItem": "Has no item discount to show",
			"noCategory": "specify category ID to display module in the language file lang/en.json.
 Find key sb_themes › sb_hotdeal_home2 > category_auto > id",
			"countdown": "11/23/2018",
			"category_1": {
			"id": "23",
			"image": " ",
			"placeholderImage": "http://via.placeholder.com/285x375",
			"url": "#"
			}
}id- is the number is category ID.image- is the image URLplaceholderImage- is the image URLurl- is the link url of image
You can find the category ID by editing the category, look at the URL on your web browser, the number is category ID:
2.The discount product : Please set sale price and date for the each product of your category that you set category id in sp deal block .
3.Set Countdown product: Read More
you should reset the specify category ID for properly in the language filelang/en.json. Find key sb_themes › sb_listing_tabs:
"sb_listing_tabs": {
            "bestselling": "Bestselling",
            "featured": "Featured",
            "new": "New Arrivals",
            "reviews": "Top Reviewed",
            "view_all": "View All Products",
			"noItem": "Has no item  to show",
            "noCategory": "specify category ID to display module in the language file lang/en.json.
 Find key sb_themes › sb_listing_tabs > category_auto > id",
            "category_1": {
                "id": "18",
				"image": " ",
				"placeholderImage": "http://via.placeholder.com/196x542",
                "url": "#"
            },
            "category_2": {
                "id": "19",
                "image": " ",
				"placeholderImage": "http://via.placeholder.com/196x542",
                "url": "#"
            },
            "category_3": {
                "id": "20",
                "image": " ",
				"placeholderImage": "http://via.placeholder.com/196x542",
                "url": "#"
            }
}id- is the number is category ID.image- is the image URLplaceholderImage- is the image URLurl- is the link url of image
You can find the category ID by editing the category, look at the URL on your web browser, the number is category ID:

You can edit url images, links, text on images in the language file en.json in the File Editor, find section sb_custom › static_brand
"static_brand": {
"banner1": {
	"image": "webdav:site/brand/brand-1.jpg",
	"placeholderImage": "http://via.placeholder.com/160x100",
	"url": "#",
	"title": "brand1"
},
"banner2": {
	"image": "webdav:site/brand/brand-2.jpg",
	"placeholderImage": "http://via.placeholder.com/160x100",
	"url": "#",
	"title": "brand2"
},
"banner3": {
	"image": "webdav:site/brand/brand-3.jpg",
	"placeholderImage": "http://via.placeholder.com/160x100",
	"url": "#",
	"title": "brand3"
},
"banner4": {
	"image": "webdav:site/brand/brand-4.jpg",
	"placeholderImage": "http://via.placeholder.com/160x100",
	"url": "#",
	"title": "brand4"
},
"banner5": {
	"image": "webdav:site/brand/brand-5.jpg",
	"placeholderImage": "http://via.placeholder.com/160x100",
	"url": "#",
	"title": "brand5"
},
"banner6": {
	"image": "webdav:site/brand/brand-6.jpg",
	"placeholderImage": "http://via.placeholder.com/160x100",
	"url": "#",
	"title": "brand6"
},
"banner7": {
	"image": "webdav:site/brand/brand-1.jpg",
	"placeholderImage": "http://via.placeholder.com/160x100",
	"url": "#",
	"title": "brand7"
}

}
Social Follow us
In your admin page › Storefront Design › Design Options › Social Media, enter your social links:
Custom Nav pages
You can edit url images, links, text on images in the language file en.json in the File Editor, find section sb_themes › menu_info_1,menu_info_2
Contact Us
In your admin page › Store Setup › Store Profile, edit Store Address and Phone:
For email, Theme Editor › Header & Footer › Address Email : write email info
Credit Link
To show/hide the credit links, go to Theme Editor › Footer section, tick or untick the checkboxes as showing above.
Payment Icon
To show/hide payment icons, go to Theme Editor › Payment Icons secitons, check or uncheck any icons you want to show or hide.
Home Page 3

You can edit url images, links, text on images in the language file en.json in the File Editor, find section sb_custom › home3Slideshow
"home3Slideshow": {
	"heading": " ",
	"banner1": {
		"image": "webdav:site/banner/home3/home6_1.jpg",
		"placeholderImage": "http://via.placeholder.com/255x150",
		"icon": " ",
		"url": "#",
		"title": "slideshow banner1",
		"text": " ",
		"button": " "
	},
	"banner2": {
		"image": "webdav:site/banner/home3/home6_2.jpg",
		"placeholderImage": "http://via.placeholder.com/255x150",
		"icon": " ",
		"url": "#",
		"title": "slideshow banner2",
		"text": " ",
		"button": " "
	}
	...
}Block Banner Services

You can edit url images, links, text on images in the language file en.json in the File Editor, find section sb_custom › home3Services
"home3Services": {
	"heading": " ",
	"banner1": {
		"image": " ",
		"url": "#",
		"icon": "truck",
		"title": "Free Delivery",
		"text": "From $59.89",
		"button": " "
	},
	"banner2": {
		"image": " ",
		"url": "#",
		"icon": "user-circle-o",
		"title": "Support 24/7",
		"text": "Online 24 hours",
		"button": " "
	},
	...
}
Banner Feature Category

You can edit url images, links, text on images in the language file en.json in the File Editor, find section sb_custom › home3Featurecategory
"home3Featurecategory": {
	"heading": " ",
	"banner1": {
		"image": "webdav:site/banner/home3/digital.png",
		"placeholderImage": "http://via.placeholder.com/240x240",
		"icon": " ",
		"url": "/smartphone/",
		"title": "Digital",
		"text": " ",
		"button": " "
	},
	"banner2": {
		"image": "webdav:site/banner/home3/fashion.png",
		"placeholderImage": "http://via.placeholder.com/240x240",
		"icon": " ",
		"url": "/health-beauty/",
		"title": "Fashion",
		"text": " ",
		"button": " "
	},
	...
}
Help & Support
If you have any question that is beyond the scope of this help file, please send us via: Submit a Ticket
Our working hours: Monday to Friday 8AM - 5PM GMT+8.
Thank you so much for purchasing this theme!
What do we support and do not support?
We Do Support:
- Provide detailed documentation to help you install and configure the theme successfully by yourself.
- Answer your enquiries about theme configuration and use.
- Answer you how to edit and translate the language files.
- Fix bugs of our themes ONLY if the source code are not modified.
We Do Not Support:
- Answer you how to use BigCommerce, manage, edit or configure any built-in BigCommerce features which are not related to our themes. Please contact BigCommerce Support for help.
- Upgrading the theme on your store if the source code was modified by any reasons.
- Editing the theme's source code for your own requirements which the theme's current version is not supported. Except editing language files.
Note
Note: We have right to answer or not answer you how to edit the theme's source code.